When you finish editing an image in Adobe Photoshop, the way you export it matters as much as the edit itself. The wrong choice can leave you with bloated file sizes, poor quality on the web, or no way to make changes later. Photoshop, a powerful tool for creating and editing images, offers a robust suite of export options designed to cater to a wide array of needs, from simple, rapid sharing to complex, multi-format delivery. In this guide, we’ll explore the Photoshop export options available, ensuring your work looks great in any format and streamlining your workflow.
The Foundation of Exporting: Understanding Your Needs
Before diving into the technicalities of export formats and settings, it's crucial to understand the intended use of your final image. Are you preparing a photograph for a high-resolution print, a series of graphics for a website, or a simple icon for an app? Each scenario demands different considerations regarding file format, compression, color space, and resolution. Aaron Nace from Phlearn emphasizes a fundamental principle: always keep two versions of your file. The first, typically a layered PSD (Photoshop Document), preserves every adjustment and element intact, allowing for future edits and revisions. The second, a flattened version, is usually a JPEG or PNG, optimized for sharing, printing, or web display. This dual-file strategy ensures both editability and efficient delivery.
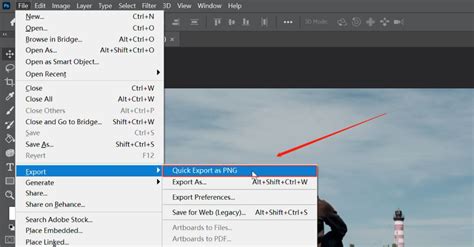
Quick Export As: Speed and Simplicity
For those times when speed is paramount and your export requirements are straightforward, Photoshop's "Quick Export As" feature is invaluable. This function allows for a fast way to save your work, leveraging your preset preferences. These preferences can be customized within Photoshop by navigating to Edit > Preferences > Export. This feature is ideal for simple exports where minimal control over specific settings is needed, making it a go-to for quick previews or sharing drafts.
Export As: Granular Control for Precision
When you need more control over your export settings, the "Export As" command is the preferred method. This dialog box provides a comprehensive interface where you can fine-tune various aspects of your exported file. Here, you can select from a range of formats, each with its unique set of parameters, allowing for precise optimization based on your project's requirements.
Key File Formats and Their Applications
Photoshop offers a variety of file formats, each suited for different purposes:
- JPEG (.jpg): Ideal for photographs and images with complex color gradients. JPEG achieves smaller file sizes by using lossy compression, meaning some image data is discarded. It supports 8-bit images and is the standard for most web and social media sharing. When using JPEG, you can balance file size against quality using a slider; often, maximum quality is not necessary, as viewers may not perceive the difference, and the file size gain is not worth it. Different JPEG formats exist:
- Baseline (“Standard”): Recognized by most web browsers.
- Baseline Optimized: Creates a file with optimized color and a slightly smaller file size.
- Progressive: Displays increasingly detailed versions of the image as it downloads, improving user experience on slower connections.Some applications may not be able to read a CMYK file saved in JPEG format.
PNG (.png): Excellent for graphics, logos, and images requiring transparency. PNG uses lossless compression, preserving all image data and ensuring sharp details, especially for graphics with solid colors or text. It is a versatile format suitable for web use.
GIF (.gif): Perfect for simple animations and graphics with a limited color palette. GIF supports transparency and animation but is limited to 256 colors, making it less suitable for photographic images.
TIFF (.tif): A high-quality format often used for print and archival purposes. TIFF supports lossless compression and can retain layers and other Photoshop-specific data, making it a good choice when preserving maximum image fidelity is critical.
- Compression: When saving a 32-bit TIFF file, you can specify predictor compression, but JPEG compression is not an option.
- Layer Compression: You can specify a method for compressing data for pixels in layers. While many applications cannot read layer data and skip over it, Photoshop can read layer data in TIFF files. Files with layer data are larger, but this saves the need for a separate PSD file.
- Platform Compatibility: Selects the platform on which the file can be read, using either IBM PC or Macintosh byte order.
- Multiresolution Information: Preserves multiresolution information at the highest resolution within the file.
EPS (Encapsulated PostScript): Primarily used for professional printing and vector graphics. EPS files can be placed in page layout programs and are compatible with PostScript printers. They can retain spot color channels.
Targa (TGA): Designed for systems using Truevision® video boards, Targa format supports various RGB and indexed-color images, including those with alpha channels.
Advanced Export Options for Specific Workflows
Photoshop offers advanced features to handle more complex export scenarios and to optimize workflow efficiency:
Exporting Multiple Artboards and Layers
For designers working with multiple artboards or needing to export individual layers, Photoshop provides powerful tools. You can export multiple artboards at once, which is incredibly useful for design variations, responsive design elements, or creating mockups. Similarly, exporting layers separately is a common requirement for web design, allowing assets to be implemented independently.
Export for Web (Legacy)
While "Export As" is generally the preferred method, the "Export for Web (Legacy)" feature is still available and useful for specific situations. This older dialog offers a different interface and set of controls that some users find beneficial for fine-tuning GIF and JPEG exports, particularly for web optimization.
Color Space and Metadata
- Color Space: Crucial for accurate color reproduction across different devices and media. Understanding whether to export in sRGB (for web) or Adobe RGB/CMYK (for print) is vital. If you are saving a CMYK image in JPEG format, be aware that some applications may not read it correctly.
- Metadata: This includes information about your image, such as copyright details, camera settings, and keywords. Preserving or embedding metadata can be important for asset management and copyright protection.
Batch Exporting and Automation
When you need to export multiple files, batch exporting is your best friend. Photoshop provides several ways to automate this process, saving significant time:
Image Processor: Located under File > Scripts > Image Processor, this feature allows you to process a batch of images, converting them to different formats (PSD, TIF, JPEG), resizing them, and even applying actions. You can select a folder of images or, by using Adobe Bridge, select specific images or all images within a folder or collection. The Image Processor can also run a custom action after batch conversion.
How to use Image Processor Photoshop - Automated Actions
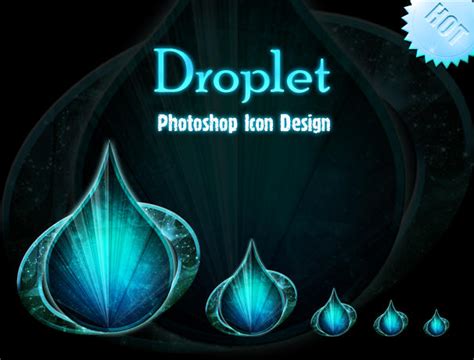
Droplets: You can create "droplets," which are essentially executable files generated by Photoshop that encapsulate specific actions. You can then drag and drop images onto these droplets, and Photoshop will automatically apply the defined actions and export the files without you needing to open the application. This is incredibly efficient for repetitive tasks, such as converting RGB chart files to grayscale and adjusting their size, or applying sharpening and auto-color correction to screenshot files. It's important to note that droplets are generally OS-agnostic, but their behavior might vary slightly between Windows and macOS.
- Actions Panel: For more complex multi-step processes, you can record custom actions in the Actions panel. These actions can then be incorporated into batch processing workflows using the Image Processor or applied to droplets.
Presets for Efficiency
To further streamline your export process, create and save export presets. This allows you to quickly recall frequently used combinations of format, quality, and size settings, ensuring consistency and saving valuable time.
File Size vs. Quality: Finding the Right Balance
A constant consideration in exporting is the trade-off between file size and image quality. The key is to understand how different export options affect your final file and to choose the right settings for your specific use case. For web use, smaller file sizes are generally preferred for faster loading times, while print requires higher fidelity. Aaron Nace points out that for web sharing, you don’t always need to push the quality slider to its maximum; often, a slightly lower quality setting yields a significantly smaller file size with no discernible loss in visual quality to the average viewer.
Saving and File Handling in Photoshop
Beyond explicit export functions, understanding Photoshop's saving mechanisms is integral to an efficient workflow:
- Default Save Location: In recent versions, the default save location is often set to Creative Cloud.
- Background Save: Enabled by default, this allows you to continue working while files are being saved in the background.
- Auto Save: Configurable in Preferences > File Handling, Auto Save can recover changes in case of a computer crash.
- Saving to Original Folders: "Save As" typically defaults to saving in the original file's location.
- "Copy" Appending: Photoshop automatically adds "copy" to filenames when saving a duplicate. This behavior can be disabled in preferences.
- Cloud Documents Local Storage: The default location for local copies of cloud documents can be adjusted in preferences.
- Closing Files: Option/Alt-clicking a file's close button prompts to save each file. "File > Close Others" closes all documents except the active one.
- Maximize Compatibility: Setting Preferences > File Handling > Maximize PSD and PSB File Compatibility to "Always" ensures that a flattened, high-resolution preview is saved within the layered file, making it compatible with applications like Lightroom. To open this composite version, hold Option+Shift (Mac) or Alt+Shift (Win) when clicking "Open."
- Password Protection: Saving documents as Photoshop PDFs offers security options, including password protection, accessible via the "Save As" dialog.
By mastering these export and saving options, you can ensure your work is delivered in the most appropriate format, maintains the desired quality, and contributes to an efficient and productive workflow. Experimenting with these tools will help you find the best approach for your individual needs.