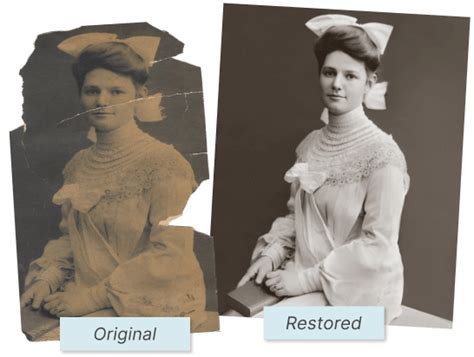
The sepia tone, a warm, taupe-colored tint overlaying a black and white photograph, has long been cherished for its ability to impart a nostalgic and vintage aesthetic. This effect, reminiscent of early photographic processes, continues to hold its charm in the digital age. While originally achieved through chemical processes like film tinting or the use of silver sulfide ferrocyanide, Photoshop offers a multitude of accessible digital methods to replicate this timeless look. This guide will explore various techniques for applying a sepia tone in Photoshop, from straightforward presets to more nuanced, customizable approaches, ensuring both beginners and experienced users can achieve their desired vintage effect.
Understanding the Sepia Effect
At its core, the sepia effect transforms a grayscale image by introducing warm, brownish hues. This is not a single, rigidly defined color, but rather a spectrum that photographers of the past used to develop their unique stylistic signatures. The emulsion dye, originally derived from cuttlefish ink, lent a characteristic brown tint to early photographs. Today, achieving this look in Photoshop can be done in a matter of minutes, allowing for personalized results that suit individual tastes and photographic styles.
Method 1: Utilizing the Camera Raw Filter for Non-Destructive Sepia
One of the most powerful and flexible methods for applying a sepia tone in Photoshop, especially within Photoshop CC and later versions, is through the Camera Raw filter. This approach allows for non-destructive editing, meaning your original image remains untouched, and the sepia effect can be easily modified or removed at any time.
Step 1: Prepare Your Image
Begin by opening your chosen image in Photoshop. For optimal results and to enable non-destructive editing with the Camera Raw filter, it is highly recommended to convert your image layer into a Smart Object. This is done by right-clicking on your image layer in the Layers panel and selecting "Convert to Smart Object." You'll notice a small Smart Object icon appear on the layer's thumbnail, indicating its new status.
Step 2: Access the Camera Raw Filter
With your layer as a Smart Object, navigate to the Filter menu and select "Camera Raw Filter." This will open the Camera Raw dialog box, which provides a comprehensive suite of tools for image adjustment, mirroring the standalone Adobe Camera Raw plugin.
Step 3: Convert to Grayscale
Within the Camera Raw filter, locate the "HSL / Grayscale" panel. Here, you will find an option to convert your full-color image to black and white. Before applying the sepia tone, this conversion is crucial. For a more refined black and white conversion, you can individually adjust the sliders within the "Grayscale Mix" section. Dragging sliders for colors like Reds, Oranges, and Yellows to the right will lighten corresponding areas in the grayscale image, while moving them to the left will darken them. For instance, adjusting the Yellows slider can significantly impact the appearance of foliage, making grass appear lighter in the black and white conversion.
Step 4: Apply the Sepia Tone with Split Toning
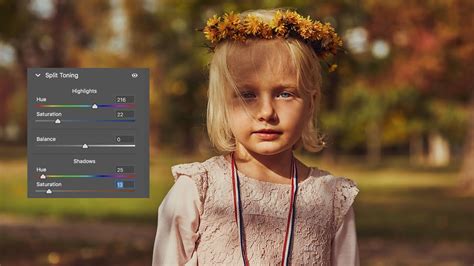
Once your image is in grayscale, navigate to the "Split Toning" panel. This panel is divided into sections for Highlights, Shadows, and a Balance slider. To create a classic sepia tone, you will primarily work with the Shadows section.
- Highlights: Leave the Hue and Saturation sliders for the Highlights set to 0. This ensures that the brighter areas of your image remain in grayscale.
- Shadows:
- Hue: For a typical sepia tone, a Hue value between 40 and 50 is generally effective. A value of 45 often produces a pleasing orange-ish yellow.
- Saturation: You will only see the color applied when you increase the Saturation slider. Adjust this to achieve the desired intensity of the sepia tint.
- Balance: The Balance slider controls how far the sepia tone extends into the brighter areas of the image. Sliding it towards the left (towards the Shadows) will push the sepia color further into the highlights. You can adjust this to achieve a subtle or pronounced sepia effect across the entire tonal range.
Step 5: Finalize and Adjust
After configuring the Split Toning settings, click "OK" to apply the Camera Raw filter. Because you converted your layer to a Smart Object, the Camera Raw filter will appear as a "Smart Filter" beneath your image layer in the Layers panel. This is the beauty of non-destructive editing. You can toggle the sepia effect on and off by clicking the "eyeball" icon next to the filter's name. Double-clicking the "Camera Raw Filter" text will reopen the dialog box, allowing you to further refine your sepia tone settings without redoing any work.
Sepia Tone Like Phil Borges in Adobe Photoshop
Method 2: Using Adjustment Layers for Versatile Sepia Toning
Photoshop's adjustment layers offer a flexible and non-destructive way to apply effects, and sepia toning is no exception. Several adjustment layers can be employed to achieve this look, each with its own nuances.
The Hue/Saturation Adjustment Layer
A quick way to add a sepia tone is by using the Hue/Saturation adjustment layer.
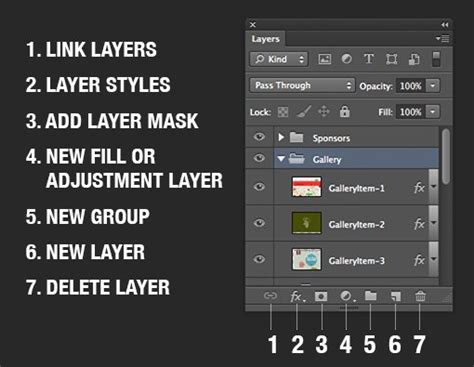
- Create the Adjustment Layer: Click the "Create New Adjustment Layer" icon at the bottom of the Layers panel and select "Hue/Saturation."
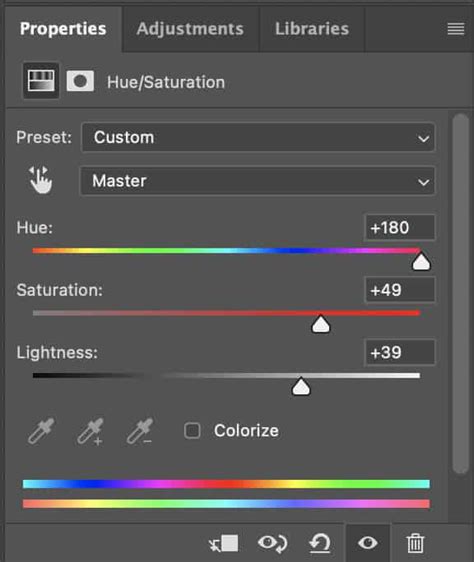
- Enable Colorize: In the Properties panel for the Hue/Saturation layer, check the "Colorize" box. This will immediately apply a uniform color tint to your image.
- Adjust Hue and Saturation: Now, you can creatively choose your sepia color. The "Hue" slider determines the base color, and the "Saturation" slider controls its intensity. Experiment with different Hue values (often in the yellow-orange range) and Saturation levels to find your signature sepia.
- Tweak Opacity: You can further refine the effect by adjusting the opacity of the Hue/Saturation layer.
The Photo Filter Adjustment Layer
The Photo Filter adjustment layer is designed to simulate the effect of placing a colored filter in front of a camera lens, making it a natural choice for sepia toning.
- Create the Adjustment Layer: Go to Layer > New Adjustment Layer > Photo Filter.
- Select Sepia: In the Properties panel, choose "Sepia" from the "Filter" drop-down menu.
- Adjust Density: The "Density" slider controls the strength of the sepia tint. Increase it for a more pronounced effect.
- Customize Color: If the default sepia isn't to your liking, click the "Color" swatch. This allows you to pick a different custom color and apply it as the sepia tint.
The Color Balance Adjustment Layer
The Color Balance adjustment layer offers precise control over the color casts in your image's midtones, highlights, and shadows, making it a powerful tool for fine-tuning a sepia effect.
- Create the Adjustment Layer: Go to Layer > New Adjustment Layer > Color Balance.
- Adjust Midtones: Focus on the "Midtones" first. You'll typically want to reduce the Cyan/Red slider towards Red, the Magenta/Green slider towards Green (or keep it neutral), and the Yellow/Blue slider towards Yellow. Experiment with these sliders to achieve the desired warm, brown hue.
- Refine Shadows and Highlights: You can further refine the sepia tone by adjusting the sliders in the "Shadows" and "Highlights" sections. For instance, adding a touch of yellow to the shadows can deepen the sepia effect.
The Color Fill Layer
A Color Fill layer can also be used to create a sepia tone, particularly when combined with blend modes.
- Create the Fill Layer: Go to Layer > New Fill Layer > Solid Color.
- Choose a Sepia Color: Select a warm, brown or taupe color from the Color Picker.
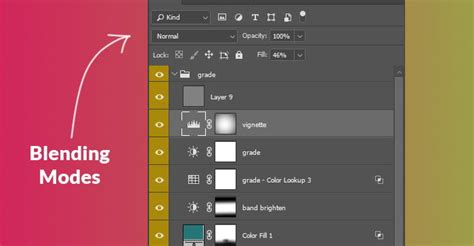
- Change Blend Mode: The key to this method is changing the blend mode of the Color Fill layer. Set it to "Color." This will apply the hue and saturation of the fill color to your image while retaining the luminosity of the original image.
- Adjust Opacity: Fine-tune the intensity of the sepia effect by adjusting the opacity of the Color Fill layer.
Method 3: Duotone Mode for Classic Sepia
While less flexible for further editing compared to adjustment layers, the Duotone mode offers a direct way to convert an image to a two-color (or more) representation, which can be used for a classic sepia look.
- Convert to Grayscale: First, ensure your image is in grayscale. Go to Image > Mode > Grayscale. Discard any color information if prompted.
- Enter Duotone Mode: Navigate to Image > Mode > Duotone.
- Select Sepia: In the Duotone dialog box, choose "Sepia Tone" from the "Type" drop-down menu. Photoshop will apply a default sepia.
- Customize Colors: You can customize the colors by clicking on the color swatches. This allows you to select specific brown hues for the single-color, duotone, tritone, or quadtone options.
Enhancing the Sepia Effect: Contrast and Detail
Regardless of the method chosen to apply the sepia tone, adjusting contrast and detail can significantly enhance the final result, making it more visually appealing and mimicking the characteristics of older photographs.
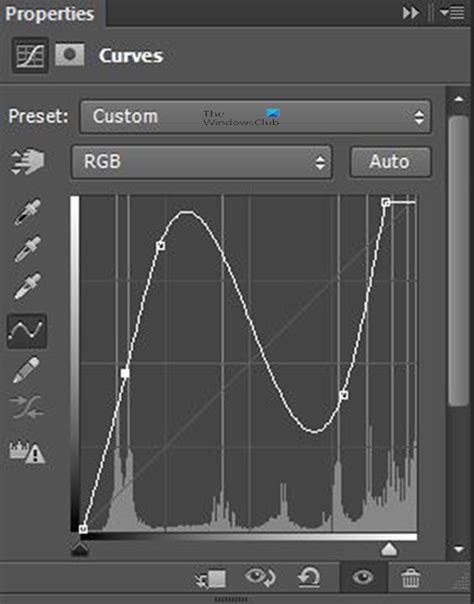
Increasing Contrast with Curves
A slight S-curve in the Curves adjustment layer can effectively increase contrast, adding depth to your sepia-toned image.
- Create the Adjustment Layer: Add a Curves adjustment layer (Layer > New Adjustment Layer > Curves).
- Form an S-curve: In the Curves graph, pull the bottom-left point (black point) slightly upwards to lighten the blacks, and pull the top-right point (white point) slightly downwards to darken the whites. This creates a gentle S-shape, boosting contrast.
Adding Shadows and Vignettes
Many old photographs exhibit subtle shadows and a darkening effect around the edges, known as a vignette, which can further enhance the vintage feel.
- Adding Shadows: Create a new layer above your background but below your subject. Using a soft brush with low flow and a dark color sampled from your image, gently paint shadows around the base of your subject or in areas where natural shadows would occur.
- Creating a Vignette: A new layer can be used to create a vignette. Fill this layer with a color lighter than your background. Then, using a large, soft brush with black as the foreground color, paint over the center of the image on this new layer, gradually revealing the lighter color around the edges. Alternatively, using the Camera Raw filter's "Effects" panel, you can add a "Post Crop Vignetting" effect.
Conclusion: Embracing the Sepia Aesthetic
The sepia tone offers a unique way to imbue photographs with a sense of history, warmth, and nostalgia. Photoshop provides a versatile toolkit, from the powerful Camera Raw filter for precise, non-destructive adjustments to the straightforward application of adjustment layers and presets. By understanding the underlying principles of sepia toning and experimenting with the various tools available, photographers can effectively transform their digital images into timeless, vintage-inspired pieces that resonate with a classic aesthetic. The ability to work non-destructively with layers ensures that you can always revisit and refine your sepia creations, making the process both creative and forgiving.