Adding depth and nuanced texture to digital artwork is a hallmark of sophisticated design. One of the most effective, yet often underutilized, techniques for achieving this is stippling. While traditionally a painstaking manual process, digital art tools have revolutionized its application. This guide delves into the world of Procreate stipple brushes, offering a detailed tutorial on how to leverage these powerful tools to elevate your designs from flat to fabulously textured. We will explore the fundamentals of stippling, the advantages of using specialized brush packs, and practical techniques for achieving seamless gradients, sharp edges, and organic randomness within your Procreate creations.
The Power of Stippling: Adding Depth and Dimension
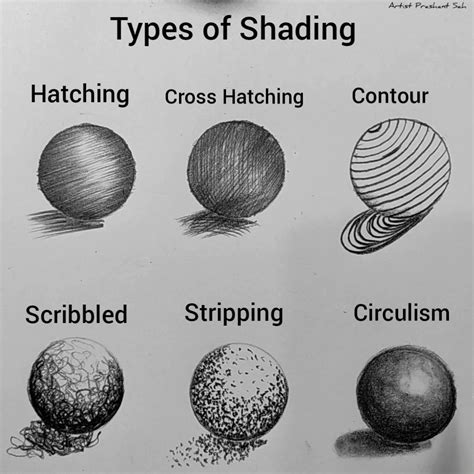
Stippling, at its core, is a shading technique that utilizes a multitude of small dots to create tone, shadow, and texture. The density and arrangement of these dots dictate the perceived darkness and form. Where you shade, how you achieve a smooth fade, and how you make the overall effect aesthetically pleasing are key questions that arise when approaching this technique. A well-executed stipple can imbue a design with a unique tactile quality, mimicking the look and feel of traditional ink work. This depth is crucial for designs that aim to capture attention and convey a sense of realism or a specific artistic style. The beauty of digital stippling lies in its ability to replicate this traditional art form with speed and versatility, allowing artists to achieve complex shading effects that would be incredibly time-consuming by hand.
Unlocking Versatility with Stipple Brush Packs
The advent of specialized brush packs in digital art software like Procreate has been a game-changer for artists. A well-curated brush pack provides a variety of tools, allowing you to select the perfect brush for your specific design needs. For stippling, this is particularly true. The Tattoo Stipple Brush Pack, for instance, is composed of brushes that utilize dots as their fundamental element. Within such a pack, you can find brushes with varying dot characteristics: some feature fuzzy dots, others clean and precise ones, some offer wobbly or blobby dots for a more organic feel, and some even incorporate lines and fillers to expand your textural palette. This diversity ensures that you are not limited to a single dot style, but can instead choose the brush that best complements the existing lines and overall aesthetic of your design. The ability to experiment with different dot types-from sharp and defined to soft and diffused-opens up a vast array of creative possibilities, enabling you to tailor the texture to precisely match your artistic vision.
Getting Started: Importing and Initial Application in Procreate
Once you have downloaded a stipple brush pack, the next step is to integrate it into your Procreate workflow. Pull up your existing design in Procreate, or begin a new one. If you are starting with a base illustration, you might have already drawn some foundational lines that indicate where you want to apply shading. A helpful tip when drawing perfect circles or half-circles in Procreate is to draw the initial shape and then hold your stylus steady on the canvas. Procreate will automatically refine it into a perfect geometric form, which can be useful for creating consistent shadow shapes.
When it's time to introduce shading, especially with stippling, it is highly recommended to create a new layer specifically for your stipple work. This practice is fundamental for maintaining flexibility and ease of editing later in your creative process. Working on a separate layer prevents your shading from directly impacting your base artwork, allowing for adjustments without destructive interference.
10 Essential Layer tips for Procreate Users
Selecting and Applying Your Stipple Brush
With your new layer created, the next crucial step is to pick the stipple brush you want to use. The selection process should ideally be guided by the existing elements in your design. For example, if your design features fuzzy lines, selecting a fuzzy dotted brush can create a harmonious and cohesive look. Cory, in his approach, often selects a brush that visually resonates with the existing textures. Once you have chosen your brush, you can begin marking the area you intend to shade. The principle of stippling is straightforward: the more you apply the brush in a specific spot, the darker that area will become. Conversely, by shading less or applying the brush with lighter pressure, you can achieve a gradual fade-out effect, creating subtle transitions from dark to light.
Mastering Gradients and Edge Control
Achieving smooth stipple gradients and defined edges is where the true artistry of digital stippling comes into play. For areas where you desire a shadow to fall off quickly or create a more defined edge, selecting one of the line brushes from your stipple pack can be highly effective. You can draw a line precisely where you want the shadow to terminate. Then, switch back to your original dotted brush and draw over that line. This technique helps to create a textured, fuzzy edge that blends seamlessly with the surrounding stippled area, offering a more organic and less abrupt transition than a hard-edged shadow.
Creating super-smooth stipple gradients does take a little practice. It involves a nuanced understanding of brush opacity, flow, and the density of dots. Experimenting with different pressure levels and the speed at which you apply the brush will yield varying results, allowing you to fine-tune the gradient to your exact specifications. The brushes designed for stippling are often perfect for creating super-fast stipple blends or intricate edge details with short, impactful transitions from light to dark. This capability is invaluable for adding depth to elements like cast shadows, atmospheric perspective, or textured surfaces.
The Importance of Layer Management for Editability
As you delve deeper into stippling, particularly for complex designs, the management of your layers becomes paramount. A common pitfall for many artists is attempting to mask or shade everything on a single layer. This approach will inevitably make refining your work more difficult later on. It is far more advantageous to make multiple selections on different layers. This strategy ensures that your stipple shading remains easy to edit if you need to make changes. For instance, if you decide a shadow needs to be darker, lighter, or repositioned, having it on its own layer allows for these modifications without affecting other parts of your artwork.
However, it's a balance: too few layers can lead to difficulty in editing, while too many can become overwhelming and disorganized. Therefore, it's crucial to establish a system for naming and organizing your layers. Future you will be immensely grateful to the present you for clear, descriptive layer names like "Shadow - Left Cheek," "Texture - Background," or "Highlight - Fabric," rather than a chaotic jumble of generic labels such as "Layer 47 copy 8." Before you begin brushing on a layer, always ensure that the layer thumbnail is selected. This simple check prevents you from accidentally applying your stippling to the wrong area or layer, saving you from potential frustration and rework.
Achieving Organic Randomness in Digital Stippling
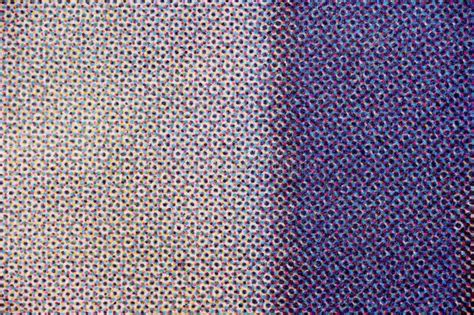
While digital stipple brushes offer incredible precision and speed, a common challenge is replicating the inherent randomness that gives analog stippling its unique, organic quality. Most digital stipple brushes, when used uniformly, can sometimes produce a predictable or artificial pattern. To combat this, many advanced brush packs are designed with this very issue in mind. Each precision brush group may come with matching sparse, medium, and densely spaced versions. These variations are ready to brush on dozens, or even hundreds, of authentically random dots in a single stroke. This built-in randomness is key to achieving a more natural, hand-drawn feel. By varying the pressure, speed, and angle of your stylus, combined with these thoughtfully designed brushes, you can simulate the subtle imperfections and delightful unpredictability of traditional stippling.
The concept of "authentically random dots" is crucial here. It means the brushes are engineered to produce variations in dot placement, size, and density within a single stroke, mimicking the natural, imperfect marks made by hand. This is especially important for creating believable textures on surfaces like skin, fabric, or weathered materials. When these brushes are used effectively, they can transform a good design into a truly captivating one, adding a layer of depth and realism that is hard to achieve with simpler shading methods.
Advanced Techniques and Creative Applications
Beyond basic shading, Procreate stipple brushes can be used for a multitude of creative applications. Consider using them for creating subtle textures on backgrounds, adding a grainy effect to digital photographs, or even generating intricate patterns. For instance, a sparse stipple brush can be used to create a delicate mist or atmospheric haze. A densely packed stipple brush can be employed to create a rich, velvety texture or a deep, dark shadow that absorbs light.
When working with different stipple brush types, don't be afraid to combine them. A fuzzy dot brush might be excellent for the main body of a shadow, while a cleaner dot brush could be used for the sharper edges or for adding highlights within the shadow area. The line brushes can be invaluable for creating sharp, defined borders or for hatching techniques that mimic traditional pen and ink.

The ability to adjust brush settings within Procreate-such as spacing, jitter, and shape dynamics-further enhances the potential of stipple brushes. By tweaking these parameters, you can further customize the behavior of any stipple brush, creating unique textures that are entirely your own. For example, increasing the "jitter" setting can make the dots scatter more randomly, while adjusting the "spacing" can control how close together the dots are placed. This level of control allows artists to move beyond the default settings of a brush pack and truly personalize their tools.
Experimentation is key. Try applying stippling to different types of artwork-portraits, landscapes, abstract pieces. See how the texture changes the overall mood and feel of the image. For example, in a portrait, stippling can add a subtle, realistic skin texture or create dramatic, chiaroscuro lighting. In a landscape, it can be used to depict the texture of foliage, the roughness of rocks, or the soft diffusion of light through clouds.
Remember that the goal is often to create a sense of depth and form that feels natural and intentional. This means paying close attention to where light would realistically fall and where shadows would be cast. Understanding basic principles of light and shadow will greatly inform your stippling decisions, making your artwork more convincing and visually appealing. The versatility of stipple brushes means they can be used for both subtle enhancements and dramatic stylistic statements, making them an indispensable tool in any digital artist's arsenal.