Capturing attention with words has always been a timeless design strategy. In the realm of graphic design, particularly within Adobe Photoshop, the ability to effectively underline text is a fundamental yet often underutilized skill. While it might seem like a simple function, mastering its nuances can significantly enhance the readability and visual appeal of your designs. This guide will delve into various methods for underlining text in Photoshop, from straightforward character panel adjustments to more creative approaches, ensuring you can work smarter, not harder, and elevate your design game.
The Power of the Character Panel: Your Primary Underlining Tool
Photoshop's intuitive Character panel is the most direct and efficient way to add underlines to your text. This panel provides a suite of options that allow for precise control over typography, including the crucial underlining feature. Its options are readily accessible, often taking just a couple of minutes to master.
Method 1: Underlining Existing Text via the Character Panel
This method is ideal for applying underlines to text that has already been placed in your Photoshop document.
- Step 1: Select the Type Tool: Locate the Type Tool (often represented by a "T" icon) in the left-hand sidebar of your Photoshop interface. Click on it to activate.
- Step 2: Select the Text: Navigate to your canvas and click on the existing text you wish to underline. To select the entire text, you can either double-press on the word or simply click and drag your cursor across the desired text. For selecting all text within a text box, a shortcut is available: on Windows, press
Ctrl + A; on Mac, pressCommand + A. - Step 3: Access the Character Panel: The Character panel is usually visible in the right-hand toolbar. If it's not immediately apparent, you can access it through the menu bar. Navigate to
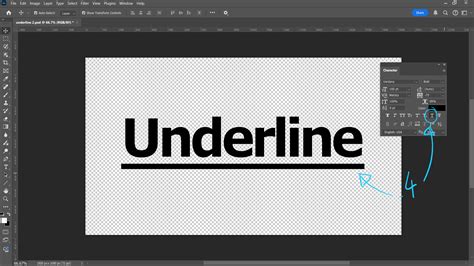
Windowat the top of the screen, and then selectCharacterfrom the dropdown menu. - Step 4: Apply the Underline: Within the Character panel, you will find various typographic controls. Look for the Underline icon, which is typically depicted as a capital "T" with a line beneath it. Clicking this icon will immediately apply an underline to your selected text. You've now successfully underlined your text!
Method 2: Underlining Text as You Type
This approach is beneficial when you know from the outset that you want your text to be underlined.
- Step 1: Open Photoshop and Prepare Your Canvas: Start by opening Adobe Photoshop and creating a new document or opening an existing one. It's good practice to add a new layer for your text to maintain organization.
- Step 2: Activate the Type Tool: Select the Type Tool (T) from the left sidebar or by pressing the 'T' key on your keyboard.
- Step 3: Create and Input Your Text: Click and drag on your canvas to create a text box. Alternatively, you can simply click on the canvas to start typing. Input the text you want to appear. If you need to reposition the text box, activate the Move Tool by pressing 'V' on your keyboard and then adjust the text's placement.
- Step 4: Adjust Text Properties (Optional but Recommended): Before or after typing, you can utilize the options in the top menu bar to adjust font properties such as font family, size, and weight (bold, semi-bold, etc.).
- Step 5: Open the Character Panel: As described in Method 1, go to
Window > Characterto bring up the Character panel. - Step 6: Select the Underline Icon: With your text cursor active within the text you wish to underline, click on the Underline icon (T with an underline) in the Character panel. Your text will now be underlined.
Advanced Techniques: Highlighting Text in Photoshop
While underlining adds emphasis, "highlighting" text in Photoshop can be interpreted in various ways, often implying a colored background behind the text. This can be achieved through a more layered approach, offering greater flexibility in color and style.
Method 3: Creating a Highlight Effect Using Duplicate Layers and Shapes
This method involves a few more steps but allows for significant customization of the highlight.
- Step 1: Prepare Your Text Layer: Open your image in Photoshop and ensure your text is on its own layer. If not, select the Type Tool, create your text, and it will automatically be placed on a new text layer.
- Step 2: Duplicate the Text Layer: Right-click on your text layer in the Layers panel and select
Duplicate Layer. This creates an exact copy of your text layer. - Step 3: Access the Character Panel for Underlining: Select the duplicated text layer. Now, access the Character panel (
Window > Character). Ensure the text on this duplicated layer is selected (you might need to activate the Type Tool and select it again) and click the Underline icon. - Step 4: Adjust Underline Color and Appearance: With the underlined text on the duplicated layer still selected, you can adjust the color of the underline. Open the Color Picker by clicking the color swatch in the Character panel or by going to
Edit > Filland choosing a color. You can also adjust the underline's color, width, and style using theStrokeandFilloptions within theProperties panel(Window > Properties). - Step 5: Convert Underline to Shape (for manipulation): To treat the underline as a distinct element that can be moved and manipulated independently, you need to convert it to a shape. With the duplicated text layer containing the underline active, go to the
Layermenu, thenType, and selectConvert to Shape. Note: This action rasterizes the text, meaning it can no longer be edited as editable text. - Step 6: Isolate the Underline: Now, select the
Path Selection Tool(often found grouped with the Direct Selection Tool). Click and drag to create a selection around the underline. Once selected, you can press theDeletekey to remove the text, leaving only the underline shape. - Step 7: Position the Highlight: Select the
Direct Selection Tool(the white arrow). Click on the underline shape you've isolated. You can now drag this underline shape independently. Position it directly beneath your original text layer to create the appearance of a highlight. You can further adjust its color and thickness using theProperties panel. - Step 8: Repeat for Multiple Highlights: If you need to highlight specific words or phrases, repeat steps 2-7 for each word, ensuring your duplicated layers are strategically placed below the original text layer.
Keyboard Shortcuts for Efficiency
Working with shortcuts can significantly speed up your workflow.
- Windows:
- Select text and press
Ctrl + Uto toggle the underline on/off.
- Select text and press
- Mac:
- Select text and press
Command + Uto toggle the underline on/off.
- Select text and press
These shortcuts apply directly to the underline feature within the Character panel.
Understanding Underline Settings Beyond the Basic Icon
The Character panel offers more nuanced control over underlines than just a simple toggle. When you click the underline icon, Photoshop applies a default underline. However, you can fine-tune this:
- Underline Color: As mentioned, the underline typically inherits the text color. However, by converting the underline to a shape or by using specific layer styles, you can assign a different color.
- Underline Width and Offset: While the basic underline icon doesn't offer direct control over width and offset, these can be adjusted by converting the underline to a shape and then manipulating its properties. The
Properties panel(Window > Properties) becomes invaluable here, offeringFillandStrokeoptions that can be applied to shapes. For instance, after converting the underline to a shape, you can adjust its stroke weight and position relative to the text. - Underline Style: The default underline is a solid line. For more stylized underlines, you might need to explore creating custom shapes or using brushes that mimic dashed or dotted lines, then applying them manually beneath the text.
Avoiding Common Misconceptions and Clichés
A common misconception is that underlining in Photoshop is solely about the single "T" icon in the Character panel. While this is the most straightforward method, it's important to recognize that Photoshop's power lies in its flexibility.
- Underlining vs. Highlighting: It's crucial to differentiate between a true underline (a line directly beneath text, often used for emphasis or indicating a hyperlink) and a background highlight (typically a colored block behind text, common in documents). The methods described address both interpretations.
- Over-reliance on Default Settings: While quick, the default underline might not always fit the aesthetic of your design. Experimenting with color, thickness, and placement is key to achieving a professional look.
- Rasterizing Text Prematurely: When attempting more complex highlighting, be mindful of when you convert text to shapes or rasterize layers. Doing so before you're finished with text editing will lock in those changes, making future edits impossible. Always work on duplicate layers for such transformations.
Creative Applications of Underlining
Beyond simple emphasis, underlining can be used creatively:
- Creating Geometric Patterns: By duplicating and manipulating underlines, you can create interesting geometric backgrounds or decorative elements.
- Framing Text: A thick underline, perhaps with a stroke, can act as a minimalist frame for short pieces of text.
- Simulating Handwriting: With careful adjustment of stroke style and color, underlines can sometimes mimic the look of a handwritten annotation.

Video Tutorial Recommendation
For a dynamic and visual understanding of these techniques, consider a video tutorial.
How to Underline Text in Photoshop
Conclusion: Elevating Your Textual Design
Underlining text in Photoshop is more than just a formatting option; it's a design tool that, when used effectively, can significantly improve the clarity and impact of your visual communication. From the swift application via the Character panel to more elaborate highlighting methods, understanding these techniques empowers you to make informed design choices. Remember to leverage keyboard shortcuts for efficiency and always consider the aesthetic implications of your choices. By mastering these methods, you can ensure your text not only conveys information but also captures attention and enhances the overall design.