Motion blur is a powerful photographic and post-processing technique that can imbue static images with a dynamic sense of movement, speed, and depth. Photographers frequently use motion blur to take their work to the next level. This effect is achieved by either using longer exposure times in-camera or by skillfully applying digital filters in post-production software like Adobe Photoshop. Understanding when and how to apply motion blur correctly is a must for every creative artist looking to add an extra dimension to their visual storytelling. This guide will explain how to add motion blur in Photoshop, the industry's leading digital photography-editing software, so without further ado, let's get right into it.
Understanding the Essence of Motion Blur
At its core, the motion blur effect occurs when a photographer uses a longer shutter speed to capture a moment from the real world. This means their camera's sensor will be exposed to light a bit longer than usual. If an object is in motion during that time, its movement will be recorded as a streak or a softened trail in the final image. This creates a visual representation of time passing and movement occurring within the frame.
Conversely, if you desire a crisp, frozen-in-time image and wish to avoid any motion blur while taking the photograph, you should set your device's exposure time (shutter speed) to be as fast (shorter exposure) as possible. Using a fast shutter speed means your sensor is exposed to light for a much shorter period, resulting in "crispier" photography that represents a fraction of that moment much more accurately. This allows the camera to capture the image so quickly that you can see the smallest detail as if it were frozen in time, with no motion blur.
In summary, the distinction lies in the exposure duration:
- Fast Shutter Speed (Minimal Exposure): Results in "crispier" photography, capturing a precise moment without blur. Ideal for freezing action.
- Slow Shutter Speed (Longer Exposure): Results in a more "drawn-out" photography, capturing "multiple fractions" of a moment. This allows any objects in motion during that time to appear blurry, smeared, or leave a trail, also known as "motion blur streaks." This is famously seen in long-exposure shots of car lights on a highway or the illuminated paths of Ferris wheel rides.
Applying Motion Blur in Photoshop: Step-by-Step
Adding motion blur digitally in Photoshop allows for precise control and the ability to enhance existing images or create entirely new effects. This section will guide you through the fundamental methods.
Method 1: Using Photoshop's Native Motion Blur Filter
This is the most direct way to introduce motion blur to your image.
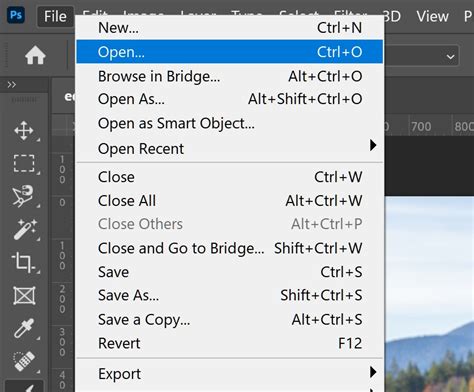
Open the Image You Want to Blur in Photoshop:To begin, you first need to open the software. Load up Photoshop, click File > Open, and double-click on the image you wish to add motion blur to from your Desktop or another location. This will import it into the program and then it's ready to be worked on. For testing purposes, it's often recommended to create a new project and import the image into that.
Make the Image a Smart Object:Before you can create motion blur for your image, it's highly recommended to convert your layer to a Smart Object. To do this, click on the image layer within the "Layers" section, then choose Layer > Smart Objects > Convert to Smart Object.
This crucial step allows you to apply filters non-destructively. Now you can add effects to the entire image and modify them as you wish without permanently changing or "damaging" the original pixel data of the background layer. You can also use the traditional way, which is just making a duplicate layer (Ctrl+J or Cmd+J) and working on it to keep the original one safe, but Smart Objects offer more flexibility for adjustments.
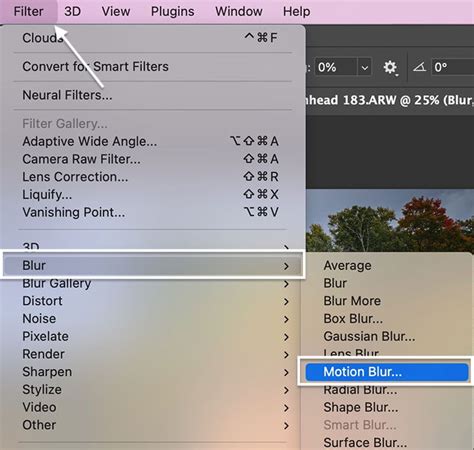
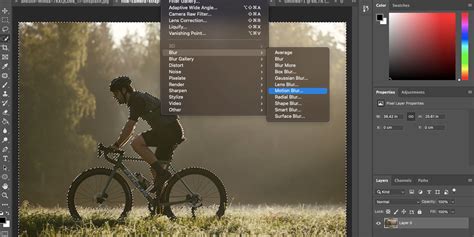
Apply The Motion Blur Effect:From the top-bar menu in Photoshop, click "Filter," then hover your cursor over the "Blur" category to expand the options menu, and finally, choose "Motion Blur."
This will add motion blur to your image, and you'll be immediately able to tell the difference by comparing it with the original photo. The process is similar if you wish to experiment with other blur effects, like Radial Blur or Gaussian Blur.
Modify The Parameters:Now, the only thing left is to modify the parameters of this Adobe Photoshop motion blur filter and get the result you need for the photo. A dialog box will appear with two primary sliders:
- Distance: This slider will determine how strong the motion blur is. A higher value creates a more pronounced blur, suggesting faster movement.
- Angle: This slider will change the direction of the motion blur. You can use this to fake the effect of someone driving downhill, falling off a cliff, or any other directional movement.
To get the most natural motion blur look, it's essential to match the angle with the actual or perceived direction of the object's movement within your shot. For instance, if a car is moving from left to right, set the angle accordingly.
That's all there's to it for the basic application of the Motion Blur filter!
Method 2: Utilizing Blur Gallery for More Creative Control
Photoshop's Blur Gallery offers more advanced and intuitive ways to apply blurs, including specialized tools for simulating motion and depth.
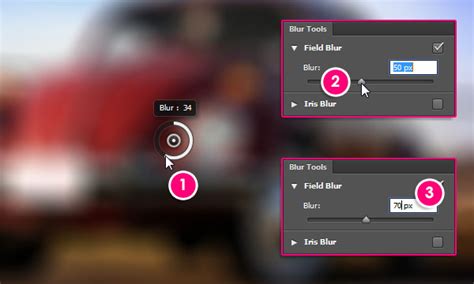
Field Blur for Depth of Field Effects:To play with depth of field, choose Filter > Blur Gallery > Field Blur. You'll see a pin in place blurring the entire image. Click an area you want to keep in focus to create a second pin, and then drag its blur dial to zero. This allows you to selectively keep parts of the image sharp while others are blurred, mimicking the shallow depth of field often seen in photography.
Motion Blur for Directional Speed:To create a sense of speed by adding a blur that flows in one direction, choose Filter > Blur > Motion Blur. Adjust the Angle to match the direction of your subject’s motion. This is similar to the native filter but can sometimes offer a more integrated workflow within the Blur Gallery.
Path Blur for Curved Movement:To create movement in multiple directions or along a curved path, choose Filter > Blur Gallery > Path Blur. Drag the controls to create a blur in the direction of the arrow. This is incredibly useful for simulating the motion of a spinning object or a subject moving along a non-linear path. You can add multiple points to control the blur along the path.
Easy Motion Path Blur in Photoshop
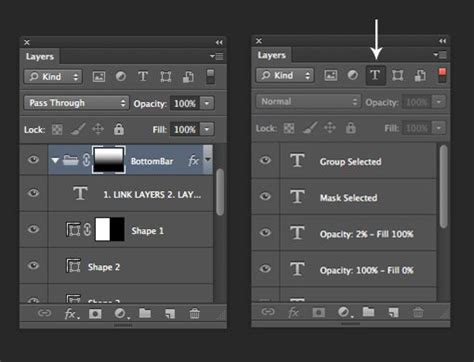
Isolating the Blur with Masks:A critical aspect of achieving realistic and compelling motion blur is knowing where to apply it. You can isolate the blur effect by masking the areas where you want to keep detail. When using Smart Filters, Photoshop automatically creates a Smart Filter mask. You can paint on this mask with black to hide the blur effect or with white to reveal it, giving you granular control over where the blur is applied.
Kathleen Martin, an illustrator and designer working in the Adobe Studio, demonstrates how to create exciting motion blur effects. She preps her images by working with Smart Objects, then gets her subject moving with filters and the Pen tool. She works with Sliders to speed up or down the movement and explores the Layers panel's Smart Filters mask to specify what she does (and does not) want in focus. For example, when working with a dancer photo, she unlocked the layer, applied a blur to the entire image using Filter > Blur Gallery > Path Blur, and then updated the default marker by dragging the arrow to control the direction of movement. To bring specific parts of the model back into focus, she clicked the Smart Filters mask thumbnail in the Layers panel.
Enhancing Motion Blur with Third-Party Plugins
While Photoshop's built-in tools are powerful, third-party plugins can offer even more specialized effects and streamlined workflows.
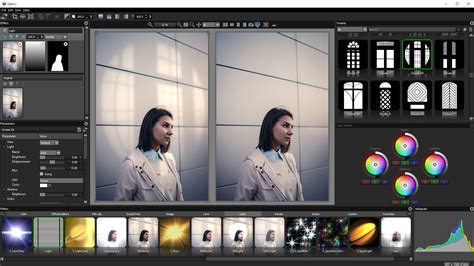
Using Boris FX Optics
For an even more advanced and professional approach, consider using plugins like Boris FX Optics. This plugin offers a wide array of visual effects, including sophisticated motion blur options derived from their industry-leading Sapphire package.
Insert the Image Into Photoshop:As before, open your desired image in Photoshop. It's good practice to duplicate the background layer (Ctrl+J or Cmd+J) so you have a safe copy to work on and revert to if needed.
Add Motion Blur Through Optics:To launch Optics, click "Filter" and use your cursor to hover over "Boris FX," then choose "Optics." This will load the Optics interface. Use the search bar to type in "Motion" and choose the "S_BlurMotion" effect from the list. You can select a preset from the left-side Presets panel if any of them match your criteria. The default preset is often suitable for many different photos, and you can customize it further.
Fine Tune The Effect:After selecting a preset within Optics, you'll be able to customize it using a myriad of settings available in the "Parameters" section on the right side. Simply move the sliders, and you'll preview the motion blur changes in real-time. When you are satisfied with the result, click "Apply" in the bottom-right corner, and the effect will be saved on your image.
Create a Layer Mask (Optional):If you don't want the motion blur to apply to the entire image, Optics provides built-in tools to easily create a layer mask. This allows you to isolate the effect to only one person or one object within your shot. Click on "Add Mask" within the Optics panel, then choose your preferred method of adding a mask. After creating the layer mask, ensure the effect is applied to it. You can then choose to merge layers for better organization. Mark your blur layer to easily identify which layer adds the effect.
Practical Examples and Considerations
Motion blur isn't just for action shots. It can be used creatively on still elements to imply movement or add a sense of dynamism.
Example: Motion Blur on a Forest Scene
Consider a rather boring and cluttered image made in a forest. Applying motion blur can add a sense of wind blowing through the trees or the feeling of movement as you pass through the scene.
- Set the direction and amount of blur: Adjust the settings to match the perceived movement in the image.
- Use a duplicate layer: If your photo editor supports layers, make a copy of the background layer and apply the filter to the new layer.
- Crop the edges: As noted, you can sometimes tell when blur is done in Photoshop because the edges of the image don't blur evenly. Cropping these tell-tale edges can help create a more natural look.
Avoiding Common Pitfalls
One common giveaway that motion blur has been applied digitally is the unnatural uniformity of the blur, especially at the edges of the frame. In-camera motion blur often has a more organic fall-off. To combat this in Photoshop:
- Use masks: As discussed, selectively applying the blur and feathering the mask edges can help.
- Combine blur types: Sometimes, a combination of different blur filters or even multiple applications of the same filter with varying settings can yield more complex and realistic results.
- Consider perspective: Ensure the direction of the blur aligns with the perspective of the scene.
The Artistic Advantage of Motion Blur
Motion blur can showcase movement and action within your shot in unique ways and add depth, making it an indispensable tool for photographers and digital artists. Whether you're aiming to convey the exhilaration of a speeding car, the gentle sway of trees in the wind, or simply add a touch of artistic flair to a still life, mastering motion blur in Photoshop opens up a world of creative possibilities.
The technique of using longer exposure times in photography is a foundational concept that digital artists can emulate and enhance. By understanding both the in-camera principles and the digital manipulation techniques available in software like Adobe Photoshop, you can elevate your images from static snapshots to compelling visual narratives.