Creating images with transparent backgrounds in Adobe Photoshop is a fundamental skill for graphic designers, web developers, and digital artists alike. This capability allows for seamless integration of subjects into various designs, enhancing brand identity, and producing professional-looking visuals for both print and digital media. Whether you're aiming to isolate a product for e-commerce, create a striking social media graphic, or design a website element, understanding how to effectively remove backgrounds is paramount. Photoshop offers a versatile toolkit to achieve this, with methods ranging from quick, automated solutions to precise, manual techniques, catering to different image complexities and desired outcomes.
Leveraging Automated Tools for Swift Background Removal
For many common scenarios, Photoshop’s automated tools, often powered by advanced artificial intelligence, can expedite the background removal process significantly. These tools are particularly effective when the subject is well-defined and contrasts clearly with the background.
One of the most straightforward automated approaches is the "Remove Background" tool. Accessible within the Layers panel (by clicking the Properties panel and then the "Remove Background" button), this feature utilizes Adobe Sensei, the company's AI technology, to automatically detect and isolate the subject from its background. This is an excellent starting point for users who need to quickly extract a subject for various new designs and destinations. The process is remarkably efficient: select your image, and the AI handles the isolation, creating a transparent background. This allows you to "take the background out of a picture faster than ever."
Another AI-driven feature is the ability to "Detect backgrounds and subjects with a little help from artificial intelligence." These Adobe Sensei-powered tools automatically remove backgrounds in the Layers panel. This intelligent automation is a significant advancement, enabling users to focus on their creative vision rather than spending excessive time on tedious selection tasks.
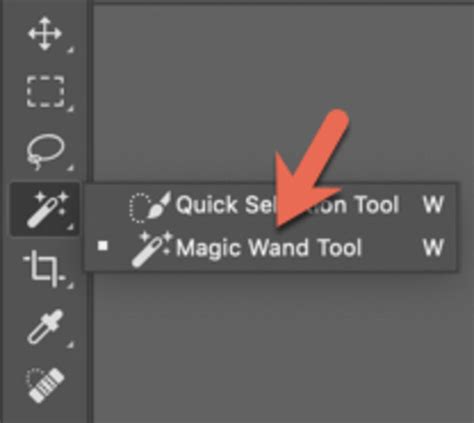
For those working with solid color backgrounds, especially white, Photoshop offers a "one-click" solution. The Magic Wand Tool (shortcut: w) is designed to select contiguous areas of similar color. Simply select this tool, then left-click on the white background. Photoshop will create a selection around the area. The effectiveness of this selection can be fine-tuned using the "Tolerance" option found in the toolbar, which controls the range of colors the Magic Wand will select. A lower tolerance selects fewer shades, while a higher tolerance selects a broader spectrum.
Once the background is selected, two primary non-destructive methods can be employed. The first, and highly recommended, is creating a layer mask. After making your selection with the Magic Wand or another tool, click the "Add a Mask" button in the Layers Panel. This hides the selected background without permanently deleting it, allowing for easy adjustments later. Alternatively, you can directly delete the selected background by pressing the Delete key. However, this is a destructive process. The "delete" option is most useful when there is no other white or lighter colors present in the image that you wish to keep.
Precision Techniques for Complex Backgrounds
While automated tools are powerful, they may not always yield perfect results, especially with intricate details, subtle color variations, or subjects that blend into the background. In such cases, manual selection techniques offer greater control and precision.
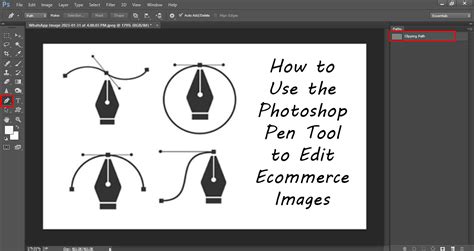
The Pen Tool is the industry standard for creating precise selections. It allows you to draw vector paths around your subject. To use it, select the Pen Tool, and carefully trace the outline of your desired subject. Once the path is complete, right-click within the path and choose "Make Selection." Similar to the automated methods, you can then either apply a Layer Mask to non-destructively hide the background or hit Delete to erase it. This method demands patience and a steady hand but provides the cleanest and most accurate results, especially for subjects with sharp edges.
For refining the edges of your selections, Photoshop offers the "Refine Edge" (or "Select and Mask" in newer versions) feature. This powerful toolset allows you to fine-tune rough or smooth edges, feather selections to create soft transitions, and even decontaminate colors to remove halos of the original background color. This is crucial for subjects like hair or fur, where achieving a natural-looking transparency can be challenging.
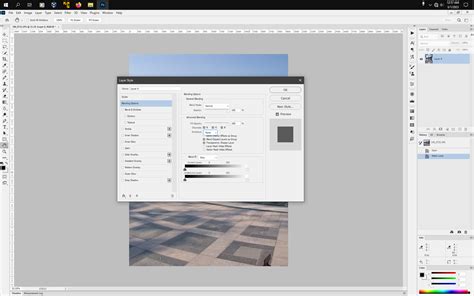
Another advanced technique involves using blending options, specifically the "Blend If" sliders. Right-click on your layer and select "Blending Options." Within this dialog box, you'll find a section titled "Blend if Grey." By dragging the sliders on the white side closer to the black, you can effectively make white or lighter pixels transparent. This method is quite effective for removing solid white or light-colored backgrounds cleanly, especially when the subject has darker tones. You can adjust the sliders to control the degree of transparency. This is considered a "pretty simple and probably the best/cleanest option as you have full control of the situation" when dealing with specific color backgrounds.
Understanding Transparency and File Formats
The goal of removing a background is often to create transparency, which enables an image to be placed over different backgrounds without the original background interfering. This is particularly important for web use, where images need to be flexible and adaptable.
Photoshop supports various file formats that preserve transparency, with PNG being the most common and recommended for web graphics requiring alpha transparency (varying levels of opacity). GIF files also support transparency, but they have limitations. GIF transparency is "hard-edged," meaning pixels are either fully transparent or fully opaque; there's no in-between. This is determined by whether a pixel is more than 50% transparent or 50% opaque in the original image. Hard-edged transparency is useful when the background color of the web page is unknown or when the page background has a texture or pattern.
JPEG, while widely used, does not support transparency. If you save an image with transparency as a JPEG, Photoshop will fill the transparent areas with a solid color, typically white.
How Do I Use PNG Files With CSS? - Graphic Design Nerd
For web optimization, Photoshop offers features to manage transparency and "background matting." Background matting simulates transparency by filling or blending transparent pixels with a matte color that matches the web page background. This is supported by GIF, PNG, and JPEG formats. To create background transparency or matting in an optimized image, you must start with an image that already contains transparency.
Advanced Workflows and Adobe Express Integration
For users who frequently perform background removal or need to process multiple images, Photoshop offers scripting capabilities. You can create a script that automates the process of making backgrounds transparent across a batch of images. This script can be run via File > Scripts > Browse… in Photoshop, saving considerable time for repetitive tasks.
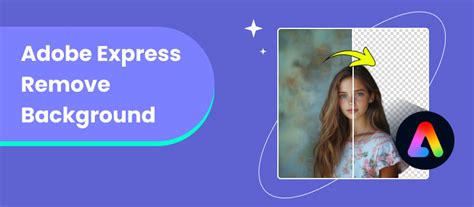
Beyond Photoshop’s core functionality, Adobe Express provides a complementary suite of tools for further enhancing images with transparent backgrounds. The "Remove Background" tool within Adobe Express allows users to upload an image and instantly download it with a transparent background. This is an "easy as selecting your image, uploading it to our free transparent background tool, and instantly downloading right to your device." Adobe Express also offers a free plan, providing access to numerous quick action tools, templates, photo editing, and effects, making it accessible for a wide range of users.
With Adobe Express, you can "Publish your image across all your digital channels and social media platforms." The platform also allows for further creative editing, such as adding shape crops, applying filters, adding GIFs and animation, and transforming your edited image into flyers, social posts, album covers, and more. This integration allows for a fluid workflow from background removal to final design creation, empowering users to "Bring your imagination to life with Adobe Express, the quick and easy create-anything app."
The ability to create non-rectangular images, a direct benefit of transparent backgrounds, is crucial for modern web design. It allows subjects to stand out without being constrained by a bounding box. By mastering these techniques in Adobe Photoshop and leveraging complementary tools like Adobe Express, users can unlock a new level of creative control, ensuring their subjects truly shine by getting rid of distracting elements in their backgrounds. The precise control offered by tools like the Pen Tool and the efficiency of AI-powered features ensure that whether you're a beginner or a seasoned professional, you can achieve professional-grade results.
tags: #adobe #photoshop #transparent #background