Many artists view drawing braids in Procreate with a sense of anxiety. Without proper guidance, your attempts at braiding digital hair might look more like a tangled mess than the intricate, woven pattern you envision. This tutorial is here to demystify the process and provide a step-by-step guide to creating realistic and visually appealing braids within the Procreate digital art application. We will explore the fundamental techniques, from initial sketching to the final touches that bring your digital braids to life.
The Foundation: Understanding Braid Structure
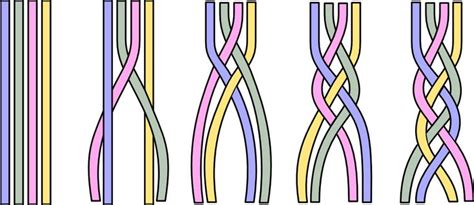
Before diving into Procreate, it's essential to grasp the underlying structure of a braid. A basic three-strand braid involves three distinct sections of hair that are systematically interwoven. One strand consistently moves over another, then under, and repeats this pattern. The illusion of depth and volume comes from the way these strands overlap and cast shadows upon each other. Understanding this fundamental over-under motion is key to creating a believable braid, whether you're drawing it on a character's head or as a standalone design element.
Setting Up Your Procreate Canvas and Brushes
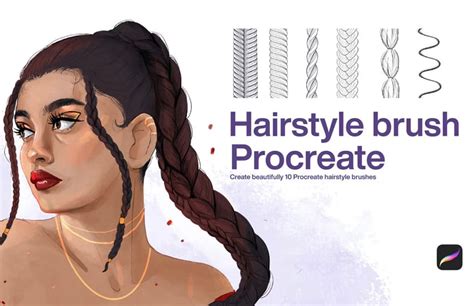
To begin your digital braiding journey in Procreate, setting up your canvas and selecting the right brushes are crucial steps. While Procreate offers a robust set of default brushes, the use of custom brushes can significantly enhance the realism and efficiency of your workflow. As a fan of custom-made brushes, I suggest you try Brush Galaxy’s collection of Procreate Hair Brushes. These specialized brushes are often designed with texture and flow in mind, mimicking the natural behavior of hair.
For this tutorial, we will be using the Chalk Sketch Brushes for initial sketching and blocking in forms due to their forgiving nature and ability to create soft, buildable lines. Subsequently, the Fur Brush Set Vol 6 will be employed for rendering the individual strands and adding finer details, as its textured quality can effectively capture the wispy and varied nature of hair. However, feel free to experiment with other brushes that you find comfortable and that help you achieve the desired aesthetic. The key is to have a brush for sketching and a brush for rendering finer details.
Step 1: Sketching the Braid's Outline and Flow
Begin by sketching a rough outline of the braid’s shape. Think about its direction and how it falls or wraps around the head. This initial sketch acts as a blueprint, guiding the placement and overall form of your braid. Don't focus on individual strands at this stage; instead, concentrate on the broad strokes and the general silhouette. Consider the weight of the hair and how gravity would affect its drape. Is the braid loose and flowing, or tight and structured? This initial shape will dictate the subsequent placement of individual strands and the overall believability of your artwork.
Step 2: Laying Down the Strands
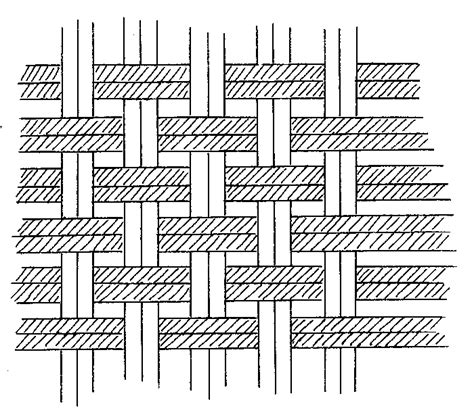
Now, use a fine brush to draw the individual strands. Each strand should weave over and under the others, following the guideline you established in the previous step. This is where the core of the braiding process takes place. Imagine the three distinct sections of hair and meticulously guide them through the over-under pattern. It can be helpful to think of it as drawing a continuous ribbon that folds and tucks. Pay close attention to how the strands naturally curve and bend. Avoid drawing them as perfectly straight lines; hair has a natural flow and subtle undulations.
When drawing these strands, it’s beneficial to use a slightly darker shade than your base hair color. This will help define the form even before shading. Think about the thickness of each strand - they won't all be perfectly uniform. Some might be thinner, while others might appear slightly thicker due to how they are positioned in the weave. This variation adds to the realism.
Step 3: Enhancing Depth with Shading
After laying down the strands, enhance the depth by darkening the areas where the hair overlaps. This is a critical step in creating a sense of three-dimensionality. Where one strand passes under another, a shadow will naturally form. Use a darker shade of your base hair color or a slightly desaturated hue to paint these areas. Be mindful of the light source; shadows will be more pronounced on the underside of the braid and in tighter woven sections.
Conversely, choose a lighter shade to add highlights. Apply them to the areas where light naturally hits the most, like the top of the braid or the edges of the strands that are exposed. Highlights should follow the curvature of the strands. Think about where the light would catch the most prominent surfaces. These highlights should not be uniform; they will be brighter on the top surfaces and diminish as they curve away from the light source. Using a soft brush for subtle transitions and a harder brush for sharper highlights can be effective.
Step 4: Refining Details and Adding Realism
Zoom in to add finer details. This includes refining the edges of the strands and adding any flyaway hairs for a more natural appearance. Look closely at real-life braids or photographic references. Hair is rarely perfectly smooth. There are always stray strands, wisps of hair that escape the main braid, and subtle textural variations. Use a very fine brush, perhaps with a bit of texture, to add these flyaways. They should be sparse and strategically placed to enhance the natural look without making the braid appear messy.
Refine the edges of the main strands as well. Ensure they have a clear definition against the background and against each other where they overlap. You can also add subtle textural details to the strands themselves. This might involve using a textured brush to suggest the individual hairs within a strand or adding very fine lines to indicate the direction of hair growth.
Step 5: Review and Iteration
Take a step back to review your braid. Zoom out of your canvas and assess the overall form, the consistency of the shading, and the believability of the details. Does it look like a cohesive braid? Are the shadows and highlights working effectively to convey depth? Are there any areas that look too flat or too busy?
This is also an opportunity to consider the context of the braid. If it's part of a character, how does it interact with the surrounding hair and head shape? Are there any subtle distortions or compressions in the braid due to its position?
Iteration is a key part of the digital art process. Don't be afraid to go back to earlier steps and make adjustments. Perhaps the initial outline needs to be tweaked, or some strands need to be redrawn to improve the weave. The goal is to achieve a result that you are satisfied with.
Procreate Brush Studio: Rendering
Beyond the Basics: Exploring Variations
Once you've mastered the fundamental three-strand braid, you can begin to explore more complex variations. Consider:
- Fishtail Braids: These involve dividing the hair into two sections and taking small pieces from the outside of one section to weave over to the inside of the other. This creates a more delicate and intricate pattern.
- French and Dutch Braids: These are essentially three-strand braids where new sections of hair are incorporated from the sides as you move down the braid. French braids involve crossing strands over the top (making the braid stand out), while Dutch braids cross them under (making the braid appear to pop out).
- Multiple Braids: Combining several braids of varying sizes and styles can create a dynamic and visually interesting hairstyle.
Understanding the core weaving principle allows you to deconstruct and reconstruct these more complex braid types.
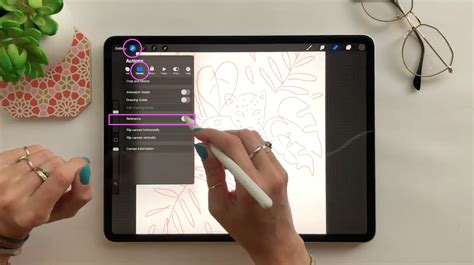
The Importance of Reference
Throughout this tutorial, the importance of visual reference cannot be overstated. While Procreate provides the tools, real-world hair and photographic references are invaluable for understanding how hair behaves, how light interacts with it, and the subtle imperfections that make it look natural. Look at photos of different braid styles, observe how they are constructed, and pay attention to the play of light and shadow. This will inform your digital interpretations and elevate your artwork.
Practice Makes Perfect
With practice, drawing braids in Procreate will become second nature, and you’ll add a beautifully complex element to your digital hairstyles. Like any skill, mastering digital braiding requires patience and consistent effort. Dedicate time to practicing the techniques outlined here, experiment with different brushes and styles, and don't be discouraged by initial challenges. Each braid you draw will build your understanding and refine your hand-eye coordination within the digital medium. The satisfaction of creating a convincing braid will undoubtedly enhance your digital portraiture and character design capabilities.