Procreate has revolutionized the digital art landscape, offering illustrators and comic artists an incredibly powerful and versatile toolset. For those passionate about comic creation, understanding and mastering Procreate's brush engine is paramount. This guide delves into the intricacies of creating custom ink brushes, enhancing your workflow, and achieving professional-grade comic art. We will explore how to leverage Procreate's Brush Studio to craft unique inking tools, incorporate custom textures for added depth, and apply these techniques to bring your comic narratives to life.
Understanding Procreate's Brush Library and Studio
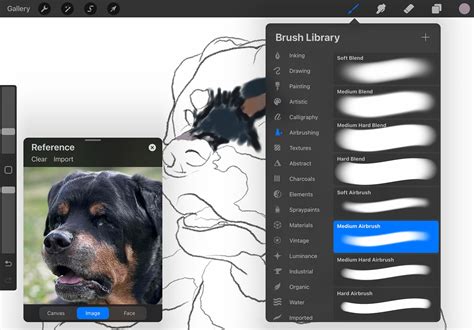
Before embarking on the journey of brush creation, it's essential to familiarize yourself with Procreate's intuitive interface for managing and customizing brushes. The Brush Library, organized into distinct categories, offers a user-friendly experience, with the left-hand panel showcasing brush categories and the right-hand panel displaying a preview of each brushstroke.
The true power for customization lies within the Brush Studio. There are two primary ways to access this feature: by tapping the '+' icon on the left side of the Brush Library panel, or by selecting an existing brush and tapping it again to bring up the brush settings, which also leads to the Brush Studio. Within the Brush Studio, a comprehensive suite of tools allows you to meticulously adjust and modify any brush in your library, including those specifically designed for comic inking.
One of Procreate's most convenient features for inking is its Brush Memory setting. This fantastic feature enables you to save up to four distinct brush size and opacity settings with a single tap on the bar. This is particularly useful when working with inking brushes, as it allows for rapid adjustments between thin and thick lines, or varying levels of opacity, directly within your workflow without needing to navigate through multiple menus.
Crafting Your Custom Comic Ink Brushes
The allure of an ink brush lies in its ability to mimic the expressive nature of traditional ink pens, allowing for dynamic line variation. Unlike a ballpoint pen, which produces a consistent line width, an ink brush offers the fluidity to transition from a thin, delicate stroke to a bold, thick line with a single, fluid movement. This inherent variability is crucial for creating dynamic comic artwork, from detailed linework to expressive character features.
To begin creating your own ink brush, start by creating a new canvas. A simple white surface is ideal for testing your newly crafted inking brushes for Procreate. Once your canvas is ready, navigate to the Brush Studio. The first critical step in brush creation involves selecting a base shape. Tap on "Shape" in the Brush Studio's left-hand panel, and you'll find a collection of pre-installed textures in the Source Library. When creating inking brushes for Procreate, it's best to choose a texture that visually resembles ink. For this tutorial, we'll select the "Blotch" shape as our foundation.

By tapping the Apple Pencil on the canvas within the Shape settings, you can observe the brush's fundamental stamp. This is a great way to understand how the chosen shape will behave. Now, let's delve into the key settings that will transform this basic shape into a functional ink brush.
Spacing: This setting controls the distance between the brush's stamps. For an ink brush that creates a continuous stroke, you'll want to choose a number less than 20%. As the spacing number increases, you'll begin to perceive the brush as a series of individual shapes with noticeable gaps between them.
Taper: The Taper settings are instrumental in modifying the beginning and end of your brush strokes. This setting directly relates to the pressure sensitivity of your stylus, such as the Apple Pencil. A well-designed ink brush set should enable seamless transitions from thin to thick lines based on pressure. For this, set Taper to its maximum. This adjustment will refine the tips of your strokes, allowing for finer detail.
Shape Behavior: Within the Shape Behavior settings, you can alter how the brush shape behaves with each stamp within a stroke. To introduce randomness and a more organic feel, change "Scatter" to 100%. This ensures the stamp randomly rotates each time you apply your Procreate inking brushes, contributing to a less uniform and more hand-drawn appearance. Furthermore, setting "Count" to 16% and "Count Jitter" to the maximum will add further variation to the density and distribution of the stamps, enhancing the brush's texture.
Grain: No ink brush is truly complete without a suitable grain texture to emulate the feel of traditional media. For this tutorial, we'll select the "Charcoal Rough" texture. Opt for the "Moving" setting over "Texturized" in this instance. This choice integrates the grain directly into the brush texture, giving your ink brush set a look that simulates traditional paint on canvas. To achieve a roller effect and a more hand-crafted aesthetic, set "Movement" to 85%. To further enhance the vibrancy of the grain texture, maintain this setting at 80%.
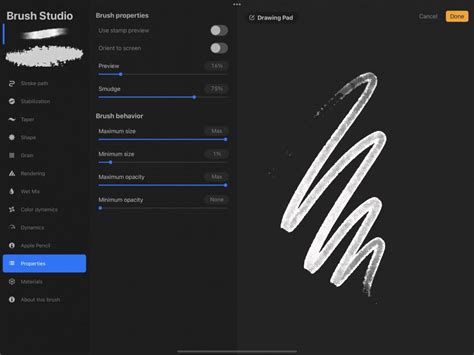
Finally, to personalize your creation, tap on "About This Brush." Here, you can assign a unique name to your brush and add your creator credit. This meticulous process of adjusting these parameters allows you to sculpt a brush that precisely matches your artistic vision for comic inking.
Incorporating Custom Textures for Enhanced Illustrations
While a well-crafted ink brush is essential, the addition of custom textures can elevate your illustrations, adding depth, grit, and a distinct visual style. Creating your own textures in Procreate is a straightforward yet powerful way to personalize your artwork and ensure your comic book stands out.
To begin, create a new canvas. This canvas will serve as the foundation for your custom texture pattern. The goal is to create a textured pattern that can be used decoratively, perhaps as a background element, for clothing, or as a subtle overlay. For this process, select a brush you find appealing from the Brush Library. The "Mercury" brush, often found in the "Inking" section, is a good choice for this tutorial.
Now, begin drawing your pattern. Don't strive for perfection; the more irregular and organic your lines, the better. Focus on covering the canvas with your chosen brush strokes, ensuring you fill the edge spaces without overshooting. This careful application prevents the texture from appearing ragged and maintains a continuous flow when applied as a brush setting.
Once you have created your pattern, it's time to import it into a brush's grain settings. Navigate to the Grain settings panel within the Brush Studio. Tap on "Grain," then "Edit," followed by "Import," and finally "Import a Photo." Select the pattern you just created from your photo library.
In the Grain settings panel, switch the "Grain Behavior" to "Texturized." The primary setting to adjust here will be "Scale." Set the Scale to 20% to appropriately size the pattern within your brush. Once satisfied, tap "Done." This process allows you to integrate any image or pattern you create into a Procreate brush, offering limitless possibilities for unique textures and effects.
Creating custom brushes and textures in Procreate has never been more accessible. The Brush Studio is a playground for experimentation; don't hesitate to explore the numerous configuration options through trial and error. If you're seeking an even broader array of options for your illustration projects, premium brush sets can be an excellent investment. Platforms like Envato Elements offer access to millions of creative assets with unlimited downloads for a low monthly fee, a valuable resource for graphic designers and illustrators aiming to expedite their workflow and enhance their artistic output.
Essential Procreate Brushes for Comic Artists
While creating your own brushes is rewarding, Procreate also boasts an extensive collection of pre-made brushes that can significantly enhance your comic art workflow. These brushes are often developed by professional artists and offer specialized features for various comic art styles.
For those seeking brushes that capture the essence of retro comics, a specific set of pencil brushes can be invaluable. These are often difficult to find and can provide a nostalgic, authentic feel to your linework.

No comic ink set is truly complete without a dedicated manga ink brush. These brushes are designed to emulate the distinct linework and shading techniques prevalent in manga, allowing artists to level up their manga illustrations with unique and specialized tools.
For character-driven narratives, Procreate brushes that offer a wide array of shape options are a game-changer. Brushes providing over 100 different shapes can empower artists to create compelling characters with intricate details and dynamic poses, elevating the overall engagement of their comic book.
Shading is a critical component of comic art, and stipple brushes are exceptionally well-suited for this purpose. Their grainy textures can transform a flat design into a masterpiece, imparting a nostalgic and retro vibe to new illustrations. These brushes are particularly effective for achieving nuanced shading and atmospheric effects.
Furthermore, specific inking brushes are highly sought after by tattoo artists, often created from real hand-drawn stippling by professionals. These brushes can translate seamlessly into comic art, offering a unique texture and a hand-rendered quality that is hard to replicate digitally.
Advanced Inking Techniques in Procreate
Beyond basic brush creation, Procreate offers advanced features and techniques that can streamline the inking process and achieve sophisticated results. One such technique involves using a brush from the "Painted" section for inking, rather than the "Inking" section. While it may seem counterintuitive, paintbrushes often possess a rounder finish, which can result in neater and simpler lines, ideal for a clean inking style often seen in classic comics and manga.
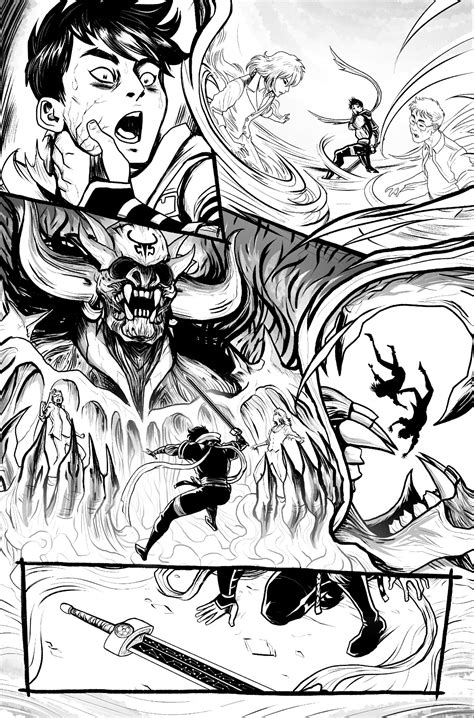
When inking a sketch, a common workflow involves reducing the opacity of the sketch layer and creating a new layer above it for the inking. This allows you to trace over the original lines, akin to using tracing paper in traditional art.
To expedite the inking process, especially for symmetrical elements like character heads, activating "asymmetry mode" (often referred to as QuickShape or Line Tool in Procreate's editing features) can be incredibly beneficial. This mode will mirror your strokes to the opposite side of the drawing, effectively creating a symmetrical effect with a single stroke.
Procreate also offers powerful shortcuts for achieving perfect shapes. For instance, when drawing a circle freehand, hold your Apple Pencil down at the end of the stroke and then tap on the screen. Procreate will automatically refine the crooked circle into a perfect one. The same principle applies to straight lines: draw your line, hold your stylus at the end, and Procreate will straighten it. These shortcuts are invaluable for achieving precise linework when a clean, polished look is desired.
Exploring Specialized Brushes for Unique Effects
The versatility of Procreate extends to specialized brushes that can replicate traditional inking effects with remarkable accuracy. The "CrowQuill Pen" by Ink Gang Boss is a prime example, designed to achieve intricate linework and captivating expressions, allowing artists to effortlessly capture every nuance and add depth to their illustrations.
For artists who require precise lines and detailed artwork, the "Technical Pen" is an indispensable tool. It mimics traditional inked linework, with pressure sensitivity capturing the nuances of hand movements to produce organic and expressive, yet uniform, lines. Its functionality is often compared to traditional Rapidograph drafting pens, offering a high degree of control for intricate character designs and dynamic comic panels.
The "Ink Bleed Pen" is another powerful tool that adds depth, texture, and drama to comic panels by mimicking the realistic ink bleeding and spreading effect found on paper. This creates visually captivating results that are difficult to achieve digitally, perfect for expressive lines, shading, and adding richness to comics. Its versatile pressure sensitivity allows for both bold and delicate lines with a gritty edge.
The "Gesinski Ink" brush is highly regarded for its versatility and ability to flawlessly capture the essence of traditional India ink. It enables intricate techniques like cross-hatching and shading, and remarkably emulates the transparency found in India ink illustrations. This allows for layering effects, creating dark areas with a sense of transparency that adds richness and texture, rivaling traditional inking techniques.
The Digital Advantage: Streamlining the Comic Creation Process
Working with Procreate for comic creation offers significant advantages over traditional methods. The most apparent is the speed factor; drawing within Procreate eliminates the tedious process of scanning and digitizing physical artwork, saving valuable time and ensuring a higher quality of final illustrations.
Furthermore, Procreate provides an extensive array of digital brushes, textures, and effects that can enhance artwork in ways traditional mediums cannot. From realistic pencil and ink brushes to dynamic gradients and lighting effects, Procreate offers a comprehensive digital toolbox. In the past, achieving special effects with ink on paper often required multiple tools and considerable effort. With digital art, these effects, and more, are easily accessible within a single application, without requiring additional physical space or cost. This de-cluttering of studio space is a welcome benefit for many artists.
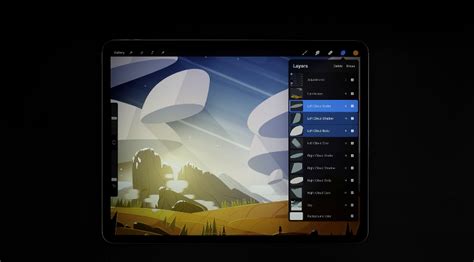
Procreate's intuitive tools allow for the perfect finishing touch to creations. A classic drawing technique, often used in comic and manga, involves inking a sketch and then coloring the inside of the lines. Procreate's robust layering system and brush customization make this process more efficient and versatile than ever before.