Creating a panorama involves merging multiple images, each focused on a different area from the same vantage point, to reveal a larger, encompassing picture. Photoshop offers powerful tools to achieve this, transforming a series of individual shots into a seamless, expansive view. This process, while seemingly complex, is made accessible through Photoshop's built-in Photomerge functionality, allowing photographers of all levels to expand their creative horizons.
The Foundation: Capturing Your Panorama
Before diving into the digital realm of Photoshop, the success of a panorama hinges on the initial capture. The fundamental principle is to maintain a consistent viewpoint. Imagine standing in one spot and slowly panning your camera across a scene, taking overlapping photographs. This consistent location is crucial to avoid parallax errors, where objects at different distances appear to shift relative to each other, making stitching difficult or impossible. Using a tripod is highly recommended, especially when shooting from an elevated position, to ensure the camera remains level and the viewpoint is precisely maintained throughout the series of shots.
The overlap between consecutive images is another critical factor. A general guideline suggests an overlap of approximately 15% to 40%. This overlap provides Photoshop with enough common data points to accurately align and blend the images. If the overlap is insufficient, the Photomerge tool may struggle to automatically assemble the panorama, leading to misalignments or gaps.
When photographing, focus on your primary subject for the initial frame. Once set, it's often beneficial to switch off autofocus. This prevents the camera from re-focusing between shots, which could introduce subtle variations in focal length and depth of field. Carefully move the camera to capture the next area, ensuring that about one-third of the previous frame is retained in the new shot. This consistent overlap is key to a successful stitch.

Furthermore, consistency in shooting conditions is vital. Avoid using flash in some pictures and not in others. While Photoshop's advanced blending features can help smooth out minor differences in exposure, significant disparities can complicate the alignment process. Similarly, try to avoid drastic changes in camera settings like white balance or exposure between shots, as this can lead to jarring transitions in the final panorama.
Accessing and Utilizing Photoshop's Photomerge Tool
Adobe Photoshop provides a dedicated tool for creating panoramas: Photomerge. This command is accessible through the "File" menu. Navigate to File > Automate > Photomerge. This action opens the Photomerge dialog box, presenting a range of options to guide the stitching process.
The Photomerge dialog box offers several layout options, including "Perspective," "Auto," "Cylindrical," and "Spherical." For most general purposes, the "Auto" setting is an excellent starting point. It allows Photoshop to analyze the images and determine the most appropriate layout. However, depending on the nature of your scene and the lens used, other options might yield better results. For instance, "Cylindrical" can reduce "bow-tie" distortion, especially in wider scenes, by projecting the images onto an unfolded cylinder. "Spherical" is ideal for creating 360-degree panoramas, aligning images as if mapping the inside of a sphere.
8-Step GUIDE: Blend Images and Create Composites Like a Pro with Photoshop ✅🔥
Within the Photomerge dialog, ensure that "Blend Images Together" is checked. This option instructs Photoshop to seamlessly blend the overlapping areas of the images, creating smooth transitions and minimizing visible seams. Once you have selected your desired layout and options, click the "Browse" button to select the source files for your panorama. You can select individual images or, more efficiently, click the first image and then, while holding down the Shift key, click the last image to highlight the entire sequence of photos intended for the panorama. After selecting your images, click "OK."
The next step is to click "OK" again in the Photomerge dialog box to initiate the stitching process. It's important to be patient during this phase. Photoshop will analyze, align, and blend the selected images. This processing can take some time, depending on the number of images, their resolution, and your computer's processing power. It's not uncommon for this to take several minutes.
Refining the Panorama: Post-Stitching Adjustments
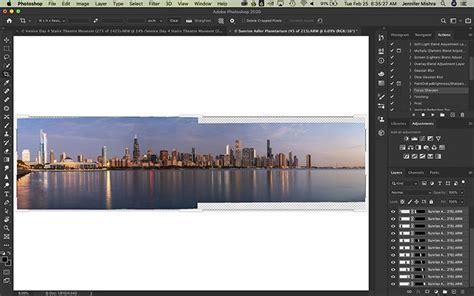
Once Photoshop has completed the Photomerge process, the resulting panorama may not be perfect. Often, there will be transparent areas around the edges, particularly in the corners, where the source images didn't cover the full extent of the merged canvas. These areas need to be filled to create a complete and polished image.
One of the most effective ways to address these empty areas is by using Photoshop's "Content-Aware Fill" feature. First, you'll need to select these transparent areas. A common method is to use the Marquee tool to draw a selection around the empty space. It's often beneficial to expand this selection slightly so that it bleeds into the existing, good pixels of the panorama. This expansion helps Photoshop sample surrounding content more effectively.
With the selection active, navigate to Edit > Fill. In the Fill dialog box, choose "Content-Aware" from the "Contents" dropdown menu. Click "OK." Photoshop will then analyze the surrounding pixels and intelligently fill the selected area, attempting to match the texture, color, and lighting of the panorama. This process might require some trial and error, and you may need to repeat it for different sections or use other tools like the Clone Stamp or Healing Brush tool for more precise retouching.
Another crucial step in refining a panorama is color correction and exposure adjustment. Even with the "Blend Images Together" option, subtle differences in color balance and brightness between the individual shots can persist. Use tools like "Brightness/Contrast," "Levels," or "Curves" to ensure a consistent and pleasing tonal range across the entire panorama. If you notice color casts, the "Color Balance" or "Hue/Saturation" adjustment layers can be used to correct them.
For more advanced users, the "Adaptive Wide Angle" filter (found under Filter > Adaptive Wide Angle) can be a powerful tool for correcting lens distortion, especially if the "Perspective" or "Cylindrical" layout in Photomerge didn't fully resolve it. This filter allows you to draw lines to define horizons and verticals, helping to straighten out warped perspectives.

Organizing and Saving Your Masterpiece
After you've completed the stitching and refinement process, it's essential to save your work. Go to File > Save As and give your panorama a descriptive name, such as "Telluride Panorama." Choose a suitable location to save the file. It's generally advisable to save your panorama in a high-quality format like TIFF or a layered PSD file to preserve all the editing information.
To maintain organization within your Photoshop document, especially if you plan further edits or need to revisit specific adjustments, grouping the layers that constitute the panorama is a good practice. Select all the layers that make up the stitched image and drag them into the "Create a new group" icon, usually located at the bottom of the Layers panel. You can then rename this group, for instance, "Panorama," for easy identification. Saving your work again, often with the shortcut Ctrl + S (or Cmd + S on Mac), ensures that all your progress is secured.
The journey of creating a panorama in Photoshop is a rewarding one, transforming multiple perspectives into a singular, compelling narrative. From the careful planning of the initial shots to the meticulous refinement within the software, each step contributes to the final, expansive vision.
Considerations for Advanced Panoramas
While the "Auto" setting in Photomerge is highly effective, understanding the other layout options can unlock more sophisticated results. The "Perspective" layout, for instance, is useful when one of the source images can serve as a vanishing point, allowing Photoshop to skew the other images to create a wraparound effect that respects this perspective. This is particularly helpful for architectural or urban scenes where strong lines are present.
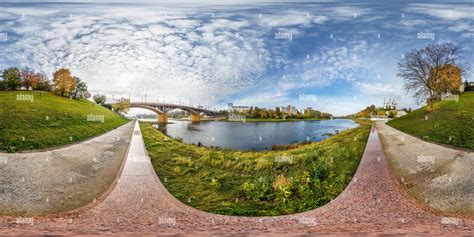
The "Spherical" layout is specifically designed for creating immersive 360-degree panoramas. If you have captured a complete or near-complete sphere of images, this option will align them as if mapping the interior of a sphere, ideal for virtual tours or creating a sense of complete immersion.
When working with very wide-angle lenses, distortion can be a significant challenge. The "Cylindrical" layout is often a good choice here as it projects the images onto an unfolded cylinder, which can better handle the distortion compared to a planar projection. However, if significant distortion persists, the "Adaptive Wide Angle" filter mentioned earlier becomes invaluable.
It's also worth noting that for users who primarily work in Adobe Lightroom Classic, there's a streamlined workflow. Within Lightroom, you can select the images you wish to merge, right-click, and choose "Edit In > Merge to Panorama in Photoshop." This option sends the selected files directly to Photoshop's Photomerge dialog, pre-loaded and ready for stitching, offering a seamless integration between the two applications.
For those seeking more control during the merging process, the "Interactive Layout" option within the Photomerge dialog allows for manual adjustments. This is where you can reposition images, fine-tune alignment, and have more say in how the final composition is assembled, especially useful when automatic blending produces less-than-ideal results.
The underlying principle of successful panorama creation remains consistent: meticulous capture followed by intelligent digital assembly. Whether you're a beginner exploring the wonders of wide-angle views or an experienced photographer aiming for professional-grade results, Photoshop's Photomerge tool provides a robust and versatile platform to bring your panoramic visions to life.