InDesign Paragraph Styles are your best friends! They might look intimidating at first glance, but they are incredibly easy to use and can dramatically save you time and effort in your design workflow. If you've had a less-than-ideal experience learning them in the past, this comprehensive guide is designed to erase those bad memories and help you embrace this powerful feature. Our goal is not merely to teach you how to create a paragraph style in InDesign, but to foster a deep understanding of the logic behind the software, sharing the sophisticated techniques that professionals employ when working on their documents.
InDesign Paragraph Styles: What They Are, Why You Should Use Them, and Their Advantages
At its core, a paragraph style is a collection of predefined rules that dictate how your text behaves and appears. These rules encompass both character-level formatting-such as font, color, and scaling-and paragraph-level formatting, including indents, alignment, and hyphenation settings. The primary benefits of utilizing paragraph styles are significant: they save you considerable time, simplify your workflow, ensure greater consistency and professionalism in your layouts, and make handling last-minute edits a breeze.
Furthermore, many advanced InDesign features are intrinsically linked to the use of paragraph styles. The most prominent example is the automated creation of a Table of Contents.
Is it Mandatory to Use Paragraph Styles?
No, it is not a strict requirement to use paragraph styles in InDesign. However, it is highly recommended that you apply a paragraph style to every piece of text within your InDesign document. Once you experience the benefits, you’ll find it impossible to go back. They will dramatically improve the quality of your work and significantly help in avoiding errors. After you have established your styles, you can format an entire document with just a few clicks, and you will quite literally fall in love with the efficiency they bring.

The Difference Between Paragraph Styles and Character Styles
To perfectly clarify the distinction between paragraph styles and character styles, consider this insightful analogy found in the Adobe Forums:
Imagine you are walking a dog.
- Paragraph styles dictate the overall route you take, your walking pace, and the frequency of your breaks. They govern the broader structure and flow.
- Character styles, on the other hand, are responsible for the smaller, more granular tasks, like picking up after your dog or tightening the leash if you spot another dog or a shiny car. They handle specific, localized adjustments.
It is crucial not to confuse InDesign Character Styles with Paragraph Styles. If you find yourself needing to apply a character style to an entire sentence, it's a strong indicator that you should instead consider creating a new paragraph style.
Important Note: A character style should ideally be applied only to individual characters or a few words, not extending beyond a single sentence.
Crafting Your Paragraph Styles in InDesign
There are two primary methods for creating paragraph styles within InDesign:
- From the Paragraph Styles Panel: This is the most direct and common method.
- From Already Formatted Lines of Text: This allows you to quickly capture existing formatting.
Creating a Paragraph Style from the Paragraph Styles Panel
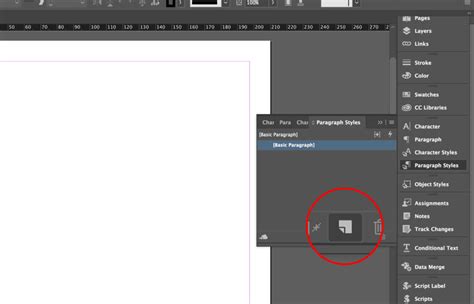
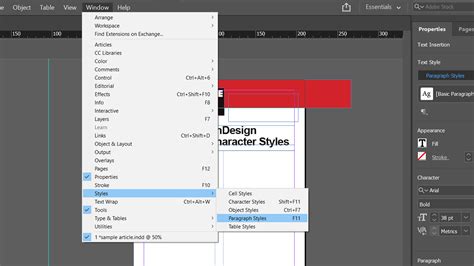
To begin, ensure that no text is currently selected. Open the Paragraph Styles Panel by navigating to Window > Styles > Paragraph Styles. If the panel is not visible, this is how you access it.
Once the panel is open, click on the "Create new style" icon, typically located at the bottom of the panel. This action will generate a new style, often named "Paragraph Style 1" by default.
For a more efficient workflow, if you hold down the Alt (or Option on Mac) key while clicking the "Create new style" icon, InDesign will create the style and immediately open the "Paragraph Style Options" window with a single click.
Within the "Paragraph Style Options" window, you'll find numerous settings. While detailing every single option would be exhaustive, let's explore the key areas:
- Style Name: This is where you'll give your style a descriptive and easily identifiable name.
- Location: This indicates if the style is organized within a folder for better management.
- Based On: This crucial option allows you to link a new style to an existing one, inheriting its properties. We'll delve deeper into this feature later.
- Next Style: This setting determines which paragraph style will be automatically applied when you press the
EnterorReturnkey after the current paragraph. This is a significant time-saver for sequential text. - Style Settings: This section provides a summary of all the formatting attributes that will be included in your new style.
A highly effective practice, even before naming your style, is to examine this summary. If you notice any "dirty" or unintended formatting, clicking "Reset to Base" can help clean it up before you finalize the style.
Creating a Paragraph Style from Formatted Text
You can also generate a new paragraph style directly from text that has already been manually formatted. Simply select the text you've formatted, and then click the "Create new style" icon in the Paragraph Styles Panel. InDesign will capture the existing formatting and create a new style based on it. You can then double-click its name in the panel to further refine and edit it as needed.
Swiftly Modifying Paragraph Styles
Imagine you've meticulously created a series of styles, but then decide to alter the formatting of a specific element, like a heading. Perhaps you change its color, and now you want to apply this updated formatting to all other headings that share the same style. How do you accomplish this efficiently?
It's remarkably simple: select any portion of the text that uses the style you wish to modify. Then, in the Paragraph Styles panel, click on the "Redefine Style" icon (often a small icon in the top-right corner of the panel or accessible via a right-click menu). All paragraphs formatted with that specific paragraph style will be instantly updated, almost like magic. This ensures global consistency with minimal effort.
Leveraging "Based On" Styles (Linked Styles)
Among the many powerful functionalities offered by InDesign paragraph styles, the "Based On" feature is particularly favored by many professionals. This allows you to create a new paragraph style that inherits all the attributes from another existing style. Any subsequent changes made to the "base" style will automatically propagate to all styles that are based on it.
This feature is invaluable for several reasons:
- Rapid Document Appearance Changes: By strategically adjusting the base style, you can quickly alter the overall look and feel of your document, experimenting with different font combinations or color schemes.
- Efficient Multilingual Projects: This is a game-changer for documents that need to support multiple languages. You can set up base styles for each language, inheriting common formatting, and then make specific adjustments as needed.
To utilize this, simply select the desired main style from the "Based On" drop-down menu within the Paragraph Style Options window.
Combatting Overrides: The Importance of Avoiding Local/Inline Styles
Local styling-applying formatting directly to text without using styles-is a common pitfall and, frankly, an error in professional design workflows. By changing formatting locally, you relinquish control over your layout, make it significantly harder for others (or even your future self) to work on the document, and risk introducing inconsistencies and mistakes into your text.
You should always prioritize using Paragraph Styles and Character Styles and actively avoid local or inline formatting. Don't be concerned about having a large number of styles. In fact, a well-organized InDesign file, as used by many seasoned professionals, will often feature a substantial quantity of styles. As mentioned earlier, styles are an InDesign user's most valuable asset.
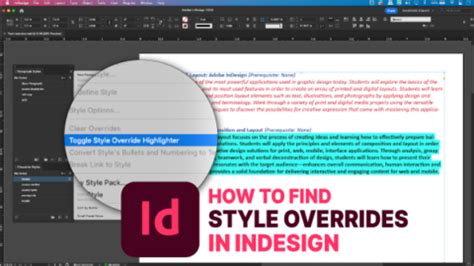
Identifying Overrides with a Click
To easily spot text that has been formatted outside of a defined style, click on the "Style Override Highlighter" icon. Text with overrides will be visually highlighted, typically in blue, making it easy to identify and correct.
Clearing Overrides with a Click
To remove all local formatting overrides from selected text, paragraphs, or text frames, click on the "Clear overrides in selection" icon. Be aware that if Character Styles have been applied, you will need to manually remove those as well, as this function primarily targets direct formatting overrides.
Building a Reusable Style Sheet: The Boilerplate Approach
When embarking on complex projects, designers often spend an inordinate amount of time rectifying layout and style inconsistencies, which can detract from the more creative aspects of the job. Time is a precious resource, and it should be dedicated to creating value. Recognizing this, many designers develop a standardized "boilerplate" file-a template containing pre-defined styles and organizational structures-that can be reused across multiple projects. This approach has proven to save a significant amount of time over the years.
Before sharing such a boilerplate, it's essential to explain some fundamental rules and tips that are commonly employed within them.
1. Grouping Styles with "Empty" Paragraph Styles
A clever technique, learned from designers like Kai Rübsamen, involves using "empty" paragraph styles to act as folder names for grouping related styles. The presence of asterisks (*) after a style name can indicate that other styles are based on it, providing a clear visual hierarchy and overview.
When you import styles from another document, they will appear outside of these designated "folder" styles, making it quick and easy to identify and manage them. Naming these organizational styles with your project name can further enhance clarity.
2. Naming and Structuring Your Styles: Adopting a Naming Convention
Establishing a consistent naming convention for your styles is an art form that significantly enhances document manageability. Here are some effective rules:
- Group Styles: Place all styles within a designated folder structure.
- Use "Empty" Styles for Groups: Utilize empty paragraph styles to visually delineate and group categories of styles.
- Prefix with "p": Start paragraph style names with "p" to clearly distinguish them from character styles.
- Use Asterisks for Base Styles: Employ asterisks (*) to denote main styles upon which other styles are based.
- Avoid Starting with Numbers: Do not begin style names with numbers. This is crucial for compatibility with web exports (EPUB, HTML), as CSS styles cannot start with a numeral.
The p_base_language style, for instance, serves as a foundational style to which p_H1 and p_body styles are linked. In this base style, you might define only the text language and horizontal scale (set to 100%). This allows for precise control over hyphenation and spell-checking, and the horizontal scale can be used to estimate the space a hypothetical new language might occupy in your layout. For example, German text is often around 140% of English in terms of space. By using the horizontal scale in the base language (English), you can simulate this expansion, adapt your layout accordingly (enlarging text frames, adjusting column breaks), and then reset the scale to 100%.
Professionally, using a distinct font family for headers and another for body text is a simple yet effective tip that elevates the visual appeal of a design. Therefore, linking all header styles to p_H1 and body text styles to p_body allows for swift experimentation with different font pairings to enhance the layout.
Stop Wasting Hours Font Pairing - Use These Instead!
For those interested in font pairing, a great resource is "The Ultimate Guide to Font Pairing."
Additional Useful Styles Features
Next Style
For any Paragraph Style, you can predefine the style that will automatically follow when you press Enter or Return. This is exceptionally useful when typing text directly within InDesign, as it streamlines the formatting process.
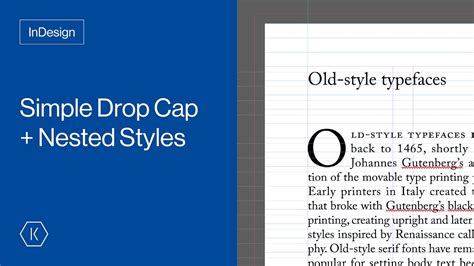
Drop Caps and Nested Styles
These two powerful functions enable you to automatically achieve sophisticated text effects, such as the visually striking drop caps often seen in publications.
Copying Paragraph Styles Between Documents
You can effortlessly copy paragraph styles (and other text styles) from one InDesign document to another, or even from multiple documents.
- Open the Paragraph Styles Panel.
- Click on the flyout menu icon (usually in the top-right corner).
- Select either "Load Paragraph Styles…" or "Load All Text Styles…".
- Navigate to and choose the InDesign file from which you wish to import styles.
- Click "OK". A dialog box will appear, allowing you to select the specific styles you want to load.
Importing Text from Word to InDesign with Styles Intact
When importing a Word document into InDesign, you have the capability to retain its existing text styles. This is a crucial step for maintaining consistency, especially when migrating content from other sources.
To learn the detailed steps and best practices for importing and linking Word files while preserving their styles, refer to dedicated tutorials on "How to Import a Word Document into InDesign" and "How to Link a File Word into InDesign."
Scripting for Enhanced Paragraph Style Management
For users looking to automate and streamline their workflow even further, InDesign scripts can be incredibly beneficial. A curated list of the best InDesign scripts often includes a dedicated section for scripts related to style management. Exploring these scripts can unlock advanced capabilities for manipulating and applying paragraph styles.
Understanding Overrides and Style Management in Practice
When working with stylesheets, one of the most common issues encountered is the possibility of one style overriding another, leading to a cascade of unexpected formatting. An override occurs when a style is applied to text or objects, and then that specific instance is modified directly. This is typically indicated by a plus (+) symbol appearing next to the style's name in the panel. It's important to remember that Character Styles generally take precedence over Paragraph Styles, and Cell Styles have authority over Table Styles.
InDesign offers several tools to manage these overrides:
- Style Override Highlighter: As mentioned, this highlights text with direct formatting.
- Clear Overrides: This function removes direct formatting, reverting the text to its defined style.
- Named Grids: For frame grids, named grid formats can be applied within the Frame Grid format settings.
- Object Styles: These standardize formatting for objects like shapes and frames, including attributes like drop shadows, bevels, frame options, and text wrap. Object styles can also govern anchored objects.
- Table Styles and Cell Styles: Specifically designed for tables, these allow for detailed control over table formatting. A Paragraph Style can even be applied to a Cell Style for consistent text treatment within table cells.
The "Style Packs" feature in InDesign is another valuable tool designed to save time and effort. These are content-aware, built-in sets of paragraph styles that can be readily applied. You can access and manage these within the Character or Paragraph styles tabs.
Furthermore, styles can be created, edited, and deleted in standalone Adobe InCopy documents or in InCopy content linked to an InDesign document. However, it's important to note that when InCopy content is updated in InDesign, any style modifications made in InCopy will be overridden by the InDesign style.
Ultimately, mastering InDesign style sheets is not just about applying formatting; it's about building a robust, efficient, and maintainable workflow that allows for creative freedom and professional-grade results, regardless of project complexity.