DaVinci Resolve stands as one of the premier video editing software packages available today, and for good reason. Its robust feature set, available in both free and paid versions, caters to a wide range of users, from hobbyists to seasoned professionals. For those who have invested in expanding their creative workspace with a second monitor, the dual-screen setup in DaVinci Resolve can be a game-changer, particularly for tasks like color grading and intricate editing. This feature allows for the distribution of your workspace across two displays, making it easier to manage timelines, previews, and various panels simultaneously. However, users sometimes encounter a frustrating issue where the dual-screen option appears greyed out, preventing them from utilizing this powerful functionality. This article delves into the reasons behind this common problem and provides comprehensive solutions to get your dual-screen setup working seamlessly.
Understanding the Dual Screen Feature in DaVinci Resolve
The dual-screen functionality in DaVinci Resolve is designed to significantly enhance workflow efficiency. It allows editors to dedicate one monitor to the main editing interface, while the second monitor can be used for a full-screen timeline, a dedicated preview window, or other essential panels. This separation of elements reduces clutter on the primary screen and provides a more focused and immersive editing experience. The ability to spread your workspace across two monitors is a concept familiar to users migrating from other professional editing software like Premiere Pro, where dual-screen setups are also highly beneficial.
Activating Dual Screen Mode
To activate the dual-screen mode in DaVinci Resolve, the process is relatively straightforward, provided the underlying conditions are met. First and foremost, it is crucial to ensure that both of your monitors are connected to your computer and recognized by the operating system before launching DaVinci Resolve.
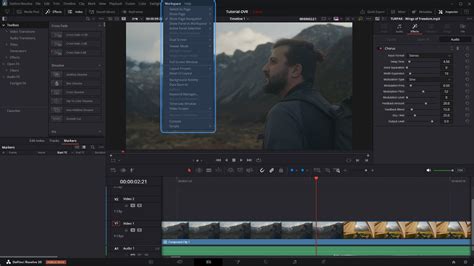
- Locate the Workspace Menu: Upon opening DaVinci Resolve, navigate to the menu bar at the top of the interface. Here, you will find an option labeled "Workspace."
- Access Dual Screen Settings: Clicking on "Workspace" will reveal a dropdown menu. Within this menu, search for the "Dual Screen" option.
- Enable Dual Screen: Selecting "Dual Screen" will present another sub-option, typically labeled "On." Clicking "On" should activate the dual-screen mode, distributing the DaVinci Resolve interface across your connected displays.
Setting the Primary Display
Once dual-screen mode is active, you may wish to designate one of your monitors as the primary display - the one where you'll primarily interact with the main DaVinci Resolve interface.
- Return to Workspace Menu: Go back to the "Workspace" option in the menu bar.
- Select Primary Display: From the dropdown menu, choose "Primary Display."
- Choose Your Preferred Screen: A list of your connected screens will appear. Select the monitor you wish to designate as your primary display. This choice should be based on comfort and workflow preference.
Full Screen Timeline for Enhanced Editing
For an even more focused editing experience, DaVinci Resolve offers a "Full Screen Timeline" option, which expands the timeline to occupy an entire monitor.
- Navigate Workspace Options: Once again, access the "Workspace" menu.
- Activate Full Screen Timeline: Under the "Dual Screen" submenu, you will find an option for "Full Screen Timeline." Activating this will dedicate one of your screens to displaying the timeline in its entirety, providing a clearer and more expansive view of your project's structure. This feature is particularly helpful for intricate edits and detailed timeline management.
Addressing the "Greyed Out" Dual Screen Issue
When the "Dual Screen" option in DaVinci Resolve is greyed out, it signifies that the software is unable to properly enable this feature. This can be a perplexing issue, especially for users who have successfully used dual-screen setups in other applications. The problem often stems from a few key areas: hardware requirements, the sequence of launching applications, and the types of monitor connections used.
Hardware Requirements and Breakout Devices
Unlike some other video editing software, DaVinci Resolve, particularly for advanced features like true hardware-accelerated video output to a second monitor, has specific hardware requirements. The user's suspicion that the issue might be OS-related is valid, but hardware plays a crucial role.
- Blackmagic Breakout Devices: For optimal and reliable dual-screen functionality, especially when it comes to professional video output (like the "Video Clean Feed" feature for paid Studio version users), DaVinci Resolve often requires a Blackmagic Design breakout device. These devices, such as the Decklink series, act as specialized hardware interfaces that facilitate direct video output to a dedicated monitor, bypassing the operating system's standard display management in some instances. Without such a device, the software might not recognize or enable the dual-screen feature as intended, especially for professional previewing. It's essential to verify if your setup meets these hardware prerequisites.
Sequence of Launching Applications and Displays
The order in which you connect your displays and launch DaVinci Resolve can significantly impact its ability to recognize and utilize a dual-screen setup.
- Connect Displays Before Launching Resolve: A common oversight is launching DaVinci Resolve before all external monitors are connected and recognized by the operating system. The software needs to detect the complete display configuration at startup. If a second monitor is connected after DaVinci Resolve has already loaded, the software might not register its presence for dual-screen functionality. The principle here is similar to plugging in a USB device after a program that requires it has already started; it might not be recognized unless the software is restarted or the device is connected beforehand. Therefore, always ensure your dual-monitor setup is active and recognized by your computer's OS before initiating DaVinci Resolve.
Monitor Connection Types
The type of cables and ports used to connect your monitors can sometimes play a role in how display configurations are interpreted by software.
- HDMI vs. DisplayPort: While modern operating systems and graphics cards are generally adept at handling mixed connection types (e.g., one monitor via HDMI and another via DisplayPort), in some edge cases, inconsistencies can arise. If you're experiencing issues with dual-screen functionality, it can be beneficial to ensure that both monitors are using the same connection type if possible. For instance, if one is connected via HDMI and the other via DisplayPort, try using two DisplayPort cables or two HDMI cables if your hardware supports it. This uniformity can sometimes eliminate subtle compatibility conflicts.

Solutions and Workarounds for Greyed Out Dual Screen
When faced with a greyed-out dual-screen option, several troubleshooting steps can be taken. These range from simple resets to more involved configuration adjustments.
Resetting the UI Layout
DaVinci Resolve offers a built-in function to reset its user interface (UI) layout, which can sometimes resolve display-related glitches.
- Access Workspace Menu: Navigate to the "Workspace" menu at the top of the DaVinci Resolve window.
- Select Reset UI Layout: Within the dropdown menu, find and click on "Reset UI Layout." This action will revert the software's interface to its default arrangement, which can clear corrupted display settings and potentially re-enable the dual-screen option. This is analogous to resetting workspace configurations in other professional software.
Managing Primary Display Dominance
The user's experience highlights a common scenario where the operating system might "forget" which display is considered dominant. This can interfere with DaVinci Resolve's ability to correctly assign its interface elements.
- OS Display Settings: The solution often involves manually reasserting the correct display order within your operating system's display settings. On macOS, this typically means going to System Preferences > Displays and ensuring that the main monitor (the one with the menu bar) is correctly identified and positioned relative to the secondary monitor. Sometimes, simply dragging the monitor icons to reflect their physical arrangement and then re-selecting the primary display can resolve the issue.
- Switching Display Modes: A practical workaround, as described by users, involves a sequence of switching display modes:
- Ensure both monitors are connected and recognized.
- Open DaVinci Resolve.
- If dual screen is greyed out, first switch Resolve to "Single Display" mode (if accessible).
- Re-arrange or confirm the primary display settings in the OS.
- Re-engage "Dual Screen" mode in DaVinci Resolve.
- Ensure the desired monitor is assigned as the correct display (e.g., the monitor on the right).
Utilizing Workspace Presets
A highly effective strategy for managing dual-screen configurations and resolving occasional glitches is to utilize DaVinci Resolve's workspace presets.
- Create and Switch Presets: Having a couple of different Workspace presets readily available can be a lifesaver. You can create a preset for your single-display setup and another for your dual-display setup. When you encounter the greyed-out issue, switching back and forth between these presets can often force Resolve to re-evaluate and correctly apply the dual-screen configuration. This is a quick and efficient way to troubleshoot without deep dives into system settings.
DAVINCI RESOLVE SECOND SCREEN: How to use multiple monitors in Resolve
The Cinema Viewer: A Free Version Alternative
For users of the free version of DaVinci Resolve, the dedicated "Dual Screen" option under the Workspace menu is not available. However, this does not mean you are entirely without the ability to preview your work on a separate monitor.
- Cinema Viewer Mode: The free version offers an alternative through the "Cinema Viewer" mode. This feature allows you to send a full-screen preview of your video playback to a different connected monitor. While this mode is more limited than the full dual-screen functionality of the Studio version, it provides a valuable way to preview your edits on a larger or dedicated display. To access it, you typically need to be in a tab other than the 'Cut' page. This can be a crucial workaround for those on a budget looking to leverage a second screen for playback.
Advanced Features: Video Clean Feed (Studio Version)
The paid Studio version of DaVinci Resolve unlocks more advanced features for dual-screen setups, most notably the "Video Clean Feed."
Accessing Video Clean Feed
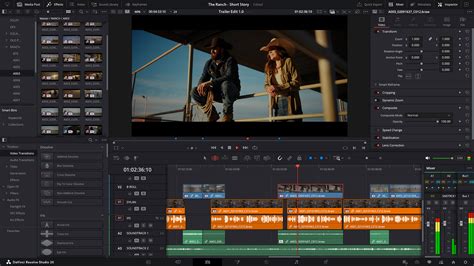
The Video Clean Feed feature allows for a dedicated, high-quality video output to a secondary monitor, free from the DaVinci Resolve user interface elements. This is essential for professional color grading and client review sessions.
- Navigate to Workspace: Go to the "Workspace" menu.
- Select Video Clean Feed: Within the dropdown, find and select "Video Clean Feed."
- Choose Preview Display: A list of your connected displays will appear. Select the monitor where you want the clean video feed to be displayed.
This ensures that your editing work is performed on one screen, while a true representation of the final video is visible on another, uninterrupted by UI elements. This feature truly enhances the professional editing and color grading workflow.
Final Considerations for a Smooth Workflow
The dual-screen setup in DaVinci Resolve, while powerful, can sometimes present minor hurdles. Understanding the potential causes - from OS display management to hardware dependencies and software launch order - is key to resolving issues like the greyed-out option. By systematically applying the troubleshooting steps, utilizing workspace presets, and understanding the alternatives available in different versions of the software, users can ensure their dual-screen setup contributes to a more efficient and enjoyable editing experience. The excitement of expanding your workspace with a new monitor is palpable, and with these solutions, you can unlock the full potential of your dual-screen environment in DaVinci Resolve.