The Inspector panel in DaVinci Resolve is a cornerstone for detailed clip manipulation and effect control. Often overlooked by beginners, this panel is, in fact, one of the most critical components of the software for achieving polished and professional video edits. It serves as the central hub for fine-tuning almost every aspect of your clips, from basic transformations to intricate effect adjustments. Understanding and mastering the Inspector panel is key to unlocking the full potential of DaVinci Resolve, transforming raw footage into compelling visual narratives.
Accessing and Understanding the Inspector
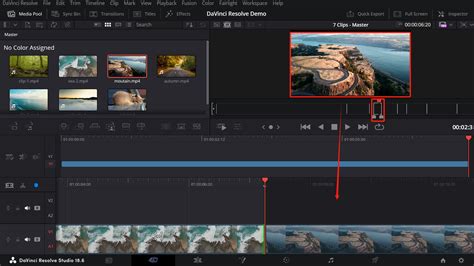
The Inspector panel is readily accessible via an icon located in the top-right corner of the DaVinci Resolve interface. Its presence is signaled by a small icon, and it can be toggled on or off as needed. When you select a clip on your timeline, the options presented within the Inspector panel dynamically change, adapting to the specific type of media you are working with. Whether you are inspecting a video clip, an audio clip, an effect, a transition, or even a static image, the Inspector panel offers a tailored set of controls. This adaptability ensures that you always have the most relevant tools at your fingertips for the task at hand.
A crucial aspect of using the Inspector effectively is ensuring that the correct clip is highlighted. The Inspector modifies the properties of the selected clip, which is typically indicated by an orange outline on the timeline. If you intend to modify one shot but have another highlighted, any adjustments made in the Inspector will be applied to the wrong clip. Therefore, it is imperative to double-check that the clip you wish to modify is indeed the one currently selected and highlighted on your timeline before making any changes. This fundamental step prevents unintended alterations and ensures your editing process remains precise.

Core Functionality: Transforming Clips
The Inspector panel provides a comprehensive suite of tools for transforming your video clips. These capabilities allow for significant adjustments to the visual presentation of your footage. You can perform fundamental actions such as zooming in or out, rotating the clip to correct framing or achieve creative effects, and cropping to refine the composition. Beyond these basic transformations, the Inspector also enables more advanced manipulations. For instance, you can combine multiple clips or adjust the speed of playback, offering dynamic control over the pacing and flow of your narrative.
One particularly useful feature within the Transform section of the Inspector is the ability to soften the corners of your cropped area. This is ideal when you are aiming for softer edges rather than sharp, defined lines, adding a subtle yet effective polish to your visuals. Furthermore, the Inspector grants access to various composite modes. These modes dictate how layers of video blend together, allowing for sophisticated visual effects and seamless integration of different elements.
For those dealing with footage captured with wide-angle lenses, the "Analyze" option within the Inspector can be a lifesaver. This feature automatically detects and corrects lens distortion, helping to restore a more natural perspective to your shots. This is particularly valuable when working with footage that exhibits significant warping or bending, ensuring a more professional and less disorienting viewing experience.
Animating Properties with Keyframes
A powerful aspect of the Inspector panel is its support for animation through keyframes. This allows you to create dynamic changes in clip properties over time. To animate a specific property, you first position the playhead at the desired starting point of the animation. Then, you click the diamond icon located next to the property you wish to animate. This action creates a keyframe, marking the current state of that property. Next, you move the playhead to the point where you want the animation to end. Finally, you change the value of the property. DaVinci Resolve will then automatically interpolate the change between the initial keyframe and the new value, creating a smooth animation. This process can be applied to a wide range of properties, from zoom and position to rotation and opacity, enabling sophisticated visual storytelling.
Navigating Different Clip Types
The Inspector panel's behavior and available options are context-dependent. This means that the specific controls you see will vary based on the type of clip you have selected.
- Video Clips: For standard video clips, you will find a comprehensive set of transform, cropping, and compositing tools. This is where you'll adjust zoom, position, rotation, and apply various visual effects.
- Audio Clips: When an audio clip is selected, the Inspector panel shifts to provide audio-specific controls. While direct audio editing within the Inspector is possible, it is generally recommended to utilize the dedicated Fairlight page for more advanced audio post-production. The Inspector can offer basic adjustments like volume and panning for quick tweaks.
- Effects: If you have applied an effect to a clip, the Inspector panel will display the "Effects" tab. This section is crucial for fine-tuning the parameters of the applied effect. Each effect has its own unique set of controls, allowing for granular adjustments to achieve the desired look or functionality.
- Transitions: Similarly, when a transition between two clips is selected, the "Transition" tab appears in the Inspector. Here, you can modify the settings of the transition, such as its duration, alignment, and any specific parameters unique to that transition type.
- Images: For still images, the Inspector provides tools for scaling, positioning, and applying effects, much like with video clips, but tailored for static media.
The File Inspector: Metadata Management
In more recent versions of DaVinci Resolve, the Inspector panel includes a "File Inspector" option. This specialized view allows you to edit certain metadata associated with your media files directly within Resolve. This can be incredibly useful for organizing your projects, adding descriptive information, or correcting any inaccuracies in the file's embedded data.
The Inspector on the Cut Page vs. Edit Page
It's worth noting that the functionality of the Inspector panel is consistent across different pages within DaVinci Resolve, even if the interface varies. For instance, the "Transform" tools available in the Inspector on the Edit page are identical to those found on the Cut page. If you perform a zoom adjustment on a clip using the Inspector on the Edit page, and then switch to the Cut page, you will find the same zoom value reflected in the Cut page's interface, and vice versa. This consistency ensures a seamless workflow regardless of the editing environment you prefer. The Cut page often offers visual overlays for these transform adjustments, allowing for intuitive click-and-drag manipulation directly on the viewer, mirroring the precise control offered by the Inspector's numerical input fields.
Enhancing Video Quality with the Inspector
The collective power of the settings and options within the Inspector panel is what truly makes or breaks the quality of a video project. When these tools are employed correctly and with creative intent, they can elevate a simple edit into a visually stunning piece of work. The ability to precisely control zoom, position, rotation, and apply effects with nuanced adjustments allows editors to craft unique looks and enhance the storytelling through visual means.
The Inspector panel, while potentially requiring some initial learning and experimentation, quickly becomes an intuitive and indispensable tool for advanced editing. Its high degree of functionality and scalability make it a robust platform for enhancing video projects of all complexities. From subtle adjustments that refine the final look to bold creative choices that define a visual style, the Inspector panel in DaVinci Resolve is where the intricate details of your edit come to life.
Master the DaVinci Resolve Inspector Tool (Beginner Guide)
Handling Resolution Differences
The Inspector panel is also instrumental when dealing with footage of varying resolutions. For example, if you are working on a 4K project but have imported a 1080p clip, the Inspector allows you to scale and position the lower-resolution clip within the higher-resolution frame. You can zoom into the 1080p clip to fill the 4K frame, and the Inspector provides the necessary controls to ensure the scaling is done in a way that minimizes quality loss and achieves the desired framing. This capability is crucial for maintaining visual consistency and professional polish when working with mixed-resolution media.
Advanced Compositing and Effects
Beyond basic transformations, the Inspector panel is the gateway to DaVinci Resolve's powerful compositing and effects capabilities. As mentioned, composite modes allow for creative layering and blending of video elements. This can be used for everything from creating picture-in-picture effects to generating complex visual illusions.
The Effects tab within the Inspector is where the true magic of motion graphics and visual effects often happens. When you apply an effect from Resolve's extensive library â be it a color correction filter, a blur, a particle generator, or a complex 3D object â all its adjustable parameters appear within this tab. This granular control allows you to meticulously dial in the exact look and behavior of each effect. For instance, you can adjust the intensity of a color grade, the radius and falloff of a blur, the density and velocity of particles, or the texture and lighting of a 3D element.
The ability to animate these effect parameters using keyframes, as discussed earlier, opens up a universe of dynamic visual possibilities. Imagine animating a blur to gradually appear, or a color grade to shift throughout a scene. This level of control allows for sophisticated visual storytelling and the creation of unique stylistic elements that can define the aesthetic of a project.
Softening Edges and Creative Cropping
The option to soften corners when cropping is a subtle yet powerful tool found within the Inspectorâs transform or cropping sections. Instead of a hard, digital cut-off, you can introduce a gentle fade or blur at the edges of your cropped area. This can be particularly useful when integrating graphics or lower-thirds into your footage, creating a more organic and less jarring blend. Itâs also a stylistic choice that can add a touch of softness and artistic flair to otherwise sharp compositions.
The Interplay Between Pages
While the Inspector panel itself is a consistent tool, its integration with different pages within DaVinci Resolve highlights the software's flexible design. The Edit page offers a broad array of editing tools, with the Inspector providing deep control over selected clips. The Cut page, designed for rapid assembly, also offers access to the same transform tools, often through more visual, overlay-based interfaces, but ultimately feeding into the same underlying Inspector parameters. This ensures that whether you are performing a quick trim or a meticulous color grade, the core manipulation tools remain accessible and consistent.
The Inspector panel is not just a collection of sliders and numerical inputs; it's a dynamic interface that adapts to your workflow. Its ability to handle diverse media types, facilitate animation, and control a vast array of effects makes it an indispensable part of the DaVinci Resolve editing ecosystem. Mastering this panel is a significant step towards achieving professional-level results and unlocking the full creative potential of this powerful software.