In the realm of video production, the quality of audio is as crucial as the visual presentation. While many tools can elevate a video's aesthetic, the importance of pristine audio often goes overlooked. This guide delves into specific audio editing techniques within DaVinci Resolve, a powerful video editing and audio post-production software by Blackmagic Design, to enhance the sonic landscape of your projects. We will focus on the fade effect, a fundamental tool for professional audio, and explore various methods to implement it effectively within DaVinci Resolve.
Understanding the Fade Effect: From Concept to Application
A fade effect is a gradual adjustment of audio volume over a specified duration. This can manifest as a sound that begins at a low volume and progressively increases to a desired level (fade-in), or conversely, starts at a certain volume and diminishes to silence (fade-out). The application of fades is ubiquitous, commonly heard in commercials, YouTube content, and even popular music, serving to create smooth transitions, emphasize moments, or simply provide a polished auditory experience. The versatility of fades allows for nuanced control; one can initiate a fade at a high volume and decrease it, or achieve a rapid increase in volume followed by a slower progression, or the reverse. Learning to implement these effects in DaVinci Resolve empowers creators to imbue their videos with a professional sound.
DaVinci Resolve, renowned for its comprehensive toolkit, is accessible to a wide audience. The software is available for free download, allowing anyone to explore its capabilities. For those seeking advanced features, an upgrade to the Studio version is available for a one-time payment of $295. This guide aims to provide a clear path for users who wish to achieve high-quality audio fades efficiently, thereby streamlining their editing process and producing more engaging video content.
Method 1: The Simple Handle Adjustment for Quick Fades
One of the most straightforward methods to introduce a fade effect in DaVinci Resolve involves directly manipulating the audio clip's handles within the Timeline. This approach is ideal for those who prioritize speed and simplicity.
To begin, import the audio clip you intend to edit into your DaVinci Resolve project and place it on the Timeline. Once the audio clip is visible, locate the end of the clip. With a left click, select the audio clip. Now, hover your mouse over the end of the clip where you will see a handle. Dragging this handle inwards towards the beginning of the clip will visually represent the fade-out effect being applied. A line will appear on the audio clip, indicating the fade.
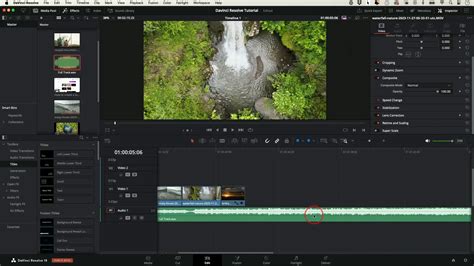
Crucially, this handle offers more than just a linear fade. By dragging the audio handle up and down, you can adjust the curvature of the fade. A steeper curve will result in a faster transition, while a gentler curve will create a more gradual change in volume. This subtle control over the curve can significantly impact the overall feel of the fade.
The primary advantage of this method lies in its inherent simplicity and speed. It requires minimal technical knowledge and can be executed in a matter of seconds, making it an excellent choice for quick edits or when working under tight deadlines.
However, this method is not without its limitations. A significant con is the lack of granular control over specific volume and duration parameters. This means that achieving identical fade settings across multiple audio clips can be challenging, as the adjustments are visually based rather than numerically defined. For more precise control, alternative methods are recommended.
Method 2: Keyframing for Precise Fade Control
For users who require a greater degree of control over their audio fades, employing keyframes is the recommended approach. Keyframes allow for precise manipulation of volume over time, offering granular adjustments to the fade's starting point, ending point, duration, and curvature.
The core of this method involves working with the volume control, which is represented by a thin horizontal line running through the center of the audio clip on the Timeline. Adjusting this line by dragging it up or down will change the overall volume of the clip, but this change will occur throughout the entire clip. To implement a fade effect that occurs only within a specific section, keyframes are essential.
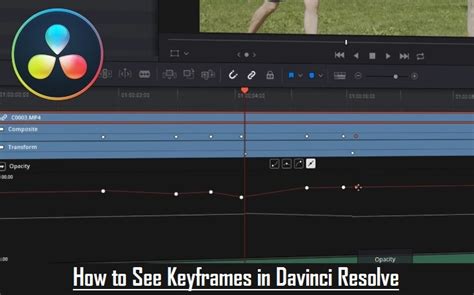
To add a keyframe, hover your mouse cursor over the thin volume line at the precise point where you wish to initiate your fade-out effect. On Windows, press Alt + Click. On a Mac, press Option + Click. This action will create a keyframe directly on the clip at the Playhead's current position.
To define the fade, you will need to create a second keyframe. Position the Playhead at the desired end point of your fade. You can then click on the second keyframe and move it left and right to adjust the duration of the fade and up and down to control the final volume level. For a fade-out, you would typically move this second keyframe down towards zero volume. For a fade-in, you would create the first keyframe at zero volume and the second at your desired starting volume.
Furthermore, DaVinci Resolve provides an additional avenue for keyframe management through the Inspector window. By clicking the diamond-shaped button located next to "Clip Volume" in the Inspector, you can add keyframes at the Playhead's current position. This offers a centralized location for managing all keyframes associated with a particular clip, providing an organized workflow for complex audio edits.
The advantage of using keyframes lies in the unparalleled control it offers. You can precisely define the exact moment a fade begins and ends, the speed at which it progresses, and the specific volume levels at any given point. This precision is invaluable for intricate audio mixing and ensures consistency across different clips when needed.
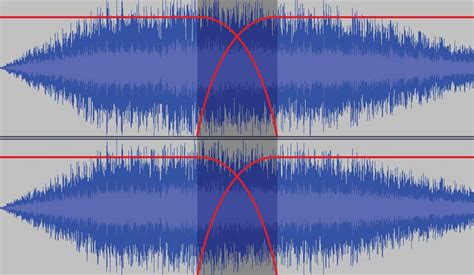
Method 3: Automatic Crossfades for Seamless Transitions
DaVinci Resolve also offers an automated method for creating fade-in and fade-out transitions, particularly useful for overlapping audio clips. This feature, known as crossfades, simplifies the process of blending audio segments seamlessly.
To implement a crossfade, you first need to ensure that your audio clips are positioned on the Timeline in a way that allows for overlap. Select the first clip to which you want to add a crossfade. Navigate to the Effects Library, typically found in the top-left corner of the DaVinci Resolve interface. Within the Effects Library, locate the "Audio Transition" category. Here, you will find various crossfade effects. Choose the crossfade effect that best suits your needs.

Once you have selected a crossfade effect, click and drag it onto the overlapping section of your audio clips on the Timeline. DaVinci Resolve will automatically apply the transition, creating a smooth blend between the two audio sources.
The settings for these automatic crossfade audio transitions can be further customized. To do this, you can change the default crossfade audio transitions by navigating through the Effects Library to Toolbox > Audio Transitions > Crossfade. This allows you to select and configure specific crossfade types before applying them.
Within the Inspector tab, after applying a crossfade, you can adjust its parameters. While the core effects are preset, the Inspector allows for fine-tuning of duration and other transition-specific settings, offering a balance between automation and customization.
The benefit of using automatic crossfades is the speed and ease with which smooth transitions can be achieved, especially when dealing with multiple audio segments that need to flow into one another. It eliminates the need for manual keyframing for basic overlap fades.
Enhancing Audio Quality Beyond Fades: Noise Reduction
While fades are crucial for dynamic audio control, the overall quality of your audio recording can significantly impact viewer engagement. Sometimes, despite best efforts, recorded audio may suffer from background noise or other imperfections, necessitating post-production cleanup. DaVinci Resolve includes powerful tools to address these issues, such as audio noise reduction.
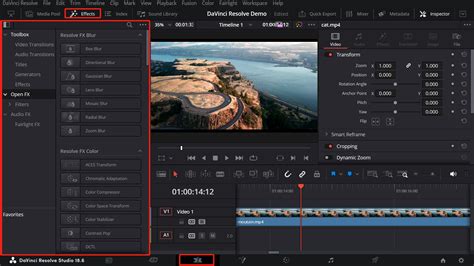
To apply noise reduction, locate the "AudioDenoise" effect, usually found within the Effects Library under "Dynamics" or a similar audio effects category. Click and drag the AudioDenoise effect onto the audio clip in your Timeline. Upon application, the effect works automatically to reduce unwanted background noise, instantly improving the clarity and professionalism of your audio clip. Experimentation with the effect's parameters in the Inspector can further refine the noise reduction process to suit your specific audio challenges.
The DaVinci Resolve Ecosystem: A Workflow Designed for Creativity
What truly sets DaVinci Resolve apart is its philosophy of offering multiple pathways to achieve desired results. This flexibility is invaluable for optimizing your workflow and catering to individual creative preferences. The software is designed to "edit without limits," providing a comprehensive toolkit engineered to translate your ideas to the screen fluidly. The aim is to enable the creation of cinematic, professional-looking effects within minutes, fostering a natural flow of creativity by minimizing tedious technicalities often associated with building elements from scratch across disparate tools. DaVinci Resolve endeavors to remove technical limitations that might hinder creative expression.
The commitment to improving these tools is ongoing. For users seeking advanced creative assets, platforms like MotionVFX offer a universe of professional plugins and elements. These tools are designed to integrate seamlessly into your editing process, whether you're working in DaVinci Resolve, Final Cut Pro, or other compatible software.
MotionVFX provides a "one-stop access to the entire MotionVFX universe." Users can browse, download, and apply elements, and utilize their software tools directly within their editing environment. An extensive collection of tutorials is available, showcasing use cases for all products and demonstrating how to leverage these tools effectively.
To facilitate the use of MotionVFX products, users can download and install "mExtension," an application that enables browsing, downloading, and applying plugins and elements directly to the timeline without leaving their primary editing software. During the installation process, users are prompted to select the software plugins they wish to install and to activate the device they are currently using.
Understanding the value of trying before committing, MotionVFX offers a 14-day free trial for each subscription plan. This trial provides full access to all plugins, without watermarks or render limits, allowing users to experiment and ensure the tools align with their workflow before subscribing. Even before initiating the free trial, a "Free Elements" collection is available to all users who download and install mExtension, offering a versatile range of overlays, effects, transitions, typography, and add-ons with designs ranging from subtle to bold.
The free trial is designed for users to assess if the subscription meets their expectations, enabling an informed decision. Post-subscription, users have the flexibility to cancel at any time. Canceling a subscription will prevent future billing, and access to subscription products will continue until the end of the current billing cycle. Should a user wish to reactivate their subscription, they can do so, with payments collected according to the defined schedule or immediately if the subscription has expired.
There is a daily download limit of 500 elements across all plans, though transferring downloaded elements between devices does not count towards this limit. All subscription information and management, including changes to billing periods or upgrades to higher tiers like "Ultimate," can be accessed and modified within the "My Subscriptions" section of a user's account or directly within mExtension. It's important to note that a payment method will be requested before launching the free trial.
By mastering audio fades and leveraging the comprehensive tools within DaVinci Resolve and its ecosystem, creators can significantly elevate the production value of their video projects, ensuring that both the visual and auditory elements captivate and engage their audience.