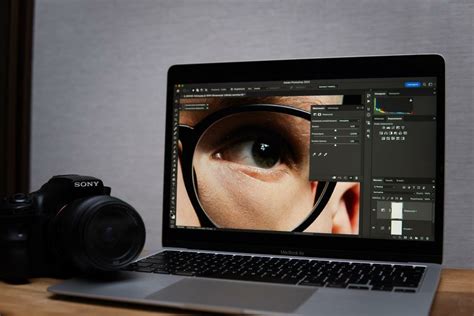
Creating compelling digital backgrounds in Photoshop offers a versatile and cost-effective solution for photographers, graphic designers, and digital artists. Whether aiming for a specific mood, enhancing consistency in a series of portraits, or simply seeking creative flexibility, Photoshop's tools empower users to craft unique backdrops. This tutorial delves into the practical techniques for integrating digital backgrounds, overlays, and textures, transforming ordinary images into artistic statements.
The Appeal of Digital Backdrops
Many professional portrait photographers opt for expensive muslin backdrops, but a more economical and equally effective approach is to create your own digital backgrounds within Photoshop. This method provides unparalleled creative control, allowing for adjustments to mood, color palette, and environment long after the initial photograph has been taken. Digital backgrounds are particularly invaluable for those working in small studio spaces or on location where control over physical backdrops is limited. They enable photographers to add elements like skies, light effects, painterly textures, botanical scenes, or subtle grunge, elements that might not have been present during the original shoot.
Furthermore, digital backgrounds have become a cornerstone of modern headshot photography. In this field, efficiency, consistency, and a polished, professional aesthetic are paramount. By leveraging digital assets, photographers can maintain a cohesive look across multiple sessions, ensuring that clients receive images that are gallery-ready and suitable for large wall displays or elegant albums, rather than being confined to digital formats on phones.
Why Embrace Digital Backgrounds and Textures?
Photographers and artists turn to digital backgrounds and textures for a blend of creative and practical motivations. These digital assets offer a wealth of benefits:
- Cost-Effectiveness: They eliminate the need to purchase and store numerous physical backdrops, which can be expensive and require significant space.
- Creative Flexibility: Digital assets allow for immediate changes to the visual interest of an image without the need for reshoots.
- Environmental Control: They are ideal for situations where studio space is limited or on-location shoots lack environmental control.
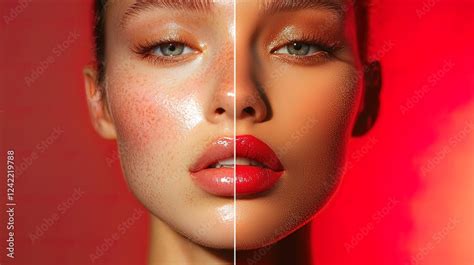
- Mood and Tone Adjustment: Color tones and the overall mood of an image can be significantly altered without re-photographing the subject.
- Artistic Enhancement: Painterly or fine art elements can be seamlessly added to portraits.
- Consistent Results: Digital workflows help maintain uniformity across multiple photography sessions, crucial for client portfolios and consistent branding.
- Repeatable Workflow: Digital backgrounds and textures facilitate a streamlined and efficient editing process, balancing creativity with productivity.
For professional headshot photographers, specialized collections like the "Ultimate Headshot Background Collection" offer studio-quality digital backdrops specifically designed for realistic and impactful headshots.
Integrating Digital Assets into Your Workflow
Before diving into the editing process, it's essential to organize your digital backgrounds, overlays, and textures. This ensures they are readily accessible when you need them.
The first step in Photoshop is to open your base image - the photograph you intend to edit. Subsequently, open the digital background, overlay, or texture file you wish to incorporate. There are several methods to add this digital asset to your existing image:
- Drag and Drop: Simply drag the digital asset file directly onto your open base image in Photoshop.
- Copy and Paste: Open the digital asset in its own window, select all (Ctrl+A or Cmd+A), copy (Ctrl+C or Cmd+C), and then paste it onto your base image (Ctrl+V or Cmd+V).
- Place Embedded: Navigate to
File > Place Embedded…and select your digital asset. This method embeds the file into your document while maintaining its full resolution and offering non-destructive scaling options.
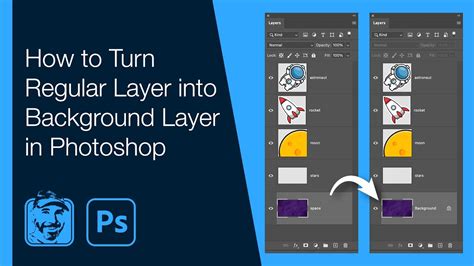
Once added, the digital background or texture will typically appear as a new layer positioned directly above your base image layer.
For those seeking ready-made artistic overlays for portraits, fine art images, or creative composites, collections such as the "Creative Photography Overlays Collection" provide a diverse library of high-resolution effects that can be applied swiftly.
Adjusting and Blending Digital Backgrounds
After introducing your chosen digital asset, the next crucial step is to blend it seamlessly with your subject. Photographers commonly employ two primary methods for achieving natural-looking integration:
Method 1: Adjusting Opacity and Utilizing Layer Masks
Reducing the opacity of the digital background layer is a straightforward way to achieve a more subtle and integrated effect. By lowering the opacity in the Layers panel, you allow the underlying image to show through, creating a softer blend.
For more precise control, a layer mask is indispensable. A layer mask allows you to selectively reveal or conceal parts of a layer without permanently altering the pixel data. To add a layer mask to your digital background layer, ensure the layer is active, then go to Layer > Layer Mask > Reveal All or click the layer mask icon (a rectangle with a circle inside) at the bottom of the Layers panel. This adds a white mask to your layer, meaning the entire digital background is currently visible.
To begin masking, select the layer mask thumbnail in the Layers panel. Choose a black brush from your toolset. By painting with black on the mask, you will hide portions of the digital background. Conversely, painting with white will reveal those areas again. The softness, hardness, opacity, and flow of your brush can be adjusted to control the transition's subtlety. This method is non-destructive, meaning you can always refine or reverse your masking at any time by simply switching your brush color between black and white.
For instance, if you have placed a digital background and wish to remove it from the subject's face, hair, or clothing, you would paint over those areas on the mask with a black brush. The beauty of layer masks lies in their flexibility; if you accidentally mask too much, simply switch your brush to white and paint back over the area to restore the digital background.
Layer Mask - Photoshop for Beginners | Lesson 4
Method 2: Employing Blend Modes
Blend modes dictate how a layer's pixels interact with the pixels of the layers beneath it. Experimenting with different blend modes can dramatically alter the appearance of your digital background and is often a swift way to discover an effect that harmonizes with your image.
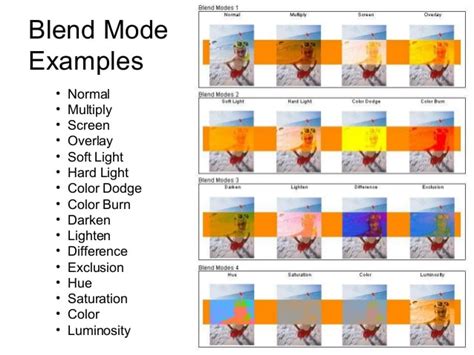
Some commonly used blend modes for digital backgrounds and textures include:
- Multiply: This mode darkens the image and is excellent for adding depth or integrating darker backgrounds.
- Screen: Ideal for lightening effects, it's useful for overlaying lighter textures or creating a brighter atmosphere.
- Overlay: This mode increases contrast and richness, making colors more vibrant and adding a sense of depth.
- Soft Light: Offers a more subtle tonal blending, providing a gentle enhancement without being overly dramatic.
Often, the most natural and compelling results are achieved by combining a chosen blend mode with a reduced opacity. For example, using a digital overlay from a collection like the "Peony Collection" in "Soft Light" mode at 50% opacity across the entire base image can effectively alter color tones and imbue the image with a warmer mood.
Advanced Techniques: Combining Elements
Digital backgrounds, overlays, and textures can be used individually or layered together to create complex and visually rich compositions. This layered approach allows for a high degree of customization and artistic expression.
A typical workflow might involve:
- Establishing the Environment: A digital background layer sets the overall scene or environment for your subject.
- Unifying Color and Adding Depth: A texture overlay can then be applied to harmonize the color palette across the entire image and introduce subtle depth or character.
- Enhancing Mood: Finally, a subtle light overlay, such as a light leak or atmospheric effect, can be used to further enhance the mood and visual flow of the composition.
These advanced techniques are widely employed in fine art portraiture, maternity photography, and styles that aim for a painterly aesthetic. Collections like the "Ultimate Fine Art Editing Collection" from The Imaginator Studio are curated with painterly backgrounds, old master backdrops, and textures designed to work synergistically.
For a comprehensive understanding of how textures can be utilized across various photographic genres, exploring resources on "Photography Texture Overlays and Editing Techniques" is highly recommended.
Strategic Application: When to Use Each Tool
Understanding the specific purpose of each tool - digital backgrounds, texture overlays, and effect overlays - is key to achieving intentional and professional results.
- Digital Backgrounds: These are best suited for situations where you need to replace an existing environment entirely or simulate a new one. They are fundamental for creating composite images with distinct settings.
- Texture Overlays: Textures are most effective when you aim to add depth, mood, or artistic character to an image without drastically changing the scene. They can unify disparate elements or impart a specific artistic feel.
- Effect Overlays: Overlays such as light leaks, haze, or atmospheric effects are powerful for enhancing storytelling and guiding the viewer's eye. They can add drama, romance, or a sense of mystery to an image.
Developing Your Creative Skills with Textures
While this tutorial provides practical techniques, further honing your skills can be achieved through structured training. Courses like "The Art of Texture" offer in-depth guidance on creating, blending, and refining textures within Photoshop, focusing on painterly and fine art workflows. Such training is particularly beneficial for photographers aiming to cultivate a unique and consistent artistic style.
Digital backgrounds, overlays, and textures are not mere shortcuts; they are powerful tools that grant photographers immense creative freedom without compromising efficiency. By mastering fundamental placement, blending, and masking techniques, you can elevate your portraits, fine art images, and creative composites, all while maintaining complete command over your visual aesthetic. These digital assets serve to expand the possibilities of photography beyond the moment the shutter clicks, enabling artists to achieve results that were previously unimaginable.
It is important to note that a foundational understanding of basic Photoshop tools is a prerequisite for effectively utilizing these techniques.
Practical Application: A Workflow Example
For a more in-depth understanding of how to integrate digital backdrops, consider the detailed workflow presented in dedicated tutorial videos. These often involve step-by-step guidance through the exact process of adding magical digital backdrops. Such tutorials typically cover:
- Editing Multiple Images: Demonstrating the process on various types of images, such as dark or backlit subjects, to showcase adaptability.
- Realistic Blending: Techniques for seamlessly blending elements like floors to create a believable environment.
- Adding Depth and Dimension: The application of shadows and highlights to enhance realism and dimension.
- Color and Tone Harmonization: Using overlays and actions to ensure colors and tones are cohesive across the composite image.
- Capturing for Composites: Insights into how to photograph subjects in a way that facilitates easier and more realistic digital backdrop integration.
These tutorials often emphasize that the goal is to enhance existing images and that the provided subject photos are pre-edited, focusing solely on the digital backdrop integration process. Skin retouching, liquify, or other model-specific edits are typically outside the scope of these specific tutorials, which are dedicated to mastering digital backdrop techniques.
The learning process for these advanced edits can take years of practice and experimentation. However, structured tutorials can condense this learning curve, providing years of accumulated tips and tricks in a more accessible format.
Considerations for Purchase and Learning
When acquiring digital assets or tutorials, it's important to understand what is being offered. Many products are instant downloads, meaning nothing is physically shipped. Due to their digital nature, refunds or exchanges are often not provided. It's also crucial to recognize that while tutorials offer guidance and techniques, the exact results may vary based on individual practice, the specific images used, and the user's skill level. Consistent practice and repetition are key to achieving desired outcomes.
Most creators are happy to assist purchasers with any questions regarding the tutorial content, ensuring a supportive learning environment. If a previously purchased tutorial is updated with new content, purchasers may be eligible to receive the additional materials free of charge.
Layer Mask - Photoshop for Beginners | Lesson 4
tags: #digital #background #photoshop