Procreate has emerged as a leading application for digital art enthusiasts, offering a powerful yet intuitive platform for creating and manipulating artwork on the iPad. Its versatility makes it an excellent choice for those looking to explore the engaging world of digital coloring pages. This tutorial will guide you through the essential steps and techniques to transform digital coloring pages into vibrant pieces of art using Procreate, catering to both beginners and experienced digital artists.
Importing Your Digital Coloring Page into Procreate
The journey into digital coloring begins with importing your chosen artwork into Procreate. It's crucial to start with a clean canvas to ensure the crispness of your line art is preserved.
- Initiate a New Canvas: Open the Procreate app. From the gallery view, tap the "+" icon to create a new canvas. Alternatively, you can import your coloring page directly as a new canvas.
- Importing the Artwork: Tap the wrench icon, which opens the Actions menu. Navigate to "Insert a photo" or "Insert a file" to locate and select your digital coloring page. Procreate will automatically place the line art onto a new layer.
- Layer Management: Once imported, it's good practice to rename this layer to "Line Art." To ensure your colors stay within the lines and the line art remains visible, set the blend mode of this "Line Art" layer to "Multiply." This blend mode makes all white areas transparent and darkens any non-white areas, allowing colors placed on layers beneath to show through without obscuring the lines.
- Prepare for Coloring: Create a new layer directly beneath your "Line Art" layer. This new layer will serve as your primary coloring canvas.
File Formats for Coloring Pages
Most standard image formats, such as PNG and JPG, work seamlessly for coloring projects in Procreate. Layered files, like PSD, can also be imported, offering more flexibility for advanced editing. If your coloring page is in PDF format, it's advisable to convert it to a JPG or PNG first using an online converter or a graphics application before importing it into Procreate. This ensures compatibility and optimal performance within the app.
Essential Procreate Tools for Digital Coloring
Procreate offers a robust suite of tools that significantly enhance the digital coloring experience, making it easier to achieve professional-looking results and enjoy the creative process.
Brushes and Their Applications
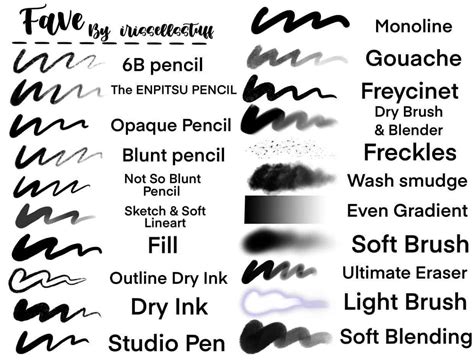
Procreate boasts an extensive library of brushes, catering to virtually any artistic style or texture you desire. For coloring, consider brushes that mimic traditional media like crayons, colored pencils, or markers.
- Crayon Brushes: These can add a textured, slightly grainy feel to your coloring, reminiscent of traditional crayon art.
- Colored Pencil Brushes: Ideal for achieving smooth gradients and delicate shading, offering a sophisticated finish.
- Marker Brushes: Perfect for bold, flat colors or for creating smooth, blended effects.
The "Tamar" brush from the Painting set and various airbrushes are also popular choices for their versatility. Experimenting with different brushes is key to discovering your personal style and achieving unique effects.
Leveraging the Selection Tool
The Selection tool is invaluable for precisely isolating specific areas of your coloring page. This allows you to fill selected regions with color without any risk of spilling over the lines, which is particularly helpful for intricate details or areas with small gaps in the line art.
To use the Selection tool:
- Activate the tool from the upper-left menu (it looks like an "S" or a ribbon).
- Choose "Freehand" from the options that appear at the bottom of the screen.
- Carefully trace the outline of the area you wish to color. Close the selection by tapping on the circle at the start of your trace.
- With the selection active (indicated by moving diagonal lines), select your desired brush and color. Any marks made will be confined strictly within the selected area.
The Power of Alpha Lock
Alpha Lock is a powerful feature that ensures you only color within the existing pixels of a layer. Once you have filled a layer with a base color, enabling Alpha Lock on that layer prevents any new marks from appearing outside of that color. This is perfect for adding shading or highlights without accidentally coloring over your lines or other areas.
To use Alpha Lock:
- Ensure your base color is on its own layer.
- In the Layers panel, swipe left on the layer you want to lock.
- Tap "Alpha Lock." A small checkered pattern will appear next to the layer thumbnail, indicating it's active.
Using Reference Layers for Precision
When you designate your "Line Art" layer as a "Reference" layer, Procreate uses it to guide actions on other layers. This means that when you use tools like ColorDrop on a layer beneath the reference, Procreate "knows" where the lines are and will fill the designated areas accordingly.
To set a Reference Layer:
- In the Layers panel, tap on the "Line Art" layer.
- Select "Reference" from the menu that appears. A blue "Reference" icon will show next to the layer.
- Create a new layer beneath the "Line Art" layer. This is where you will apply your colors.
Coloring Techniques in Procreate
Procreate offers several intuitive methods for filling your digital coloring pages with color, each with its own advantages.
ColorDrop: Quick and Efficient Filling
ColorDrop is an excellent tool for rapidly filling closed shapes with color.
- Select your desired color from the Color Palette.
- Tap and hold the color swatch in the upper-right corner of the screen.
- Drag the color down into the area you wish to fill.
- Adjusting Threshold: If the color doesn't fill the area completely or spills over, you can adjust the ColorDrop Threshold. After dropping the color, keep your stylus on the screen and drag it left to decrease the fill or right to increase it. This slider controls how tightly the fill adheres to your line art.
- Best Practice: To maintain flexibility, it's recommended to use ColorDrop on layers separate from your line art, especially when using the Reference layer method.
How to use Instant Fill In Procreate And Adjust The Threshold
Coloring on Layers Underneath Line Art
This method involves placing your coloring layers beneath the "Line Art" layer. This ensures that your outlines remain crisp and distinct, giving you the freedom to color, shade, and experiment without affecting the integrity of the line art.
- Import your coloring page and set its layer to "Multiply" (or "Reference" for more advanced control).
- Create a new layer beneath the "Line Art" layer.
- Use your preferred brushes to color on this new layer.
Utilizing Blend Modes for Creative Effects
Blend modes, such as "Multiply," are fundamental to Procreate's layering system and can be exceptionally useful for coloring. By setting your "Line Art" layer to "Multiply," you can then color on layers below it, allowing the colors to show through the white spaces of the line art.
Advanced Tips and Tricks for Enhanced Coloring
Beyond the basic coloring methods, Procreate offers several advanced features that can significantly refine your workflow and elevate the quality of your digital artwork.
Clipping Masks for Controlled Shading and Texture
Clipping masks allow you to confine the effects of a layer to the content of the layer directly below it. This is a fantastic way to add shading, highlights, or textures to specific colored areas without affecting anything else on the canvas.
To use a Clipping Mask:
- Create a new layer above the layer you want to modify (e.g., a base color layer).
- Tap on this new layer and select "Clipping Mask" from the menu.
- Any marks you make on this new layer will only appear where there is color on the layer beneath it.
Layer Organization: A Foundation for Success
While not strictly necessary for simple coloring, organizing your colors onto separate layers can dramatically improve your workflow, especially for complex projects.
- Individual Color Layers: Assigning each distinct color or color group to its own layer provides immense flexibility. If you decide to change a color later, you can easily edit or recolor a single layer without impacting other parts of your artwork.
- Recoloring and Alpha Lock: Procreate's "Recolor" feature, found within the Adjustments menu, can quickly change the hue of an entire layer. Combined with Alpha Lock on a single-color layer, you can effectively recolor specific sections.
Avoiding Common Beginner Mistakes
Many common frustrations in digital coloring stem from simple oversights:
- Gaps in Line Art: If your line art has small gaps, tools like ColorDrop might spill color outside the intended area. Carefully inspect your line art and, if necessary, use a fine-tipped brush to close any gaps on the "Line Art" layer itself or on a layer above it.
- Working on the Wrong Layer: Always double-check that you are coloring on the intended layer. The "Line Art" layer should generally remain untouched for coloring purposes.
- Incorrect Threshold Settings: For ColorDrop, taking a moment to adjust the threshold slider is crucial for achieving clean fills.
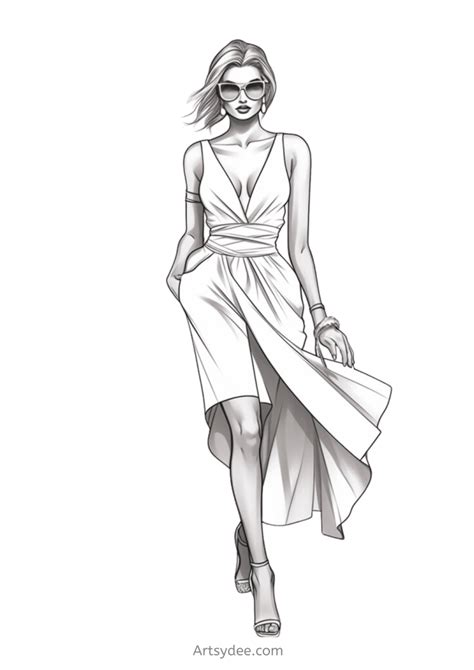
Practice with Ready-Made Pages and Resources
Utilizing pre-made digital coloring pages is an excellent way to jump directly into practicing techniques without the initial setup. Many artists offer free or paid coloring pages designed specifically for digital use.
- Free Resources: Explore resources that offer free Procreate-ready coloring pages. These are often provided as .Procreate files, which are pre-organized with layers ready for coloring.
- Commercial Coloring Books: Books designed for both printing and digital use, such as "The Secret Garden Coloring Book," provide a structured way to begin your digital coloring journey.
Creating Your Own Digital Coloring Pages in Procreate
The creative possibilities extend to designing your own line art for coloring. Procreate is a powerful tool for this as well.
- Canvas Setup: Begin with a canvas size appropriate for your intended use. For printability, an 8.5x11 inch canvas at 300 DPI (2400x3300 pixels) is a good standard.
- Sketching: Use various sketching brushes to lay out your scene or design.
- Clean Line Art: Create a new layer above your sketch and use a precise brush like the "Studio Pen" (a built-in Procreate brush) to ink clean, crisp lines.
- Exporting: Once your line art is complete, you can export it as a PNG or JPG for personal coloring or as a layered PSD if you intend to share it as a coloring file for others to use. You can also export it as a PDF for printing.
The Joy of Digital Coloring
Digital coloring in Procreate offers a unique blend of relaxation and creative expression. It's a low-mess, highly forgiving medium, thanks to the unlimited undo feature and the vast array of color options. It's also an excellent way for beginners to build confidence with Procreate's powerful tools, such as layers and selection features, before diving into creating art from scratch.
There isn't one single "correct" way to color digitally. The most effective approach is to experiment with the various techniques, brushes, and tools Procreate offers. By trying different methods and observing how they impact your artwork, you'll develop a personalized workflow that is both efficient and enjoyable. The more you practice, the more intuitive and confident your digital coloring will become, opening up a world of creative possibilities.
Ultimately, Procreate provides you with complete control over your artistic process. The powerful tools available make it straightforward to stay within the lines, build depth and dimension, and bring your digital coloring pages to life in ways previously unimaginable. Happy coloring and creating!