Photoshop is a powerhouse for digital image manipulation, offering a vast array of tools and techniques to bring creative visions to life. Among the most captivating effects achievable are those involving light and glow. This tutorial delves into the art of creating various light and glow effects within Photoshop, from subtle atmospheric enhancements to vibrant, energetic displays. We will explore how to construct these effects from the ground up, using a combination of layer styles, brushes, gradients, and careful manipulation of blending modes. This guide aims to demystify these visually striking elements, enabling users to add sparkle, radiance, and dynamism to their images, whether for graphic design, photo enhancement, or artistic expression.
Crafting a Textured Background with Smoke and Color Gradients
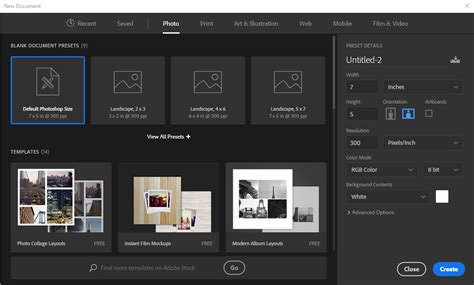
The foundation of many compelling visual effects lies in a well-crafted background. To begin our journey into Photoshop glow effects, we will establish a rich, atmospheric base. This process starts with creating a new image document, setting its dimensions to 600 pixels wide by 500 pixels tall.
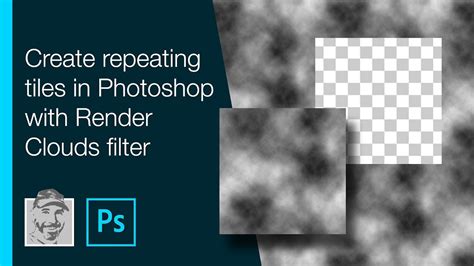
The first step towards our textured background involves rendering clouds. Create a new, empty layer and select it. Ensure your foreground color is set to black and your background color to white. Navigate to Filter > Render > Clouds. This command will generate a random pattern of clouds on your layer, providing a natural, organic texture. Since the rendering is random, you may need to repeat this step until you achieve a cloud pattern that suits your aesthetic.
To infuse this cloud layer with vibrant color, we'll introduce a new empty layer positioned directly above the clouds layer. Select this new layer and change its blending mode to Overlay. This blending mode allows the colors of the new layer to interact with the luminosity of the layer beneath, creating a richer, more complex visual. Next, set your foreground color to #06c2ff (a bright cyan) and your background color to #00ff7d (a vivid green). With the Gradient Tool selected, fill this new layer with a gradient. The resulting image should display a dynamic interplay of colors over the cloud texture, similar to what is shown in Picture 3. This layered approach builds depth and visual interest from the outset.
Incorporating Text with an Overlay Blending Mode
With the textured background established, we can now introduce text to serve as a focal point or an element that will itself emit light. Using the Type Tool, create your desired text on a new layer positioned above the background layers. The choice of font and its initial styling can significantly impact the final look, but for this foundational step, focus on clear legibility.
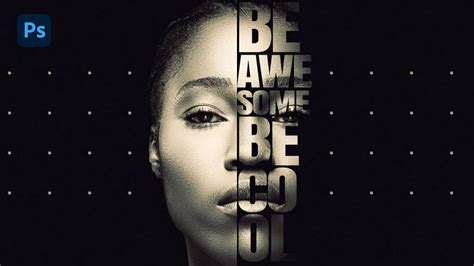
To integrate the text seamlessly with the background and prepare it for glow effects, change the blending mode of the text layer to Overlay. This adjustment will cause the text to interact with the colors and textures beneath it, making it appear as if it's part of the background rather than simply placed on top. At this stage, your image should resemble Picture 4, with the text harmoniously blended into the colorful, cloudy environment. This blending mode is particularly effective for making text feel integrated and ready to receive light-based effects.
Drawing and Styling Light Motion Trails with the Pen Tool
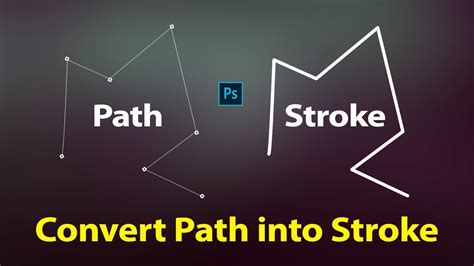
Light motion trails add a sense of speed and dynamism to an image. The Pen Tool is the ideal instrument for creating these precise, flowing lines. If you are new to the Pen Tool, it can initially seem complex, but understanding its core functionalities will unlock its power. The Pen Tool allows you to draw precise curves by clicking and dragging to create anchor points and control handles. You can modify curves by clicking on smooth points to convert them to corner points, or by clicking and dragging on corner points to convert them to smooth points. Holding CTRL while dragging anchor points provides fine control over their placement.
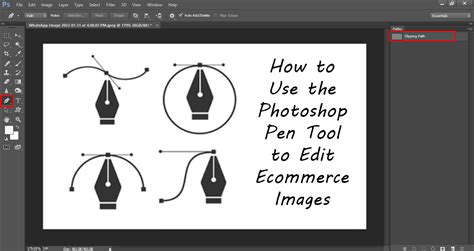
Begin by drawing a smooth curve on your canvas, similar to the example in Picture 5. At this stage, it is merely a path. To transform this path into a visible light trail, create a new empty layer above your text layer and select it. Choose the Brush Tool and, by right-clicking anywhere on the image, set the Master Diameter to 3 pixels and Hardness to 100%. Set your foreground color to white. With the Pen Tool still active, right-click on the image and select Stroke Path... from the menu. Ensure that Simulate Pressure is checked, as this will create a tapered effect on the ends of the stroke, mimicking natural brush dynamics. Click OK. You will now see a brush stroke precisely following your path. To hide the path, you can select another tool or deselect the path.
To imbue this stroke with a luminous quality, right-click on the layer containing the stroke and select Blending Options.... Enable Outer Glow and change its color to #16b5e5 (a vibrant blue). This will create a soft halo of light around the white stroke, making it appear as a glowing trail.
Adding Sparkles and Enhancing Motion Blur for Trails
To further enhance the realism and visual appeal of the light trails, we can add subtle sparkles. Select the layer containing your light trail. Using the Brush Tool, create small dots along the trail. Vary the brush sizes between 1 and 4 pixels to give the sparkles a natural, scattered appearance.
To create a sense of motion and depth, duplicate the light trail layer by right-clicking on it and selecting Duplicate Layer.... This creates an identical layer directly above the original. Change the Opacity of this duplicated motion-blurred layer to 40%. While this effect is subtle, it significantly contributes to the perception of movement within the image, as demonstrated in Picture 7. The slight transparency allows the underlying trail to show through, creating a softer, blurred effect that enhances the feeling of speed.
Constructing and Styling Realistic Stars
Stars add a celestial element to our composition, contributing to a sense of wonder and depth. We will begin by creating a basic star shape and then apply layer effects to make it luminous.
Create a new layer and select it. Set the foreground color to pure white. Select the Brush Tool and set the brush size to 3 pixels with 100% hardness. Use the Pen Tool to draw a vertical path approximately 100 pixels high. With the Pen Tool still active, right-click on the image and choose Stroke Path.... Ensure Simulate Pressure is checked and click OK. This creates a vertical white line.
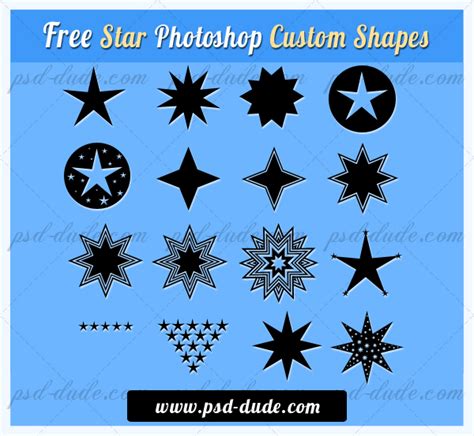
To form a star, duplicate this line layer. Rotate the new layer 90 degrees using Edit > Transform > Rotate. Merge these two layers down by right-clicking on the upper layer and selecting Merge Down. Now, duplicate this cross shape. Rotate the new layer 45 degrees and then scale it down to 70% of its original size using Edit > Transform > Scale. Change the Opacity of this scaled layer to 70%. Merge these two layers together. Finally, scale the entire star down to 40%.
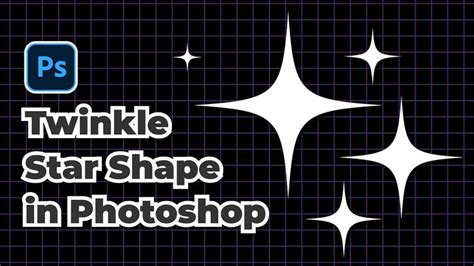
To give the star its glow, copy the layer style from the light trail layer to the star layer. You can do this by right-clicking on the light trail layer, selecting Copy Layer Style, then right-clicking on the star layer and selecting Paste Layer Style. Modify the Outer Glow effect within the Blending Options... of the star layer by changing the Size parameter from 5 to 2 pixels. This refines the glow, making it more concentrated. The star is now ready. Duplicate this star layer multiple times and position the stars strategically throughout your image, as seen in Picture 9, to populate your scene with celestial bodies.
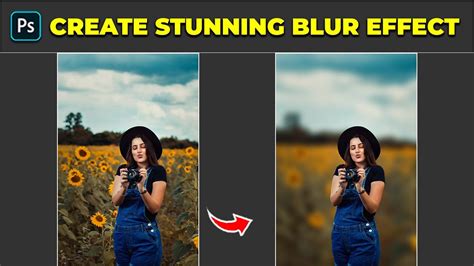
Creating Soft Bokeh Effects for Atmospheric Depth
Bokeh, the aesthetic quality of the blur in the out-of-focus parts of an image, can add a dreamlike and professional finish. We will create simple bokeh circles that can be scattered to enhance the overall atmosphere.
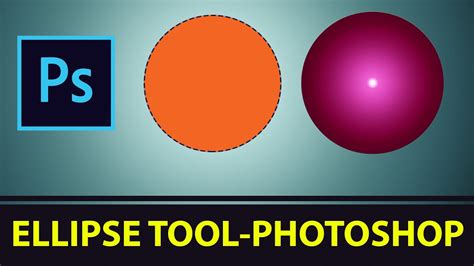
Create a new empty layer and select it. Use the Ellipse Tool to draw a circle approximately 50 pixels wide. Right-click on this circle layer and select Blending Options.... Rasterize the layer styles by right-clicking on the layer and selecting Rasterize Layer Style.
Next, create a new empty layer directly below the bokeh circle layer. Right-click on the bokeh circle layer and select Merge Down. This merges the circle shape with the layer below it. Apply a Gaussian Blur of 1 pixel to this merged layer using Filter > Blur > Gaussian Blur. This softens the edges of the circle, giving it a more diffused appearance.
Change the Blending mode of this blurred circle layer to Overlay and its Opacity to 14%. This subtle blending and transparency will make the circle appear as a soft, glowing point of light. Create two copies of this layer and position these three bokeh circles as you wish within your image. By strategically placing these soft circles of light, you can add depth and a professional polish to your composition.
Advanced Glow Techniques: Layer Masks and Blend Modes
Beyond the foundational effects, Photoshop offers sophisticated methods for creating nuanced glow effects, often involving layer masks and advanced blending modes. One efficient technique for adding glow involves using solid color layers, blend modes, and masks.
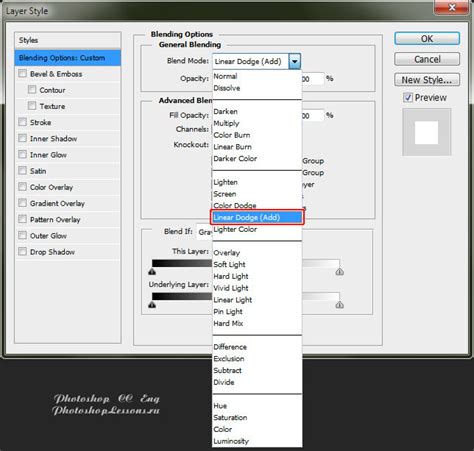
Start by inserting a solid color layer. Choose a color that complements the object you want to illuminate. For instance, a deep red-orange can be effective for a primary glow color. Change the blend mode of this solid color layer to Linear Dodge (add). This blend mode significantly brightens the image, making the color appear to emit light.
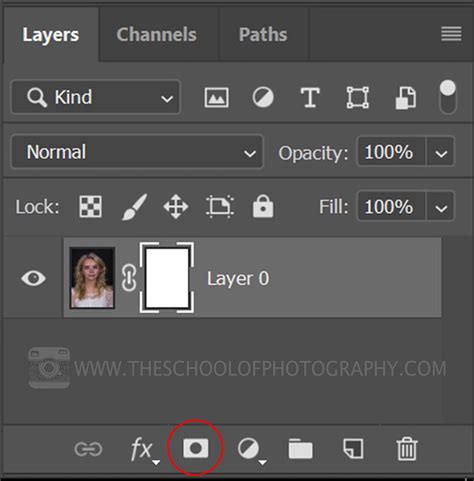
Next, add a layer mask to this solid color layer. Invert the mask by pressing Ctrl+I (or Cmd+I on Mac) with the mask selected. This will hide the effect of the solid color layer. Select a soft brush, slightly larger than the object you intend to glow. Reduce the brush flow to 1% or 2%. Paint with white on the mask to gradually reveal the glow color. You can increase the brush size and paint with white to make the glow brighter closer to the object.
To further refine the glow, duplicate the glow layer. Invert the mask on the new layer to be completely dark again, or clear it by pressing Alt+Backspace (or Cmd+Backspace on Mac). This allows for independent control over different layers of glow. This method is particularly effective for simulating neon lights or adding a radiant aura around elements in a portrait.
Integrating Glow Effects with Subjects and Environments
A truly convincing glow effect requires seamless integration into the overall image, especially when interacting with subjects or environmental elements. This often involves manual adjustments and careful masking.
Consider creating a glowing ring of energy around a subject. Begin by creating a solid circle using the Ellipse Tool, holding SHIFT to maintain a perfect circle. Duplicate this circle layer. Rasterize the layer style of the duplicate. To create a diffused glow, apply a Gaussian Blur to this rasterized layer. Repeat this process, creating multiple ring layers with progressively stronger blurs.
To add natural variation, create a Layer Mask on each ring layer and paint with black over random spots using a large, soft brush at a low flow. Experiment with different Blending Modes for each ring layer. For complex effects like those seen with a Dissolve blending mode, it might be beneficial to convert the effect to a new layer set to Normal blending mode. To replicate the particles created by a Dissolve blend, you can use Select Color Range on the glow effect, then create a new layer and fill the selection with the glow color.
Integrating the glow with a subject often requires masking. Group all the glowing ring layers. Zoom in on the subject and use Select > Color Range to create a selection of the subject's darker areas (e.g., clothing). Load this selection as a Layer Mask for the entire glow group. This will ensure the glow appears behind the subject.
To make the glow appear realistic, you'll need to integrate it with the image's lighting. This involves manually painting with a bright color sampled from the glow around the edges of the subject using the Brush Tool. Pay close attention to detailed areas like hair. Use larger, softer brush strokes for broader glow effects and utilize Blend If sliders in the Layer Styles to ensure these highlights appear only where natural highlights exist in the image. You can also duplicate the entire glow group, transform, and reposition it to integrate it into the environment, such as casting a glow onto the ground.
Exploring Advanced Tools and Resources
Photoshop's capabilities extend to creating highly specialized glow effects through custom brushes and pre-made assets.
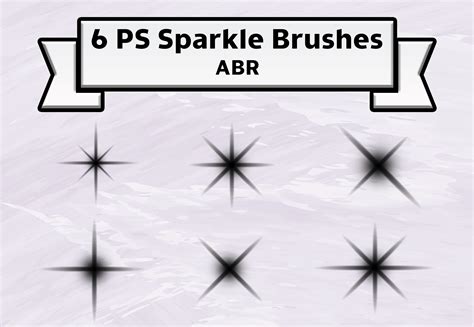
Custom Photoshop Brushes
Custom brushes can significantly enhance special effects. Many tutorials provide custom brushes for free in their download packages, allowing users to replicate intricate textures and particle effects used in advanced glow designs. These brushes can be loaded into Photoshop and used with the Brush Tool to add unique elements to your compositions.
Premium Layer Styles and Actions
For those short on time or seeking professional-grade results, premium layer styles and Photoshop actions offer accelerated workflows. Envato Market, for instance, provides a variety of layer styles specifically designed to create sharp, impactful glow effects for text and other elements. These styles are often highly customizable, allowing for adjustments in intensity and color.
Photoshop actions are another powerful tool. Certain actions can automate the creation of complex glow effects, even generating animated GIFs. These non-destructive actions are user-friendly and provide an excellent way to experiment with a wide range of glow-inspired effects.
Specialized Glow Effect Packs
Beyond general-purpose tools, there are specialized packs designed for specific types of glows. Some packs offer a variety of pre-set color options for lights and glows, with fully editable content, making it easy to jump in and create stunning visuals. There are even effects designed to mimic "glowing in the dark," which can be combined with other learned techniques for unique results.
Understanding Photoshop and Graphic Design Fundamentals
To effectively utilize these glow effect techniques, a foundational understanding of Photoshop and graphic design principles is beneficial.
What is Adobe Photoshop?
Adobe Photoshop is a leading raster graphics editor and image manipulation program. It is widely used by photographers, graphic designers, and digital artists for creating and editing images, digital art, and graphic design. Photoshop offers a comprehensive suite of tools for photo retouching, compositing, digital painting, and more. It allows users to adjust colors, remove blemishes, add text or graphics, and apply a vast array of filters and effects.
Photoshop for Complete Beginners | Lesson 1
What is Graphic Design?
Graphic design is the art and practice of planning and projecting ideas and experiences with visual and verbal content. It involves visual communication and problem-solving through the use of typography, photography, illustration, and other visual elements. Graphic design is essential for marketing, branding, user interface design, and creating visually appealing content across various media. Key principles include layout, typography, color theory, and branding.
Tips for Using Adobe Photoshop
- Learn the Basics: Before diving into complex effects, master fundamental tools and concepts like layers, selections, and basic adjustments.
- Embrace Layers: Layers are the cornerstone of non-destructive editing in Photoshop. Use them extensively to isolate elements and maintain flexibility.
- Experiment: Don't be afraid to try different tools, filters, and blending modes. Experimentation is key to discovering new possibilities.
- Save Often: Regularly save your work to prevent data loss.
- Utilize Brush Presets: Explore and create brush presets to quickly apply specific brush characteristics.
- Understand Blending Modes: Blending modes dictate how layers interact with each other, opening up a world of creative possibilities for combining elements and creating effects.
Brushes and Brush Presets
In Photoshop, brushes are versatile tools used for painting, retouching, and creating textures. You can select brushes from the toolbar or the brush settings panel. A brush preset is a saved configuration of brush attributes, such as size, shape, hardness, spacing, and texture. Creating and using brush presets allows for rapid application of specific brush styles, enhancing efficiency and consistency in your workflow.
Photoshop vs. Illustrator
While both are Adobe products, Photoshop and Illustrator serve different primary purposes. Photoshop is primarily a raster graphics editor, ideal for photo manipulation and pixel-based artwork. Illustrator, on the other hand, is a vector graphics editor, perfect for creating scalable logos, illustrations, and typography that maintain crispness at any size. Understanding when to use each program is crucial for efficient design work.
Conclusion
The ability to create compelling light and glow effects in Photoshop is a valuable skill for any digital artist or designer. By mastering techniques ranging from simple gradient overlays and layer styles to advanced masking and blending mode manipulations, users can imbue their images with a vibrant and dynamic luminescence. Whether you are aiming for subtle atmospheric enhancements or dramatic, eye-catching displays, Photoshop offers a rich toolkit to achieve your creative goals. Continuous practice, exploration of new tools, and an understanding of fundamental design principles will further elevate your ability to craft stunning visual effects.