Lightroom, while perhaps not as intricate as Adobe Photoshop, offers a wealth of nuanced editing capabilities. For many, myself included, the primary interaction with Lightroom revolves around its sliders, subtle color adjustments, and the processing of raw files, rather than extensive modifications typically reserved for Photoshop. One tool that often presents a learning curve, yet unlocks significant creative potential, is the Graduated filter. This powerful feature allows for targeted adjustments across a portion of an image, offering a more refined control than global edits. The transition from the sky to the landscape, for instance, can be a sticking point for photographers. I recall early in my photographic journey, the tendency was to simply darken any elements of a landscape image that extended into the sky, such as trees. This often resulted in an unnatural, heavy-handed effect on the overall image. The solution to this, as discussed by Serge Ramelli and explored within this article, lies in understanding and effectively utilizing the Graduated filter, and more recently, its evolution into the Linear Gradient tool in Lightroom Classic.
Understanding the Graduated Filter's Mechanism
At its core, the Graduated filter in Lightroom creates a transition of edits across your image. The effect begins at a specified intensity, gradually increasing or decreasing in strength as it moves across the designated area. It's important to understand that the Graduated filter is not a singular effect; rather, it serves as a versatile tool capable of applying a wide array of different edits. This means it can be used to adjust exposure, contrast, color balance, and much more, all within a defined gradient.
The fundamental principle behind the Graduated filter is its ability to adjust a part of a scene without impacting the entire composition. This makes it an indispensable tool for landscape photographers, who commonly employ it to refine the sky without altering the land below. However, its utility extends far beyond landscapes. Portrait photographers also find great value in its selective application. As this article will demonstrate, the potential uses for the Linear Gradient (the modern iteration of the Graduated filter) are vast. Learning its intricacies and experimenting with its capabilities is key to unlocking its full potential.
Applying the Graduated Filter: A Step-by-Step Guide
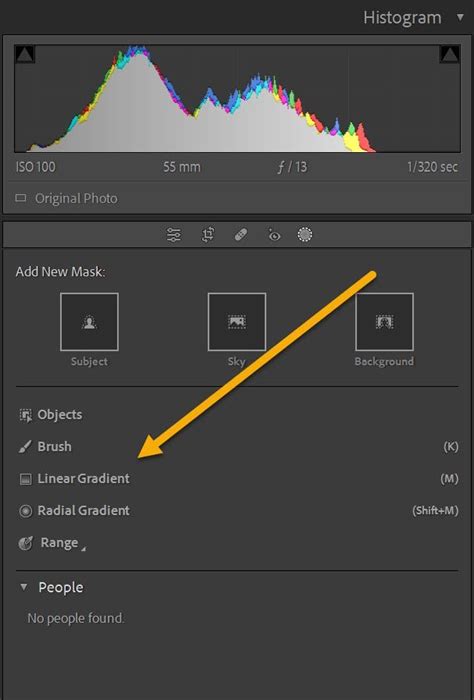
Initiating a Graduated filter in Lightroom is a straightforward process. First, select the Graduated filter icon from the toolbar. You'll then hover your cursor over your image. A click and drag action will apply the filter mask. This action reveals a series of lines, with a red overlay clearly indicating the areas that will be affected by your chosen adjustments. The central handle allows you to reposition the entire filter across the scene.
Once the filter is positioned to your satisfaction, you can proceed to apply your desired edits. Alternatively, you can refine the shape and extent of the filter mask itself. The "Add" and "Subtract" options within the Masks panel are crucial for this. They allow you to expand or shrink the Graduated filter's influence. For example, if you wish to edit the sky while carefully excluding certain foreground elements like trees, you would first create your initial Graduated filter. Following this, you can utilize the "Subtract" function with another gradient to precisely mask out those unwanted areas.
Common and Creative Applications of the Graduated Filter
1. Enhancing the Sky
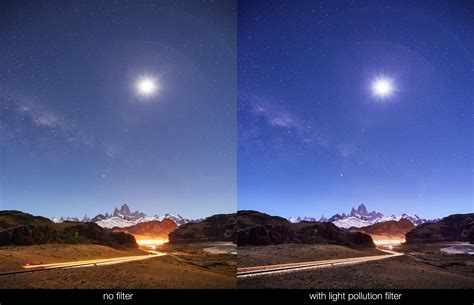
The most frequent application of the Graduated filter is to darken the sky. This edit can introduce much-needed contrast, enhance detail, and imbue the sky with a sense of drama. It's important to note, however, that the Graduated filter cannot salvage a completely blown-out sky; it requires some existing detail to work with.
For an even more polished sky, consider applying a second, smaller Graduated filter just above the first. After applying your initial gradient to the sky, create a second, less feathered gradient. Then, reduce the Exposure slider once more. This layered approach can lead to superior results by creating a more nuanced and natural-looking transition.
2. Balancing Foreground and Sky
While much has been discussed about the Graduated filter's power in adjusting skies, its ability to selectively edit foregrounds is equally significant. Simply drag a Graduated filter over the image foreground and begin adjusting sliders. Boosting the exposure can add detail and help establish a better balance between the land and the sky. You might also consider increasing contrast and/or clarity, both of which can contribute to a more three-dimensional feel for the foreground and the image as a whole.
How I Use Lightroom Gradients | Lightroom Graduated Filter (Tutorial)
3. Crafting Subtle Vignettes
While many photographers opt for the Effects panel or a Radial filter to create vignettes, a Graduated filter offers a unique approach. Drag a heavily feathered Graduated filter across the side of the image and use it to subtly reduce the exposure. This can be repeated and positioned until the Graduated filters effectively cover the edges of your subject, drawing the viewer's eye towards the focal point. This technique is particularly effective for isolating a subject and minimizing distracting backgrounds.
4. Mimicking Atmospheric Light
This trick proves highly effective on shots captured during early morning or late afternoon sunlight. The objective is to emulate hazy, atmospheric light that gently bleeds into the scene. Begin by creating a Graduated filter and carefully position it in the area closest to the light source. Access the "Color" option and select a hue that closely matches the color of the light. For an added layer of atmosphere, experiment with reducing the "Dehaze" slider. It's crucial to exercise caution and avoid overdoing the effect. Adjust the "Effect" slider as needed, ensuring your chosen color isn't overly conspicuous.
5. Adding Localized Color Washes
The Linear Gradient tool in Lightroom Classic, the successor to the Graduated filter, offers even more creative possibilities. Beyond tonal adjustments, it can be used to introduce localized color washes, akin to a sophisticated form of color grading. For instance, you might want to apply a specific color to a particular wall in the background without affecting other areas. This can be achieved by subtracting a Linear Gradient from a broader mask, such as a "Select Background" mask.
6. Creating a Sunset Effect
A particularly artistic application of the Linear Gradient is to impart a sunset-like color wash. By carefully positioning the gradient and selecting appropriate colors, you can convincingly simulate the warm, diffused light of a sunset, adding a dramatic and evocative quality to your images.
Advanced Techniques and Tips
Adjusting Filter Strength and Feathering
If you find the results of your Graduated filter are too intense, you can easily reduce its strength by adjusting the "Amount" slider. For finer control over the transition, the feathering of the gradient is key. You can adjust the feathering by holding down the Alt key (or Option key on older Mac keyboards) and dragging one of the outer lines of the gradient. This allows you to create a softer or sharper transition between the edited and unedited areas.
Masking and Subtraction
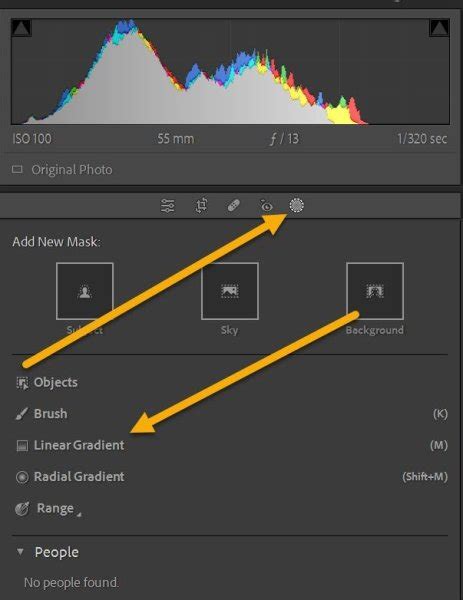
The power of the Graduated filter is amplified when combined with other masking tools. For example, you can create a "Select Background" mask to affect the entire background of an image. Then, by using the "Subtract" option and selecting a Linear Gradient, you can precisely remove the effect from specific areas, such as a particular wall or object within that background. This offers unparalleled control over localized adjustments.
To begin this process, navigate to the Masks panel, select "Create New Mask," and choose "Select Background." Next, click the "Subtract" button and opt for "Linear Gradient." Hold down the left mouse button and drag your cursor across the image to define the area from which you wish to subtract the effect.
Revealing and Hiding Mask Lines
To help visualize the area affected by your Graduated filter, you can press the 'H' key on your keyboard. This will toggle the visibility of the lines indicating the gradient's influence, allowing you to fine-tune its position and extent.
Lightroom Classic's Linear Gradient vs. Physical Filters
It's important to distinguish between Lightroom Classic's Linear Gradient tool and the physical graduated neutral density (ND) filters used by landscape photographers. While the name "Graduated filter" was historically derived from these physical filters, the digital tool operates differently. Physical graduated ND filters are designed to control the amount of light entering the camera, effectively balancing exposure between a bright sky and a darker foreground at the moment of capture.
Lightroom Classic's Linear Gradient, on the other hand, is a post-processing tool. It cannot recover detail that was not captured in the original image. If your sky is completely blown out in the raw file, the Linear Gradient cannot magically restore that lost information. It is a tool for refinement and enhancement, not a substitute for proper exposure in-camera. Understanding this distinction is crucial for setting realistic expectations and achieving the best possible results.
Experimentation and Creative Exploration
The true power of the Graduated filter and its Linear Gradient evolution lies in its versatility. While common uses like sky enhancement and foreground balancing are well-established, don't hesitate to experiment. Consider applying color washes to create mood, subtly darkening edges to draw attention to a subject, or even using multiple overlapping gradients to achieve complex lighting effects. The possibilities are limited only by your imagination.
So, pick your favorite image, open Lightroom, and dive into the world of Graduated filters. Explore the various sliders, experiment with different positioning and feathering, and discover the transformative effects this tool can achieve. How will you utilize the Graduated filter in your workflow? Which of these tips will you implement first? The journey of mastering this tool is an ongoing process of learning and creative discovery.