The digital photography landscape offers a myriad of file formats, each with its own strengths and intended purposes. Among these, the Digital Negative (DNG) and Joint Photographic Experts Group (JPEG) formats stand out, and understanding their differences is crucial for photographers, designers, and anyone working with digital images. Often, the need arises to convert DNG files, which are essentially uncompressed RAW images, into the more universally compatible JPEG format. This process, known as DNG to JPEG conversion, transforms unprocessed sensor data into a widely accessible and manageable image file.
Understanding the DNG Format: The Digital Negative
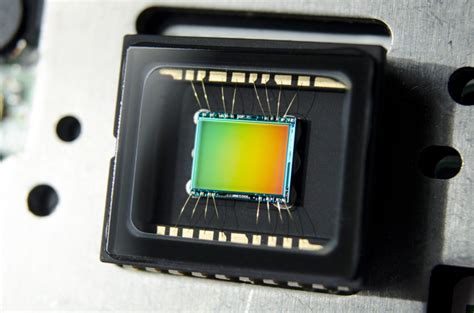
The DNG format, short for Digital Negative Image, was introduced by Adobe in 2004. Its primary purpose was to create a standardized, open-source file type for uncompressed RAW image data captured by digital cameras. Before DNG, camera manufacturers developed proprietary RAW formats, leading to fragmentation and potential compatibility issues. DNG was designed to unify these RAW images, offering a universal format for storing unprocessed sensor data.
DNG files are characterized by their uncompressed and untouched nature, meaning they contain the maximum information directly from the camera's sensor. This high-quality data is ideal for archival storage and provides photographers with the greatest flexibility during post-processing. DNG files have a TIFF structure and are supported by most camera manufacturers, making them a valuable tool for professionals and enthusiasts alike. They are often referred to as "digital negatives" because they hold the raw, unedited essence of the captured image, much like traditional film negatives.
The advantages of the DNG format lie in its ability to preserve the full dynamic range and color depth of the original capture. This allows for extensive adjustments in post-processing, such as modifying white balance, exposure, and color grading, without significant degradation of image quality. DNGs are also known for their robust metadata handling, storing comprehensive information about the capture.
However, the very nature of uncompressed RAW data means that DNG files are considerably larger than compressed formats. This can lead to significant storage requirements and can impact performance when dealing with large numbers of files. While DNG offers unparalleled editing potential, this comes at the cost of accessibility; not all devices or basic applications can open DNG files directly.
The Ubiquitous JPEG: A Format for Sharing and Display
In contrast to the specialized nature of DNG, the JPEG (Joint Photographic Experts Group) format is arguably the most popular graphic format for storing still images. Its widespread adoption is due to its excellent balance between image quality and file size, achieved through sophisticated compression algorithms. JPEG is capable of compressing images both lossy and lossless, though the lossy compression is far more prevalent and is what makes JPEG so widely used for digital photography, picture archiving, and communication via the Internet.
JPEG is a 2D pixel-based 'raster' image format. It's particularly well-suited for photographs and scans, where the subtle gradations of color and tone can be effectively represented. Many cameras, smartphones, and basic photo or drawing programs automatically save images in JPEG format. The universal compatibility of JPEG is a significant advantage; virtually any device, operating system, or application can open and display a JPEG file without specialized software. This makes JPEGs ideal for everyday sharing, web display, and general viewing purposes.
The compression technique used in JPEG can reduce image size by a factor of 10:1 to 20:1 without a noticeable loss in image quality for most practical applications. This makes JPEG files much smaller than their DNG counterparts, facilitating easier storage, faster uploads, and quicker sharing across the internet.
However, it's important to understand that JPEG is a "lossy" format. This means that during compression, some image data is discarded to achieve smaller file sizes. While this loss is often imperceptible, it can become noticeable at very high compression levels or when images are repeatedly edited and re-saved. JPEG files are typically 8-bit per channel, which limits their color depth and dynamic range compared to the higher bit-depth, linear raw data found in DNG files. Consequently, JPEG files offer less flexibility for extensive post-processing compared to DNG.
Why Convert DNG to JPEG?
The decision to convert DNG to JPEG stems from a variety of practical needs and benefits:
- Enhanced Compatibility: JPEG is a universal format. Converting DNG to JPEG ensures that your images can be opened, viewed, and shared on virtually any device, operating system, or platform, from smartphones and tablets to web browsers and basic image viewers.
- Reduced File Sizes: DNG files, with their uncompressed RAW data, can be very large. Converting to JPEG significantly reduces file size, making it easier to store more images on your devices, manage your photo library, and transfer files more quickly. This is particularly beneficial for users with limited storage space or those who deal with a high volume of images.
- Web and Online Sharing: JPEGs are the standard for web content. They load faster in web browsers, consume less bandwidth, and are compatible with social media platforms and websites. Converting DNGs to JPEGs creates web-ready images that are universally viewable and faster to load online.
- Printing and Lab Services: While DNG offers the highest quality for professional printing, many printing services and labs specifically require JPEG files. Converting to JPEG ensures compatibility with these services.
- Streamlined Workflow: For photographers and designers, converting DNGs to JPEGs can streamline workflows. It allows for quicker previews, easier sharing of proofs, and integration into projects that require more widely compatible formats. Batch conversion tools can further automate this process, saving significant time on large shoots.
- Easier Archival (for general purposes): While DNG is excellent for archival of the original RAW data, for general purposes where extreme editing flexibility is not the primary concern, smaller JPEG files can be more practical for long-term storage and accessibility.
IS RAW BETTER? You may be surprised!
The Conversion Process: From Raw Data to Shareable Image
Converting a DNG file to a JPEG involves several crucial steps that transform the unprocessed sensor data into a standard image format. This process is often referred to as "demosaicing" or "RAW processing."
- Demosaicing: The camera's sensor captures light data through a color filter array (like a Bayer filter). Demosaicing is the process of interpolating the missing color information for each pixel to create a full-color image.
- Color Profiling and Tone Mapping: The raw data is then interpreted using a specific color profile (e.g., sRGB, Adobe RGB). Tone mapping adjusts the brightness, contrast, and highlights/shadows to create a visually appealing image.
- White Balance and Exposure Adjustments: These essential parameters are applied to ensure accurate colors and proper exposure.
- Compression and Quality Settings: Finally, the image is compressed using the JPEG algorithm. Users can typically select a quality setting, ranging from low (higher compression, smaller file size, potential quality loss) to high (lower compression, larger file size, better quality). The output is a standard 8-bit per channel image.
Online DNG to JPEG converters, such as CloudConvert and Zamzar, simplify this process for users. These platforms typically follow a straightforward three-step procedure:
- Step 1: Upload DNG File: Users drag and drop their DNG files into the converter or use a browse function to select them from their computer. Many tools support uploads of up to 250MB per file.
- Step 2: Choose JPEG as Destination Format: The user confirms that JPEG (.jpeg) is the desired output format. Options for JPEG output quality, color profiles (like sRGB, Adobe RGB), and resizing may also be available.
- Step 3: Download JPEG File: After clicking "Convert," the service processes the file, and once ready, provides a link to download the converted JPEG file. Some services may offer a Zip folder for multiple file downloads.
Key Considerations and Best Practices for DNG to JPEG Conversion
To achieve the best results when converting DNG to JPEG, several factors should be considered:
- JPEG Quality Settings: When converting, always choose a high JPEG quality setting (e.g., 90â100%) to retain as much color detail and avoid visible compression artifacts. For web use, an 80â90% quality setting often provides a good balance between file size and visual fidelity.
- Color Profile: For general use and web display, sRGB is the most common and universally compatible color profile. If you intend to perform further professional editing or print with specific requirements, Adobe RGB might be considered, though it's crucial to ensure all subsequent steps in your workflow support it. For web delivery, converting to sRGB is generally recommended.
- Resolution and Resizing: Decide whether to keep the original resolution or downscale the image. Downscaling can further reduce file size, which is useful for web or email. Ensure aspect ratio is preserved if resizing.
- Metadata Preservation: Depending on your needs, you might want to preserve EXIF, IPTC, or XMP metadata (which includes camera settings, copyright information, etc.) in the converted JPEG. Many converters offer options to keep, strip, or selectively preserve metadata.
- Pre-conversion Editing: For optimal final image quality, it's best to perform essential edits like white balance, exposure correction, and noise reduction in a RAW editor (which can read DNG files) before converting to JPEG. This leverages the full potential of the RAW data.
- Batch Conversion: If you have many DNG files to convert, utilize tools that support batch processing. This allows you to apply consistent settings (quality, color profile, resize) to multiple files simultaneously, saving considerable time and ensuring uniformity.
Understanding the Limitations
It's important to recognize that JPEG is an 8-bit lossy format. This means it cannot retain the original high bit depth, linear raw data, or the full dynamic range that is present in a DNG file. Once a DNG is converted to JPEG and the changes are "locked in," you will have less flexibility for future edits compared to working with the original DNG. Therefore, it is always advisable to keep a copy of the original DNG files for archival and future editing purposes.
Choosing a Conversion Method
While photo-editing software like Adobe Photoshop, Adobe Lightroom, or even built-in applications like Microsoft Photos and Apple Photos can open DNG files and export them as JPEGs, online conversion tools offer a distinct advantage in convenience and speed, especially for batch conversions. Services like CloudConvert and Zamzar are ISO 27001 certified, emphasizing security and data privacy. They offer a user-friendly interface, eliminate the need for software installation, and are accessible from any device with an internet connection. Zamzar, for example, also offers a desktop app and an API for automated conversions, catering to diverse user needs. These platforms are trusted by users and customers since their founding in 2012, and provide huge discounts for high-volume customers, enabling custom integrations with apps.
In essence, converting DNG to JPEG is a practical step that bridges the gap between high-quality, flexible RAW data and the widespread accessibility and manageability of compressed image formats. By understanding the characteristics of both formats and employing appropriate conversion settings, users can ensure their images are not only compatible across all platforms but also retain excellent quality for their intended use.