Controlling the position and behavior of text is a key graphic design skill. Learning to control text within designs can give a big boost to both the look and flow of your projects. Moving beyond standard, horizontal typography opens up a world of creative possibilities, allowing designers to craft more dynamic, engaging, and aesthetically pleasing visuals. Whether aiming for a subtle enhancement or a bold statement, the ability to curve text transforms static words into fluid design elements. This article delves into the various techniques and tools available to achieve this effect, from simple arcs to intricate spirals, making your designs stand out from the crowd.
Understanding the Fundamentals of Curved Text
At its core, curving text involves manipulating individual letters or entire blocks of text to follow a non-linear path. This path can be a simple arc, a wave, a full circle, or even a more complex, custom shape. The primary goal is to integrate text seamlessly with other design elements, creating visual harmony and guiding the viewer's eye. A curved text effect creates an eye-catching visual element, giving your logos, quote posters, and social media posts a unique flair. It's a powerful way to add personality and style to any design, making it more memorable and impactful.
Why Curve Text?
The application of curved text extends across a multitude of design contexts. It's invaluable for creating distinctive logos, where text can wrap around a central icon or form a circular emblem. In branding, it can be used for labels, stickers, or badges, adding a professional and polished touch. For social media, curved text can jazz up portraits and create profile photo overlays, or craft compact diagrams for presentations. Furthermore, it adds a dynamic element to wallpapers, posters, and even business cards, breaking away from conventional layouts. Experimenting with different curve directions, angles, colors, layouts, and styles allows for endless creative expression. When done well, you’ll get aesthetically pleasing designs ready for sharing and printing.
Techniques for Creating Curved Text
The methods for achieving curved text vary depending on the software and the desired complexity. From vector-based editors to raster image processors, each offers unique tools to bend, warp, and twist typography.
Using Vector Graphics Software (e.g., Adobe Illustrator, Affinity Designer)
Vector graphics programs are ideal for creating scalable curved text, as they work with mathematical equations rather than pixels. This ensures that curved text remains sharp and clear at any size.
The Power of the Pen Tool and Paths: In programs like Adobe Illustrator, the most fundamental way to curve text is by using the Pen tool to draw a path, and then attaching text to that path.
- Create a Path: Use the Pen tool to draw the desired curve. This could be a simple arc or a more intricate shape.
- Type on a Path: Select the Type tool, hover over the path until the cursor changes, and then click to start typing. The text will automatically follow the contours of the path you created.
- Manipulate Text: You can then adjust the alignment of the text along the path (start, center, end), flip it to the other side of the path, and even alter the spacing between characters and lines.
Envelope Distortions: Another powerful vector technique is using envelope distortions. This allows you to wrap existing text into a predefined shape or a shape you create.
- Type Your Text: Create your text as a standard text object.
- Create a Shape: Draw the shape you want your text to conform to (e.g., an arc, a wave, a bulge).
- Apply Envelope Distort: Select both the text and the shape. Go to
Object > Envelope Distort > Make with Top Object(if the shape is on top) orMake with Warpto use predefined warp styles. This will force the text to fit within the boundaries of the shape.
Utilizing Raster Graphics Software (e.g., Adobe Photoshop)
Photoshop, while primarily a pixel-based editor, also offers robust tools for manipulating text, including curving it.
Warp Text Command: This is one of the most accessible methods for creating curved text in Photoshop.
- Type Your Text: Create a text layer and type your desired content.
- Activate Warp Text: Select the text layer. Go to
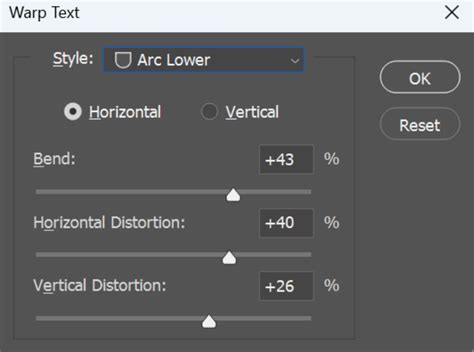
Edit > Transform > Warpor use the shortcutCTRL/CMD + Tto activate the Free Transform tool, then click the Warp icon in the options bar at the top. - Choose a Style: From the dropdown menu, select a warp style such as "Arc," "Arc Upper," "Arc Lower," "Wave," or "Flag."
- Adjust the Controls: Manipulators (handles and a grid) will appear. Drag these handles to fine-tune the curvature, bend, and distortion of your text. You can achieve various effects from subtle arches to dramatic twists.
Liquify Filter: For more organic and complex distortions, the Liquify filter can be a powerful tool, though it requires a bit more finesse.
- Prepare Text: Type your text on a separate layer. It's often beneficial to convert the text layer to a Smart Object before applying filters, allowing for non-destructive editing.
- Apply Liquify: Go to
Filter > Liquify. - Use Warp Tools: Within the Liquify dialog, use tools like the Forward Warp tool to push and pull the pixels of your text, effectively curving it. Experiment with brush size and pressure to achieve the desired effect.
Smart Objects for Precision: The Smart Object tool is a fantastic way to create curved text in Photoshop, especially when combined with other transformation tools.
- Type Your Text: Open your project and type your text.
- Convert to Smart Object: Select the text layer and navigate to
Layer > Smart Objects > Convert to Smart Object. This preserves the text's editability and allows for non-destructive transformations. - Transform and Manipulate: Make sure the layer is still selected. Once the grid appears over the text (when using Free Transform,
CTRL/CMD + T), you can click and drag to manipulate it. For more advanced shaping, you can apply Warp, Skew, or Distort transformations.
Online Curved Text Generators and Design Platforms (e.g., Canva, Easil)
Many user-friendly online platforms offer dedicated tools for creating curved text, making the process accessible even for beginners. These tools often provide pre-set styles and intuitive sliders for easy manipulation.
Canva's Curved Text Tools: Canva provides powerful and accessible tools for bending, warping, and twisting text.
- Type Your Text: Add a text box and type your content.
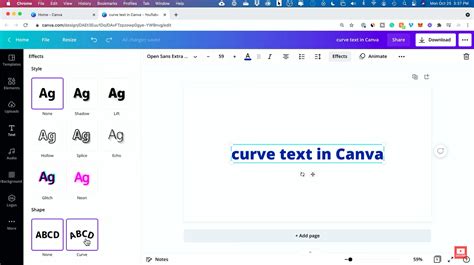
- Access Curve Options: Select the text. Look for the "Effects" option in the toolbar, and within that, you'll find "Curve."
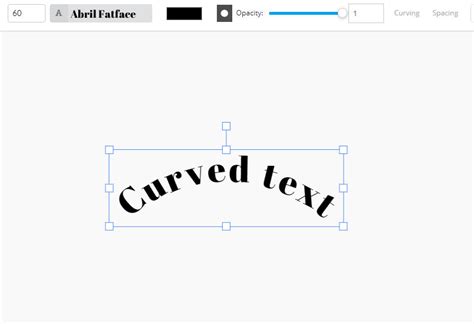
- Adjust the Slider: A slider will appear, allowing you to control the degree of the curve. You can bend, arch, and warp text to spice up your images.
- Explore Further: Canva's "TypeCraft" feature offers even more granular control, allowing you to bend, warp, twist, and create bespoke text without needing to individually change every letter's angle. You can customize your text shape and curve it your way with powerful curved lettering tools. Canva also features a circle text generator, enabling the creation of circular text effects, waves, swirls, and patterns, which are excellent for logos, labels, and wallpapers. Experiment with different curve directions, angles, colors, layouts, and styles.
Easil's Curved Text Tool: Easil offers a straightforward approach to curving text, suitable for a wide range of design needs.
- Add Text: Click the ‘Click or drag to add text’ button or add your uploaded fonts.
- Apply Curve: With your text selected, click the Curve Text icon in the top Actionbar.
- Use the Slider: A slider appears to adjust the curvature. Dragging to the right completes a circle with text facing outwards; sliding left curves the text inwards.
- Refine Spacing: Use the ‘Letter Spacing’ option in the top Actionbar to evenly distribute space between letters on your arc or circle.
- Consider Font Size: If letters appear too large on a circle, try adding more text, increasing letter spacing, or both. All upper-case lettering is often the safest choice for a perfectly symmetrical design when creating a full-text circle.
Easil provides numerous examples and templates demonstrating how to create various curved text effects, from full circles and arcs to loops and waves. These examples often involve combining curved text with graphic elements or images for more sophisticated designs.
How To Curve Text On Easil | Step By Step Guide - Easil Tutorial
Advanced Applications and Creative Examples
Beyond basic arcs, curved text can be integrated into complex designs, animations, and interactive elements. The possibilities are limited only by imagination and the tools at hand.
Creating Circular Text and Logos
Fitting text around a circle shape is a popular application. This is achieved by adjusting the curve to approximately 350-359 degrees. The text at the top will be upright, and as it curves around, it will appear upside down at the bottom. This is perfect for creating circular logos, emblems, or adding decorative text around an image.
- Matching Curves: Unite a circular image with text by matching the curve. For instance, curve text to 180 degrees and add letter spacing to complement a semi-circular image.
- Yin and Yang Effect: Create a split-colored circle effect by using two semi-circles of text with opposite curves and contrasting colors.
- Monogram Logos: Add curved text above or below a central monogram element for a classic personal brand logo.
Animated Curved Text
Curved text can be brought to life through animation, adding a dynamic layer to designs.
- Spinning Text: To animate circular text in a GIF, type your text, set it to a full circle (359 degrees), duplicate the page multiple times, and rotate the text slightly on each subsequent page. This creates a spinning effect.
- Flashing Text Elements: Combine four arcs of text to create a flashy animated GIF. Each quarter-circle of text can be rotated and then its color changed on different pages of the GIF to create a flashing or sequencing effect.
Layering and Combining Elements
Curved text often works best when layered with other design elements.
- Layering Graphics: Add a boxed or banner effect above curved text to separate messaging. Alternatively, place a graphic ring behind circular text to define it from the background.
- Image Integration: Create the illusion of an object coming through a ring of text by layering curved text segments around a cut-out image. One segment can sit behind the image, and others in front.
- Text and Graphic Harmony: Combine curved text with graphic shapes that match its curvature, such as banners or arcs, for a cohesive look.
Sophisticated Textual Arrangements
- Wave Effects: Create a wave effect by combining two textboxes with opposite degrees of curvature. Using similar fonts and character counts helps maintain balance.
- Offset Arcs: Offset opposite arcs of text to create a sophisticated wave pattern.
- Layered Rainbows: Build a social media graphic by layering multiple semi-circles of text, adjusting font sizes and colors to mimic a rainbow.
- Unique Headings: Wrap text around the end of a heading to create a visually interesting lockup, especially when combining multiple text elements.
- Circular Text with Inner Text: Double up on circles of text. Create a large outer circle and then duplicate it, reduce its size, and place it within the center of the first circle, potentially with different text content.
Incorporating Special Characters
Using repeating special characters between sections of curved text can create a unique visual texture. Dashes, colons, asterisks, bullets, or tildas can be used to add decorative elements to a full circle of text.
Best Practices for Curved Text Design
To ensure your curved text designs are effective and aesthetically pleasing, consider these best practices:
- Readability First: While creative curving is important, ensure the text remains legible. Avoid extreme distortions or overly complex paths that make words difficult to decipher.
- Font Choice Matters: The type of font used significantly impacts how well it curves. Sans-serif fonts often hold their shape better on curves than highly decorative or script fonts. However, script fonts can create elegant, flowing curves when used appropriately. All upper-case lettering is the safest choice for a perfectly symmetrical design when creating a full-text circle.
- Maintain Balance: When creating full circles or complex shapes, ensure the text is evenly distributed. Use letter spacing tools to fine-tune the appearance.
- Consider the Context: The application of curved text should align with the overall message and branding of the design. A playful curve might suit a social media post, while a subtle arc might be better for a corporate brochure.
- Test on Different Devices: If your design is for digital use, check how the curved text appears on various screen sizes and resolutions.
By mastering these techniques and adhering to best practices, graphic designers can elevate their work, infusing it with personality, dynamism, and a polished professional finish through the artful application of curved text.