DaVinci Resolve has revolutionized the post-production landscape, offering a singular, powerful platform that integrates professional editing, advanced color correction, stunning visual effects, and comprehensive audio post-production. This all-in-one solution is designed to streamline workflows, enabling creators to move seamlessly between different disciplines with a single click. Whether you're a seasoned professional working on feature films or a budding enthusiast ready to elevate your video projects, understanding how to download and install DaVinci Resolve is the crucial first step.
The All-Encompassing Power of DaVinci Resolve
At its core, DaVinci Resolve is celebrated for its ability to consolidate multiple sophisticated software functionalities into one cohesive application. This eliminates the need to learn and switch between disparate programs, allowing users to maintain a consistent workflow and work with camera-original quality images throughout the entire process. It's akin to having a professional post-production studio housed within a single application. The software is renowned in Hollywood for its incredible quality and creative tools, often considered light years ahead of the competition.
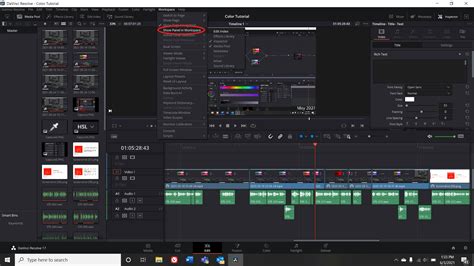
The application is structured into distinct "pages," each dedicated to a specific task, providing a specialized workspace and tools. These include:
- Media Page: For importing, organizing clips, and preparing media for your project. It also includes a clone palette to ensure data integrity during media card backups.
- Cut Page: Designed for speed and efficiency, especially for projects with tight deadlines. It features a streamlined interface with tools like source tape, dual timelines, and smart editing for rapid assembly.
- Edit Page: A traditional, powerful non-linear editor offering a familiar track layout and dual-monitor design, suitable for larger projects like feature films and television shows. It provides drag-and-drop editing, context-sensitive trimming, customizable shortcuts, and a library of titles, transitions, and effects.
- Fusion Page: The hub for creating cinematic visual effects and broadcast-quality motion graphics. It employs a node-based workflow for building sophisticated effects and animations, offering hundreds of 2D and 3D tools.
- Color Page: Hollywood's most advanced color corrector, used on more high-end feature films and television shows than any other system. It offers accessible primary controls for beginners and advanced tools for seasoned colorists.
- Fairlight Page: A professional digital audio workstation (DAW) built directly into Resolve, providing sample-accurate editing, advanced ADR and Foley, and a suite of Fairlight FX plugins. It supports up to 2,000 tracks with real-time processing.
- Deliver Page: Where you manage all encoding options, formats, and export your final projects through a render queue.
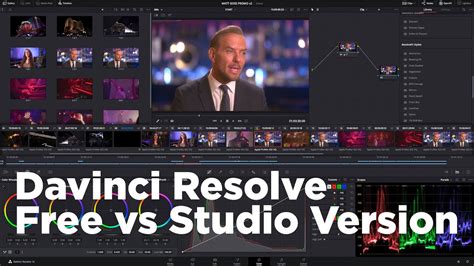
DaVinci Resolve: Free vs. Studio Version
A significant advantage of DaVinci Resolve is the availability of a robust free version. This free tier provides access to nearly all professional editing, color grading, and audio tools, making it an exceptional entry point for aspiring editors and filmmakers. The free version supports up to 8-bit video formats at 60fps and resolutions as high as Ultra HD (3840 x 2160).
For those requiring more advanced capabilities, DaVinci Resolve Studio is the paid counterpart. The Studio version unlocks additional features such as advanced HDR grading, temporal and AI spatial noise reduction, text-based editing, Magic Mask, film grain, optical blur, and enhanced codec support, including formats like H.265 10-bit which may require the Studio version for optimal performance. The Studio version also allows for higher export resolutions (up to 32K at 120fps) compared to the free version's 4K / 60 fps limit. Furthermore, the Studio version includes powerful AI tools powered by the DaVinci AI Neural Engine, such as IntelliScript for creating timelines from text, AI Animated Subtitles, and AI Multicam SmartSwitch for automatic camera angle selection.
Downloading DaVinci Resolve
The process of downloading DaVinci Resolve is straightforward and begins on the official Blackmagic Design website. Blackmagic Design offers installers for Mac OS X, Windows, and Linux, allowing users to select the version compatible with their operating system.
Downloading for Windows:
- Navigate to the DaVinci Resolve download page on the Blackmagic Design website.
- Select the Windows installer option.
- You will be prompted to fill out a short form with your personal information, including name, email, country, and company. Fields marked with an asterisk (*) are mandatory. You can optionally provide details about your intended use of the software and suggest features for future development.
- After completing the form, click "Register & Download."
- The installer file (.exe) will begin downloading.
Downloading for macOS:
- Visit the DaVinci Resolve download page on the Blackmagic Design website.
- Choose the macOS installer.
- Complete the required personal information form.
- Click "Register & Download."
- The macOS installer file (.dmg) will download to your computer.
Downloading for Linux:
- Go to the DaVinci Resolve download page on the Blackmagic Design website.
- Select the Linux download option.
- Fill in the necessary personal details.
- Click "Register & Download."
- The Linux installer file (.run) will be downloaded. For Debian-based systems like Ubuntu, a
makeresolvedebscript is available to create and install a .deb package.
The installer file size is typically between 2 to 3 GB, depending on the operating system.
Installing DaVinci Resolve
Once the download is complete, the installation process is generally quick and intuitive.
Installing on Windows:
- Locate the downloaded .exe file and double-click it to run the installer.
- Follow the on-screen instructions provided by the setup wizard.
- Accept the license agreement.
- Click "Install" to begin the installation.
- If prompted, restart your PC to complete the installation.
Installing on macOS:
- Open the downloaded .dmg file.
- Drag the DaVinci Resolve application icon into your Applications folder.
- Launch DaVinci Resolve from your Applications folder.
- You may be prompted to enter your administrator password to complete the setup.
Installing on Linux:
- Unzip the downloaded file.
- Open a terminal window.
- Navigate to the directory where you unzipped the installer.
- Run the .run installer via the terminal. For Debian-based systems, use the provided script to create and install the .deb package.
After installation, DaVinci Resolve can be found in your applications folder or program list.
Download DAVINCI RESOLVE for FREE Install Davinci Resolve 20
System Requirements for DaVinci Resolve
To ensure a smooth and efficient editing experience, it's essential to have a system that meets DaVinci Resolve's requirements. While the software is remarkably powerful, it also demands significant system resources.
Minimum System Requirements:
- Operating System: macOS 14.5 or higher (for Mac), Windows 10 or later, or a supported Linux distribution.
- System Memory (RAM): 8 GB of system memory is the absolute minimum, but 16 GB is recommended, especially when using the Fusion page. For 4K editing and beyond, 16 GB is the minimum, with 32 GB or more being highly recommended.
- GPU: A dedicated graphics card (GPU) with at least 2 GB of VRAM is required. For optimal performance, particularly with Fusion and higher resolutions, a GPU with 4 GB or more of VRAM is strongly advised. NVIDIA and AMD GPUs are generally well-supported. For macOS, Apple Silicon Macs are recommended.
- Display: A minimum display resolution of 1440 x 900 pixels. Higher resolutions are recommended for a more comfortable workspace.
- Storage: An SSD or NVMe drive is highly recommended for smooth playback and faster project loading times.
Recommended System Configuration:
For professional workflows, especially those involving 4K or higher resolution footage, complex visual effects, or extensive color grading, a more powerful system is beneficial:
- Processor: A modern multi-core CPU (e.g., Intel Core i7/i9 or AMD Ryzen 7/9 series).
- RAM: 32 GB or more.
- GPU: A high-end dedicated NVIDIA or AMD GPU with 8 GB or more of VRAM.
- Storage: Fast SSD or NVMe drives for both the operating system and project files, ideally with ample space.
It's also crucial to keep your GPU drivers updated, as these often contain performance optimizations and bug fixes relevant to video editing software.
Optimizing Playback and Performance
If you encounter performance issues such as choppy playback, consider these optimizations:
- Update GPU Drivers: Ensure you have the latest drivers installed for your graphics card.
- Lower Timeline Resolution: Reduce the playback resolution in the viewport to a lower setting (e.g., quarter resolution).
- Generate Proxies (Optimized Media): DaVinci Resolve can create lower-resolution versions of your footage (proxies or Optimized Media) that are easier for your system to play back smoothly. You can switch back to the original high-resolution files for final rendering.
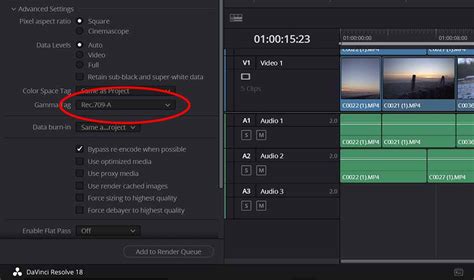
- Codec Considerations: Certain codecs, like H.265 10-bit, can be very demanding. If you experience issues with specific formats, consider transcoding them to a more editing-friendly codec or using the DaVinci Resolve Studio version which offers broader codec support.
Advanced Features and Workflows
DaVinci Resolve's capabilities extend far beyond basic editing. The software supports Blackmagic Cloud for remote collaboration, enabling teams to work together on projects from different locations using cloud-based workflows. This eliminates the need for complex file transfers and project conforming.
The Studio version introduces advanced AI tools, including:
- IntelliScript: Creates a timeline from script text.
- Dialogue Matcher: Helps to match the audio characteristics of dialogue clips.
- Music Editor: Automatically adjusts track length to fit project timing.
- Animated Subtitles: Creates dynamic, animated subtitles.
- Beat Detector: Identifies musical beats for synchronization.
- MultiCam SmartSwitch: Automatically selects camera angles based on speaker detection or other criteria.
Fusion page enhancements in Studio v20 include deep image compositing, multi-layer pipelining, and vector warping, alongside support for VR 180. Magic Mask and depth map tools also receive significant updates.
Hardware Integration
Blackmagic Design offers a range of hardware control surfaces designed to enhance the DaVinci Resolve workflow. These include:
- DaVinci Resolve Speed Editor: A compact keyboard with dedicated edit keys and a high-quality search dial for rapid editing.
- DaVinci Resolve Editor Keyboard: A full-sized QWERTY keyboard with color-coded shortcut keycaps for efficient editing.
- DaVinci Resolve Replay Editor: Adds live camera selection and slow-motion replay capabilities for live broadcast environments.
- DaVinci Resolve Color Panels (Micro, Mini, Advanced): Designed for colorists, these panels provide tactile control over grading parameters, allowing for more intuitive and precise adjustments.
- Fairlight Hardware Consoles (Desktop, Studio): Professional audio mixing consoles that integrate seamlessly with the Fairlight page, streamlining audio post-production workflows.
These hardware solutions are designed to make creative work faster and more intuitive, moving beyond the limitations of mouse and keyboard interaction.
Maintaining and Reinstalling DaVinci Resolve
If you encounter persistent issues or wish to start with a clean slate, a clean reinstall of DaVinci Resolve might be necessary. It is recommended to follow a specific uninstallation process before reinstalling to ensure all previous settings and files are removed. This typically involves uninstalling the application through your system's control panel or application manager, and then potentially deleting residual configuration files. Always back up your project files before undertaking any reinstallation process.
Downloading and installing DaVinci Resolve is a straightforward process that unlocks a world of professional creative tools. The real challenge, and the true excitement, begins once the software is installed and you start exploring its vast capabilities to bring your video projects to life.