Removing unwanted backgrounds from images is a fundamental skill for graphic designers, photographers, and digital artists. Photoshop, a leading image editing software, offers a robust suite of tools and techniques to achieve this, from quick one-click solutions to intricate manual selections. This guide will walk you through various methods for removing backgrounds in Photoshop, ensuring you can achieve precise and professional results, regardless of your image's complexity or your skill level.
Understanding Photoshop's Contextual Task Bar and Layer Visibility
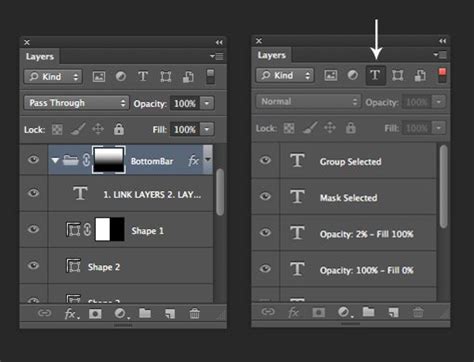
Like many advanced features within applications, Photoshop's background removal capabilities are context-dependent. The availability of tools like "Remove Background" is directly tied to the current state of your document and what is selected. If you find yourself unable to locate the "Remove Background" option, it's crucial to examine your active selection and the visible panels.
For instance, when a Photoshop document is initially opened with nothing selected, the Contextual Task Bar may not appear, and consequently, no options requiring a selection will be present. Similarly, selecting a non-pixel-based layer, such as a Curves adjustment layer, will cause the Contextual Task Bar to display Curves-specific properties, but "Remove Background" will remain absent. The "Remove Background" functionality becomes accessible only when you select an image layer. This is because image layers are the only ones that can contain background content that is intended to be removed. When an image layer is active, "Remove Background" will appear, both within the Contextual Task Bar and as a Quick Action in the Properties panel.
Furthermore, the visibility of panels plays a significant role. If all panels are hidden by pressing the Tab key, you won't see any "Remove Background" buttons, as they reside within these panels. Thus, ensuring the correct layer is selected and relevant panels are visible is the first step to accessing these powerful tools.
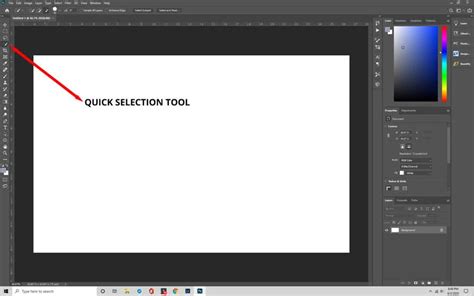
Quick Selection Tool: Swift Selections with AI Assistance
The Quick Selection tool leverages Adobe's Sensei AI technology to intelligently detect edges within your image once you begin painting a selection. This significantly simplifies the process of separating your subject from the background. It's particularly effective for making rapid selections, especially in images with intricate details or when there's a high contrast between your subject and the background.
To use the Quick Selection tool for background removal:
- Sign in to Photoshop and upload your image. You can do this by clicking "Create +" on the menu bar to the left or by selecting "Upload file" on the welcome screen.
- Select the Quick Selection tool from the toolbar. This tool might be nested under the Object Selection tool.
- Toggle the "Detect Objects" switch on. This allows Photoshop to intelligently identify potential subjects.
- Choose your image subject. For example, if you're working with a chair, click on it. Photoshop will highlight your selection with a pink overlay and wiggly lines, confirming you've selected the correct element.
- Copy the selected area. Press
Ctrl + C(orCmd + Con macOS). - Create a new layer. Navigate to the Layers panel on the right, click the "+" sign to add a new layer.
- Paste the selected area into the new layer. Press
Ctrl + V(orCmd + Von macOS). - Hide the original layer. Click the eye icon next to the original layer in the Layers panel. You will now be left with your selected subject on a transparent background.
The "Remove Background" Tool: One-Click Simplicity
For straightforward background removal, Photoshop's dedicated "Remove Background" tool offers an incredibly user-friendly experience. While it excels at quickly erasing backgrounds, it might require additional refinement for images with highly detailed or complex backgrounds. This tool is best suited for images featuring a single subject against a relatively simple backdrop, where speed and ease of use are paramount, and perfect edge smoothness is not the primary concern.
To utilize the "Remove Background" tool:
- Sign in to Photoshop and upload your image.
- Locate the "Remove background" option. This is typically found at the bottom of the image in the editing screen, often accessible through the Properties panel or as a Quick Action.
- Click the "Remove background" option. Photoshop will then automatically scan the image, identify the subject, and remove the background.
This method is exceptionally fast and requires minimal user input, making it ideal for rapid edits or when dealing with a large number of images that share similar characteristics.
Quick Tip Remove Background in Photoshop Tutorial for beginners
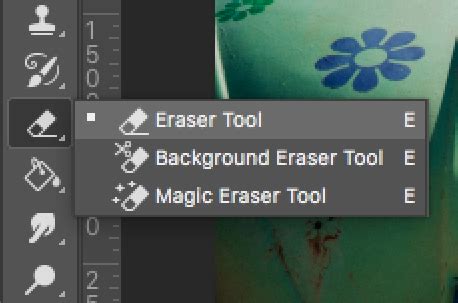
The Eraser Tool: Precision and Control for Intricate Edits
The Eraser tool provides the highest degree of control over your edits, allowing for manual removal of background elements. However, this level of precision demands patience and practice to avoid accidentally erasing parts of your subject. It is the go-to tool when you need to meticulously erase specific areas of the background or when working with images that have irregularly shaped subjects.
To use the Eraser tool for background removal:
- Sign in to Photoshop and upload your image.
- Select the Eraser tool from the toolbar. It might be located beneath the standard Eraser tool.
- Adjust brush settings. In the options bar at the top, you can modify the brush size and hardness. A softer brush will create a more gradual transition, while a harder brush will result in a sharper edge.
- Manually erase the background. Glide the brush over the areas you wish to remove. Zooming in on the image is crucial for detailed work.
- Use short strokes and Undo frequently. For complex areas, it's advisable to use short, controlled strokes and frequently use
Ctrl + Z(orCmd + Zon macOS) to undo any mistakes. - Adjust brush size as needed. You can dynamically change the brush size using the
[and]keys on your keyboard.
Background Eraser Tool: Blending Automation with Control
The Background Eraser tool offers a more sophisticated approach to manual background removal, blending some of Photoshop's automation with the user's direct control. This tool is excellent when you need more precise control over background removal but still want Photoshop to handle some of the heavy lifting. It requires sacrificing some time for greater accuracy compared to the one-click "Remove Background" option.
To employ the Background Eraser tool:
- Open your image in Photoshop and duplicate the Background layer. Right-click the "Background" layer in the Layers panel and select "Duplicate Layer." Name it as you prefer and click "OK."
- Ensure the Properties panel is open. Go to
Window > Properties. - Select your duplicated layer.
- Choose the Background Eraser tool from the toolbox. It may be hidden under the standard Eraser tool.
- Configure tool options. In the options bar at the top:
- Click the brush icon to open the brush panel and adjust the brush size and hardness (near or at 100% hardness is often recommended for defined edges).
- Set Sampling to "Continuous." This is the first of three icons after the brush size option.
- Set Limits to "Find Edges."
- Set Tolerance to a range of 20-25%. A lower tolerance selects fewer color variations, while a higher tolerance selects more.
- Erase the background. Click and hold the mouse button while moving the brush around your subject. The goal is to keep the crosshairs (the center of the tool) from touching your subject. Zoom in for detailed areas.
- Refine settings for difficult areas. If the tool is erasing your subject, undo the action and adjust the settings:
- Change Sampling to "Once." This makes the brush use only the color under the crosshairs at that moment.
- Change Limits to "Discontiguous."
- Adjust Tolerance to around 10%.
This method provides good results and allows you to be in control of defining what constitutes the subject and what is background, especially when contrast isn't high or other automated tools struggle.
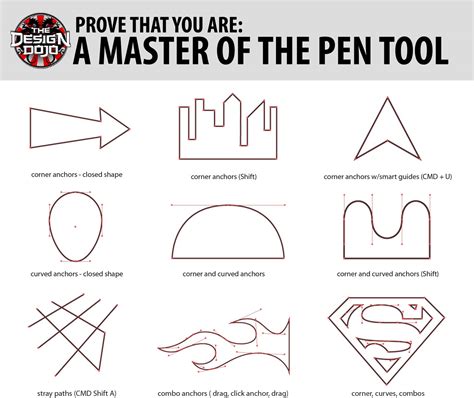
The Pen Tool: Unparalleled Precision for Complex Selections
The Pen Tool is widely regarded as one of the most precise and reliable methods for removing backgrounds in Photoshop, offering the ultimate control over your selections. While it can be the most time-consuming, the accuracy it provides is unmatched, making it ideal for intricate subjects and professional-level edits.
To master background removal with the Pen Tool:
- Open your image and duplicate the Background layer.
- Select the Pen Tool from the toolbar.
- Zoom in closely to your subject.
- Start creating anchor points. Click at the edge of your subject to create the first anchor point. Continue clicking to add subsequent anchor points, tracing the outline of your subject.
- Create curves. For curved lines, click and hold, then drag to produce a curved line, adjusting the curve by moving the mouse.
- Adjust anchor points. Use the Direct Selection Tool (often nested under the Path Selection Tool) to fine-tune anchor points and directional lines for precise adjustments.
- Complete the path. Ensure you connect the final anchor point back to your starting point to close the path.
- Save the path. Open the Paths panel (
Window > Paths). Click the three-bar menu and select "New Path," then name it. - Convert the path to a selection. Right-click your saved path in the Paths panel and select "Make Selection." Click "OK" in the dialog box.
- Invert the selection. To select the background for deletion, go to
Select > Inverse. - Delete the background. Press the
Deletekey. You should now see the checkerboard pattern indicating transparency.
Object Selection Tool: AI-Powered Subject Isolation
Introduced in Photoshop 2022, the Object Selection tool is a remarkable feature that utilizes AI to automatically detect and select objects within your image. This tool significantly speeds up the initial selection process, especially for clearly defined subjects.
To use the Object Selection tool:
- Open your photo in Photoshop.
- Select the Object Selection tool from the toolbar.
- Hover your cursor over your subject. The tool will automatically detect potential objects and highlight them in blue.
- Click on the subject to make the selection. Photoshop will then automatically apply a selection outline (marching ants).
- Refine the selection. If the initial selection isn't perfect, you can add to it by painting with the tool or subtract from it by holding
Alt(Windows) orOption(macOS) and painting over the unwanted areas. - Unlock the image layer if necessary. If your image is locked as a "Background" layer, you'll need to unlock it to allow for transparency. Double-click the layer or click the lock icon on the right side of the layer in the Layers panel. The layer will typically rename to "Layer 0."
- Invert the selection. Go to
Select > Inverseto select the background. - Delete the background. Press the
Deletekey.
Magic Lasso Tool: Intuitive Freehand Selection
The Magic Lasso tool offers a more intuitive, freehand approach to selecting subjects. You draw a rough outline around your subject, and Photoshop attempts to intelligently snap the selection to the edges.
To use the Magic Lasso tool:
- Open your image and duplicate the Background layer.
- Select the Magic Lasso tool from the toolbar.
- Draw loosely around your subject. As you move your cursor, the tool will attempt to follow the contours of the subject.
- Complete the selection. Connect back to your starting point to close the loop.
- Invert the selection. Go to
Select > Inverse. - Delete the background. Press the
Deletekey.
Refining Selections: "Select and Mask" and Layer Masks
Regardless of the initial selection method used, refining the edges of your subject is often necessary for a seamless result. Photoshop's "Select and Mask" workspace (formerly "Refine Edge") is specifically designed for this purpose.
To refine your selection:
- Make an initial selection using any of the tools mentioned above.
- Enter the "Select and Mask" workspace. You can usually find this option in the options bar when a selection tool is active, or by going to
Select > Select and Mask. - Utilize the tools within "Select and Mask."
- Refine Edge Brush Tool: Paint over areas where the selection needs improvement, particularly hair or fur, to help Photoshop differentiate between the subject and background.
- Global Refinements: Adjust sliders for Radius, Smooth, Feather, Contrast, and Shift Edge to fine-tune the overall selection.
- View Modes: Experiment with different view modes (e.g., Onion Skin, Overlay, On Black, On White) to better assess the selection's accuracy.
- Output the selection. Choose "Output To" as "Layer Mask" for non-destructive editing. This creates a mask on your layer, hiding the background without permanently deleting it.
Layer masks are a fundamental non-destructive editing technique in Photoshop. By applying a mask, you can selectively hide parts of a layer. White on the mask reveals the layer content, while black conceals it. Gray tones create semi-transparency. You can paint directly on the mask with black and white brushes to further refine the edges of your subject.
Saving Your Background-Free Image
Once you have successfully removed the background, it's crucial to save your image in a format that supports transparency. The most common and widely used format for this purpose is PNG (.png).
To save your image:
- Go to
File > Save AsorFile > Export > Save for Web (Legacy). - Choose PNG as the file format.
- Ensure that the option to preserve transparency is enabled.
Saving as a JPEG (.jpg) will not preserve transparency, as JPEGs always fill the background with a solid color (usually white).
Third-Party Solutions: Photoroom for Simplicity
For users seeking an even simpler, automated solution, third-party tools like Photoroom offer AI-powered background removal. Photoroom utilizes advanced image recognition and segmentation algorithms to automatically remove backgrounds, producing high-quality results with minimal effort. This is particularly beneficial for individuals with limited editing experience or those who need to process a large volume of images quickly. Photoroom provides a web editor and mobile applications for both iOS and Android, and its Batch Mode feature allows for the simultaneous removal of backgrounds from hundreds of images, a significant time-saver for businesses and e-commerce sellers.
Quick Tip Remove Background in Photoshop Tutorial for beginners
By understanding and utilizing the diverse array of tools and techniques available in Photoshop, from AI-driven features to meticulous manual methods, you can master the art of background removal and elevate your image editing to a professional level.