The art of visual storytelling has found a powerful and accessible ally in digital tools, with Google Docs emerging as a surprisingly versatile platform for creative expression. While primarily known as a word processing application, its integration with Google's ecosystem and its inherent flexibility allow for the creation of compelling photo collages. This guide will walk you through the process, transforming your scattered images into cohesive and impactful visual narratives. Whether you're a student aiming to impress with a project, a professional looking to enhance a presentation, or simply an individual wanting to preserve memories in a unique way, understanding how to leverage Google Docs for collage creation opens up a world of creative possibilities.
The Foundation: Accessing and Preparing Your Workspace
Before embarking on your collage-making journey, the first crucial step is to ensure you have the necessary tools at your disposal. At its core, creating a collage in Google Docs, much like many other digital creative endeavors, begins with access to the platform itself. To begin, you’ll need to open Google Docs. If you don’t already have a Google account, you’ll need to create one. This free account serves as your gateway to the entire Google suite of applications, including Docs, Sheets, Slides, and more.
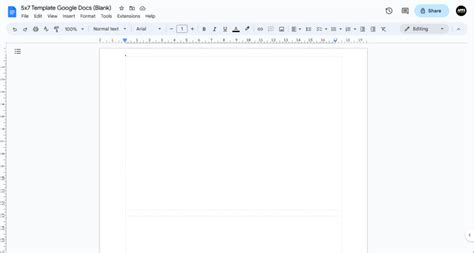
Once you've logged into your Google account, navigate to Google Docs. For the purpose of creating a collage, it’s often beneficial to start with a clean canvas. Therefore, you might want to start with a blank layout. This provides you with the maximum freedom to arrange your elements without pre-existing formatting or design constraints dictating your choices.
Integrating Your Visual Assets: Importing and Positioning Photos
The heart of any collage lies in its constituent images. Google Docs offers a straightforward method for bringing your personal photographs into your digital workspace. To start, select ‘Image’ from the toolbar. This action will present you with a menu of options detailing where to upload your images from. You can choose to upload photos directly from your local computer folders, a process that allows you to select images you’ve previously saved. Alternatively, you can pull images from your Google Drive, Google Photos, or even search the web directly through Google Docs, offering a wide array of sources to draw from.
Once you’ve added your images to the document, the real creative work begins: arranging them. Google Docs empowers you with intuitive drag-and-drop functionality. Select an image by clicking on it, and then you can easily drag it across the page to reposition it wherever you desire. This immediate visual feedback allows for rapid experimentation with different layouts and compositions.
Refining the Picture: Resizing and Adjusting Images
Beyond simple repositioning, the ability to control the size of your images is paramount to achieving a balanced and aesthetically pleasing collage. To resize images, simply click on an image to select it. You will notice small blue squares appearing at the corners and along the edges of the selected image. Clicking and dragging any of these corner squares will allow you to proportionally resize the image, making it larger or smaller while maintaining its aspect ratio. Dragging the squares on the sides will stretch or compress the image, which can be used for stylistic effect, though care should be taken not to distort the image excessively unless that is the intended outcome.
This granular control over image dimensions is essential for creating visual hierarchy within your collage. Larger images can serve as focal points, while smaller images can fill in gaps or add supporting details. The ability to adjust the pictures' position easily with your mouse, combined with precise resizing capabilities, makes Google Docs a remarkably capable tool for visual arrangement.
Enhancing the Aesthetic: Backgrounds, Shapes, and Filters
A collage is more than just a collection of photos; it's a unified visual statement. To elevate your creation, consider the impact of a well-chosen background. A visually appealing background can significantly enhance your collage, providing context, mood, or simply a clean foundation for your images to stand out. To change the background, go to 'Format' in the menu bar, then select 'Background.' Here, you can choose a solid color, a gradient, or even an image from your computer or the web.
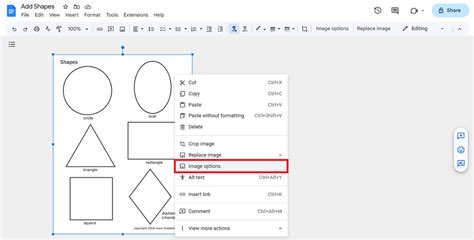
Google Docs also offers tools to add further visual interest and structure. You can choose a shape or line tool from the toolbar and draw it on your slide. These shapes can be used as frames for your photos, to create borders, or to add abstract design elements. You can customize the color, thickness, and transparency of these shapes to perfectly complement your collage.
Furthermore, while Google Docs itself doesn't have built-in photo editing filters in the same way a dedicated photo editing app might, you can leverage external tools before uploading your images. For instance, you can use online photo editors or other software to apply different filters to suit your mood or to achieve a specific aesthetic. This allows you to pre-process your images to convey a particular feeling, whether it's a vintage look, a vibrant pop, or a muted, artistic tone. The Online Photo Collage Maker mentioned in the provided information, for example, highlights the ability to apply different filters to suit your mood, a feature that can be replicated by preparing your images beforehand.
Adding Depth and Dynamism: Themes and Layout Experimentation
To streamline the design process and imbue your collage with a professional touch, consider utilizing pre-designed themes. Using a pre-designed theme can save time and add a professional touch to your collage. There are many free Google Slides themes available online that can be adapted for use in Google Docs, offering a starting point with established color palettes, font pairings, and layout structures. While Google Docs doesn't directly offer "themes" in the same way Slides does, you can import elements from a Google Slides theme into your Docs document or use them as inspiration for your own design.
Experimentation is key to discovering the most effective arrangement for your images. Don’t be afraid to try different arrangements and designs. What might seem like a random placement at first could, upon further adjustment, become the most compelling composition. Consider grouping similar photos together, creating a chronological flow, or juxtaposing contrasting images for dramatic effect. Sometimes less is more; keep it simple, focusing on the quality and impact of your chosen images rather than overcrowding the canvas.
Google Slides: Master Slides and Layouts
Beyond the Basics: Leveraging Google Slides for Enhanced Collage Creation
While Google Docs provides a solid foundation for creating collages, it's worth noting that Google Slides offers a more robust and purpose-built environment for this type of visual project. Creating a collage on Google Slides is a fun and creative way to combine multiple images and other elements into one cohesive visual presentation. It is a fantastic way to showcase photos, ideas, and designs appealingly. The interface of Google Slides is inherently designed for presentations, which often involve visual elements and layouts.
In Slides, you can insert images, resize them, crop them, and arrange them with the same ease as in Docs. However, Slides also offers more advanced features like layering, which allows you to place images precisely on top of or behind one another, creating depth and complexity. You can also easily add text boxes with various formatting options, shapes, and even animations if you wish to create a dynamic collage. The ability to choose a transition for your slide, though more relevant for presentation sequences, can also be an interesting element to consider if your collage is part of a larger digital display.
The "Online Photo Collage Maker" described in the user's input, which can automatically create beautiful collages in any shape you want from hundreds of photos, highlights the potential for more automated and sophisticated collage generation. While Google Docs and Slides don't offer this level of automation out-of-the-box, they provide the manual tools to achieve similar artistic outcomes through careful arrangement and design.
The Power of Simplicity and Creativity
Ultimately, creating a collage on Google Docs is a fun and creative way to display your photos and ideas. With these simple steps, you can design a beautiful collage that’s perfect for any occasion. The platform’s accessibility, combined with its core functionalities, makes it an ideal choice for users of all technical abilities. The ability to select a photo of your choice from your local folders and then easily adjust its position with your mouse is a testament to its user-friendly design.
The software mentioned, which "takes hundreds of your photos and in seconds, automatically creates beautiful collages in any shape you want," points to the broader landscape of digital collage tools. However, the manual approach in Google Docs or Slides allows for a deeper level of artistic control and personalization. This process is not just about assembling images; it’s about curating a narrative, evoking emotions, and communicating ideas visually. It’s time to get creative! Let’s start!
If you enjoyed learning how to make a collage, you might also be interested in our blog post on How to Create a Banner in Google Slides. This guide will teach you everything you need to know about designing custom banners for your presentations, projects, and more, further expanding your digital design repertoire. Arockia Mary Amutha, a seasoned senior content writer at SlideEgg, brings over four years of dedicated experience to the field. Her expertise in presentation tools like PowerPoint, Google Slides, and Canva shines through in her clear, concise, and professional writing style, a testament to the value of clear instruction in mastering these creative platforms.