Paint.NET, a powerful yet accessible image editing software, offers a straightforward method for removing backgrounds from your photos, leaving you with a transparent canvas to insert new scenery or elements. This tutorial will guide you through the process, from initial selection to the final saved image, ensuring a professional-looking result. The core principle involves making a precise selection of the area you wish to remove, deleting it to reveal transparency, and then seamlessly integrating a new background.
Preparing Your Image for Background Removal
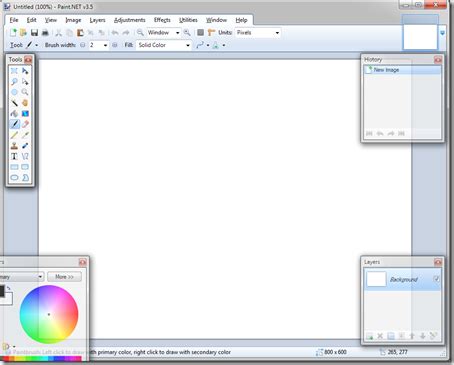
The journey begins with opening your primary image in Paint.NET. Navigate to File > Open and select the photograph you intend to work with. Once the image is loaded, it's a prudent step to duplicate the existing layer. This is achieved by selecting Layers > Duplicate Layer. After duplication, you can temporarily hide the original layer by unchecking its visibility option. This duplicated layer will serve as your working canvas, preserving the original should any adjustments be needed later.
Selecting the Background Area
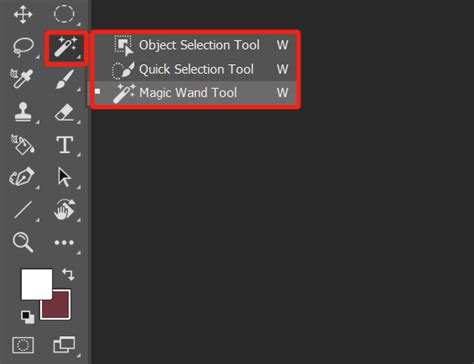
The crucial step in removing the background is accurate selection. For this, Paint.NET provides several selection tools, but for straightforward background removal, the Magic Wand tool is often the most effective. Click the Magic Wand tool icon, typically found in the toolbar. The key to using this tool effectively lies in understanding the "Tolerance" setting. This setting determines how similar in color pixels must be to be included in the selection.
When you click on the background area with the Magic Wand, a selection will form around the pixels that match the color under your cursor, within the defined tolerance. It is imperative to ensure this selection is formed on the background image, not inadvertently encompassing the main subject of your photo. You may need to experiment with the tolerance level. For instance, if the background has subtle variations in color or texture, a lower tolerance might be required to avoid selecting parts of your subject. Conversely, for a more uniform background, a higher tolerance can speed up the selection process. In our example, setting the tolerance to 31% proved effective for isolating the background.
Deleting the Background and Refining Edges
Once you are satisfied with the selection encompassing the background, the next step is to remove it. Simply press the Delete key on your keyboard. This action will erase the selected pixels, leaving behind a transparent background represented by a checkerboard pattern.
However, the initial deletion might not be perfect. There might be small remnants of the background or slightly jagged edges around your subject. This is where the Eraser Tool becomes invaluable. Select the Eraser Tool from the toolbar. For precise erasing, you can adjust the "Hardness" setting. A hardness of 75% or 100% is often suitable for cleanly removing stray pixels without leaving soft, blurry edges. Carefully go over any areas where the background still lingers, ensuring a clean separation between your subject and the now-transparent background. Pay close attention to intricate details like hair or fur, where precision is paramount.
Introducing a New Background
With the original background successfully removed, it's time to introduce a new one. This is where the creative possibilities truly open up. You will need to have your desired background image ready.
First, select all of your main project, which now has a transparent background, by navigating to Edit > Select All. Then, copy this selection to your clipboard using Edit > Copy.
Next, open your chosen background image in Paint.NET. If you haven't already, open it via File > Open. Now, you need to paste your main subject (with the transparent background) as a new layer on top of your background image. Go to Edit > Paste Into New Layer. This action places your subject as a distinct layer above the background.

Adjusting and Sizing for a Seamless Blend
After pasting your subject as a new layer, it might not perfectly align or fit the dimensions of the background. You will likely need to adjust its size and position.
To resize your subject layer, select the layer itself in the Layers panel. Then, go to Layers > Rotate / Zoom. A dialog box will appear, allowing you to use a slider to zoom in or out. Adjust the zoom level until your subject layer's dimensions match the size of the main project layer (your background). Once you are satisfied with the size, click OK. You can then use the Move Selected Pixels tool (or simply drag the layer if it's the only thing on it) to position your subject precisely where you want it on the new background. Pressing the Enter key can sometimes finalize size adjustments and ensure they are applied correctly.
Sometimes, the background layer itself might need resizing to accommodate your subject. If this is the case, select the background layer and use the same Layers > Rotate / Zoom option to adjust its dimensions accordingly.
3 of 6 -- Paint.Net More with tools and Layers
Saving Your Composite Image
The final step is to save your newly created image. To do this, navigate to File > Save As. In the Save As dialog box, you will be prompted to enter a file name. Choose a descriptive name for your project. Crucially, for images with transparent backgrounds, you must select a file format that supports transparency. The recommended options in Paint.NET are PNG or PDN (Paint.NET's native format). Selecting PNG will ensure that any transparency you've created is preserved when you open the image in other applications or on the web. PDN will save all layers and editing capabilities, which is useful if you plan to return to this project later.
By following these steps, you can effectively remove backgrounds from your images using Paint.NET and replace them with any background of your choosing, opening up a world of creative possibilities for your digital art and photo editing projects. The process, while requiring attention to detail, is designed to be intuitive and accessible, even for those new to image manipulation software.
Understanding Tolerance and its Impact
The "Tolerance" setting in Paint.NET's Magic Wand tool is a critical parameter that dictates the sensitivity of the selection. It essentially defines the range of color similarity that the tool will consider when making a selection. A lower tolerance value means the Magic Wand will only select pixels that are very close in color to the pixel you clicked on. This is useful when you have a uniform background with distinct color differences from your subject. For instance, if your subject is a bright red apple on a plain white background, a low tolerance would effectively select only the white pixels.
Conversely, a higher tolerance value allows the Magic Wand to select pixels that are more broadly similar in color. This can be beneficial for backgrounds with gradients or subtle color variations. If your background transitions from light blue to dark blue, a higher tolerance might be necessary to capture the entire background in a single click. However, increasing the tolerance too much can lead to the selection "bleeding" into your subject, especially if your subject has colors that are close to the background. Therefore, finding the optimal tolerance is often an iterative process. You might need to click multiple times, holding down the Shift key to add to an existing selection, or use the Ctrl key to subtract from a selection if the Magic Wand selects too much.

The Role of Layer Management
Effective layer management is fundamental to achieving professional results in Paint.NET, especially when performing complex edits like background removal and replacement. Each layer in Paint.NET acts as a transparent sheet stacked on top of others. This allows you to manipulate individual elements of your image independently without affecting other parts.
When you duplicate your initial layer, you create a safety net. If you make a mistake while erasing or selecting, you can always revert to the duplicated layer and start that particular step again. When you paste your subject onto a new background, it's crucial that it appears on its own layer. This ensures that you can move, resize, rotate, or even apply adjustments to your subject without altering the background image beneath it.
The ability to toggle layer visibility (by clicking the checkbox next to the layer in the Layers panel) is also incredibly useful. You can hide the background layer to focus solely on refining the edges of your subject, or hide the subject layer to ensure your background is perfectly sized and positioned. Understanding how layers interact â how they blend and overlap â is key to creating a cohesive final image.
Advanced Refinement Techniques
While the Eraser Tool is effective for basic cleanup, more complex edge refinement might be necessary for certain images. For instance, if your subject has fine details like wispy hair or translucent elements, a simple eraser might not suffice. In such cases, you might consider using the "Anti-aliasing" option when using selection tools, which can smooth the edges of a selection.
Another technique involves using the "Feather" selection. Before deleting the background, you can feather the selection by a few pixels. This softens the transition between the selected area and the unselected area, creating a more natural blend when a new background is introduced. This can be accessed through the selection tool's options.
For extremely intricate details, some users might resort to more advanced techniques that involve creating precise masks or using specialized plugins for Paint.NET, though these are beyond the scope of this basic tutorial. However, for most common background removal tasks, careful use of the Magic Wand, Eraser, and appropriate tolerance settings will yield excellent results.
File Formats and Transparency Explained
The choice of file format when saving your image is paramount, especially when dealing with transparency. Transparency refers to areas of an image that are completely see-through, allowing whatever is behind them to be visible.
PNG (Portable Network Graphics): This is the most common and recommended format for images with transparency. PNG supports alpha channel transparency, meaning it can store varying degrees of opacity, from fully opaque to fully transparent. This is ideal for logos, graphics, and any image where you need clean, sharp transparent areas.
PDN (Paint.NET Document): This is Paint.NET's native file format. Saving as PDN preserves all layers, selection masks, and other editable information within your project. This is invaluable if you intend to revisit and further edit the image later. However, PDN files are generally larger than PNGs and are not universally supported by all image viewers or web browsers for direct display.
JPEG (Joint Photographic Experts Group): This format is widely used for photographs due to its excellent compression capabilities, resulting in smaller file sizes. However, JPEGs do not support transparency. Any transparent areas in your image will be automatically filled with a solid color (usually white) when saved as a JPEG, rendering your background removal efforts moot for the purpose of transparency. Therefore, avoid saving images with transparent backgrounds as JPEGs if you want to maintain that transparency.
Understanding these file formats ensures that your work is saved correctly and that the transparency you've meticulously created is maintained. When in doubt, PNG is the go-to format for images intended for web use or further editing where transparency is a requirement.
tags: #paint #net #remove #background