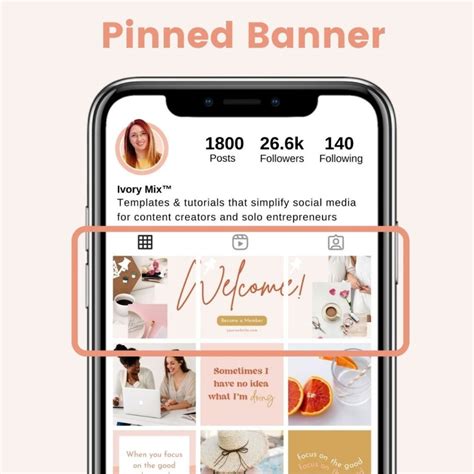
If you’ve ever scrolled past a beautifully cohesive row of pinned Instagram posts and thought, “How did they do that?”-you’re in the right place. In this tutorial, we’ll walk you through how to create a seamless, collage-style row of three Instagram posts using Canva. This technique is perfect for showcasing your services, launching a new product, or just leveling up your visual brand. The strategic arrangement of content on your Instagram profile can significantly impact how users perceive your brand, making a continuous collage a powerful tool for visual storytelling and brand cohesion.
Why Create a Continuous Instagram Grid?
With Instagram now allowing you to pin posts to the top of your feed, you have a powerful opportunity to highlight your most important content. Instead of three random posts, why not turn them into a single, continuous design that grabs attention instantly? This approach transforms your profile from a collection of individual posts into a curated visual narrative, drawing users in and encouraging further exploration of your content. A well-executed continuous grid can act as a powerful first impression, conveying professionalism, creativity, and a clear brand identity.
This is great for:
- Highlighting your services: Present a comprehensive overview of what you offer, with each post detailing a different aspect or benefit.
- Sharing your brand message: Use the three-post canvas to tell a story, convey a core value, or emphasize a key message that defines your brand.
- Featuring a recent launch: Build anticipation and excitement by unveiling a new product or service across multiple posts, creating a sense of event and importance.
- Creating a custom “about me” section visually: Offer a more engaging and visually appealing introduction to yourself or your team, humanizing your brand.
The ability to pin these posts means your carefully crafted continuous collage will remain at the forefront of your profile, ensuring that your most impactful visual statement is always the first thing visitors see. This permanence elevates the importance of this design choice, making it a strategic element of your Instagram marketing.
Understanding the Pixel Dimensions for Seamless Design
Before diving into the design process, it's crucial to understand the foundational elements that enable a seamless transition between Instagram posts. Each individual Instagram post, when viewed on its own, is a square. The standard dimension for a square Instagram post is 1080 pixels wide by 1080 pixels tall. This consistent sizing is what makes the continuous collage technique possible.
To create a design that spans three posts side-by-side, we need to calculate the total width required. Since each post is 1080 pixels wide, for three posts, we multiply this by three:
1080 pixels (width per post) × 3 (number of posts) = 3240 pixels (total width)
The height remains the same as a single Instagram post, which is 1080 pixels. Therefore, the overall canvas size for our continuous collage will be 3240 pixels wide by 1080 pixels tall. This expansive canvas allows us to design a single, unified image that will be cropped and posted as three separate but connected squares.
Instagram Puzzle Feed Tutorial 2025 | FREE & Easy!
Step 1: Setting Up Your Canva Design Canvas
Canva is an accessible and user-friendly graphic design tool that is ideal for creating this type of visual content, even for those with limited design experience. The platform provides a wide array of templates, elements, and editing tools that can be leveraged to achieve a professional and polished look.
To begin, open Canva and navigate to the custom design creation option.
- Open Canva: Go to www.canva.com or open the Canva app.
- Create a New Design: Click on the "Create a Design" button, usually located in the top right corner of the homepage.
- Select Custom Size: From the dropdown menu or the options that appear, choose "Custom Size." This option allows you to input precise dimensions for your design.
- Input Dimensions: In the fields provided for width and height, enter the calculated dimensions:
- Width: 3240 px
- Height: 1080 px
- Create Design: Click the "Create new design" button.
You will now be presented with a long, horizontal canvas. This canvas represents the combined area of your three Instagram posts laid out side-by-side. Think of it as a single large image that you will later divide into three equal parts. This unified canvas is crucial for ensuring that elements, colors, and imagery flow seamlessly across the boundaries of individual posts.
Step 2: Adding Guides to Divide Your Layout
Precision is key when creating a continuous design that needs to break perfectly into three distinct squares. Without clear visual markers, it's easy to misalign elements, leading to an unintended break in the seamless flow. Canva's ruler and guide feature is invaluable for this purpose, acting as invisible lines that help you position your design elements accurately.
To set up these guides:
Enable Rulers and Guides:
- In your Canva design, go to the top menu bar.
- Click on "File."
- Navigate to "View Settings."
- Select "Show rulers and guides."
- If you don't see "File" in the top menu, you might be in a template editing view. Look for a similar option within the main editor interface, often under "File" or "View."
Drag Vertical Guides:
- Once rulers are visible at the top and left of your canvas, you'll see measurement scales.
- Click and hold your mouse cursor on the left-side ruler (the vertical one). Drag your cursor onto the canvas. This will create a vertical guide.
- Position the first guide: Drag this guide to the 1080px mark on the top ruler. This line will mark the exact boundary between your first and second Instagram posts.
- Position the second guide: Repeat the process, dragging another vertical guide from the left ruler. This time, position it at the 2160px mark on the top ruler. This line will mark the boundary between your second and third Instagram posts.
You will now have two vertical lines on your canvas at 1080px and 2160px. These guides divide your 3240px wide canvas into three equal 1080px sections, each corresponding to one Instagram post. These guides are non-printing and will not appear in your final exported image. They are purely for your reference during the design process, ensuring that your elements align perfectly and that the visual narrative flows without interruption from one post to the next.

Step 3: Designing Your Seamless Post
This is where the creative process truly begins. With your canvas set up and guides in place, you can now design a single, cohesive image that will be divided into three Instagram posts. The key is to think of this as one continuous piece of artwork rather than three separate squares.
Principles for Seamless Design:
- Background Continuity: Use a consistent background color, gradient, or texture that extends across the entire 3240px width. This is the most fundamental element for achieving a seamless look. Avoid abrupt changes in background mid-design unless it's a deliberate stylistic choice that still feels connected.
- Element Placement: When placing text, images, or graphic elements, consider how they will be divided by the guides.
- Central Focus: Often, a key element or focal point is placed in the center post, spanning across the guides. This ensures it remains prominent regardless of how individual posts are viewed or interacted with.
- Flowing Elements: Images or graphics can be designed to "bleed" across the guide lines. For example, a person's arm might extend from the first post into the second, or a pattern might continue uninterrupted.
- Text Considerations: If you're placing text, ensure that important words or phrases do not fall directly on the guide lines, as they might be awkwardly split or less impactful when viewed individually. It’s often best to keep text primarily within one of the three sections, or ensure it's legible even if partially bisected.
- Color Palette: Maintain a consistent color palette throughout the design. This reinforces brand identity and creates a harmonious visual experience. Use colors that complement each other and are representative of your brand.
- Imagery and Graphics: If using multiple images or graphics, ensure they are arranged in a way that creates a sense of unity. This could involve using similar styles, consistent lighting, or a narrative connection between the visuals.
Design Process in Canva:
- Add Background: Start with a background color, gradient, or image that spans the entire canvas.
- Incorporate Visuals: Upload your photos or use Canva's stock library. Position them, resize them, and arrange them so they flow across the guides. You can use the guides to ensure that a subject's face is entirely within one post, or that a landscape scene continues smoothly.
- Add Text: Use the text tool to add your messaging. Place text strategically. For instance, a main headline might be in the center post, with supporting text in the side posts.
- Use Graphic Elements: Add shapes, lines, icons, or illustrations to enhance your design. Ensure these elements also contribute to the overall flow and continuity.
- Refine and Adjust: Zoom in and out to check the overall composition and the seamlessness between the imagined posts. Use the guides to make precise adjustments to element placement.
Once you are satisfied with your design, you will export this large image and then use a tool to split it into three equal squares. Many online tools or even Canva itself (by creating three separate 1080x1080 designs and manually cropping) can assist with this final step.
Step 4: Exporting and Dividing Your Design
After meticulously crafting your continuous collage on the large 3240x1080px canvas in Canva, the next crucial step is to prepare it for Instagram. This involves exporting the single large image and then dividing it into three individual 1080x1080px squares.
Exporting from Canva:
- Download: In Canva, click the "Share" button (usually in the top right corner).
- Select File Type: Choose "PNG" or "JPG" as the file type. PNG is generally recommended for graphics with text and sharp lines to maintain quality, while JPG is good for photographic images and can result in smaller file sizes.
- Download: Click the "Download" button. You will receive a single, large image file.
Dividing the Image:
There are several ways to divide your large image into three equal squares:
- Using an Online Cropping Tool: Search for "Instagram grid splitter" or "image splitter" online. Many free tools allow you to upload your large image and specify how many rows and columns you want to divide it into (in this case, 1 row and 3 columns). These tools will automatically crop and provide you with the three separate image files. This is often the quickest and most straightforward method.
- Using Canva's "Copy Page" Feature:
- After downloading your 3240x1080px design, create a new design in Canva with the standard Instagram post dimensions: 1080x1080px.
- Go back to your original 3240x1080px design.
- Select all elements on your canvas.
- Copy them (Ctrl+C or Cmd+C).
- Go to your new 1080x1080px design.
- Paste the elements (Ctrl+V or Cmd+V).
- Manually position the pasted elements so that the first third of your original design (0-1080px) fills this canvas. You might need to adjust the position of your pasted elements.
- Download this first 1080x1080px post.
- Repeat steps 3-8 for the second third of your design (1080-2160px), pasting the elements and positioning them correctly. Download the second post.
- Repeat again for the final third (2160-3240px). Download the third post.While this method is more manual, it keeps you within the Canva ecosystem.
- Using Photo Editing Software: If you have access to software like Adobe Photoshop or GIMP, you can open your large image and use the crop tool with precise dimensions (1080x1080px) to slice it into three sections.
Once you have your three individual 1080x1080px image files, you can upload them to Instagram. Crucially, you must upload them in the correct order to maintain the continuous flow. The first image you upload will appear on the left, the second in the middle, and the third on the right.
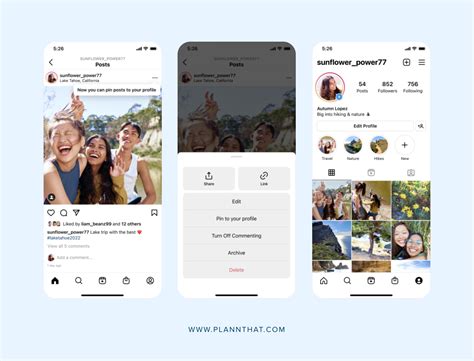
Step 5: Uploading to Instagram in the Correct Order
The final step in bringing your continuous collage to life on your Instagram profile is uploading the three individual image files in the precise sequence that preserves the visual narrative. If you upload them out of order, the seamless effect will be broken, and your carefully crafted design will lose its intended impact.
The Order of Upload:
Instagram displays your feed from left to right, top to bottom. When you pin posts, they appear at the very top of your profile, maintaining this left-to-right order. Therefore, the image that represents the leftmost section of your 3240px design must be uploaded first.
- Upload the Left Post: Select the image file that corresponds to the first 1080x1080px section of your original design. This is the image you want to appear on the far left of your three-post row.
- Upload the Center Post: Next, select the image file for the middle 1080x1080px section. This will appear in the center.
- Upload the Right Post: Finally, select the image file for the rightmost 1080x1080px section. This will appear on the far right.
Using the Pin Feature:
After uploading all three posts, you can use Instagram's pin feature to ensure they remain at the top of your profile.
- Go to your profile page.
- Tap the three dots (…) on the top right of the post you want to pin.
- Select "Pin to profile."
- Repeat this for all three posts in your continuous collage.
By pinning them, you guarantee that this visually striking row will be the first thing visitors see, making a strong and cohesive first impression. This strategy transforms your Instagram grid from a simple gallery into a deliberate and engaging visual experience, effectively communicating your brand's aesthetic and message.
Bonus Tip: Adapting the Technique for Carousel Posts
The principles behind creating a continuous collage for your pinned feed can be effectively adapted to design engaging Instagram carousel posts. A carousel post allows you to include multiple images or videos within a single post, with users swiping to view each slide. Creating a seamless visual flow between these slides can significantly enhance the storytelling and engagement potential of your carousel.
Applying the Continuous Design to Carousels:
The core concept remains the same: design a single, wide canvas that encompasses all the slides of your carousel.
- Determine the Number of Slides: Decide how many slides your carousel will have. This could be three, five, ten, or any number Instagram allows.
- Calculate Canvas Width: Multiply the width of a single Instagram post (1080px) by the number of slides. For example, a five-slide carousel would require a canvas of 1080px × 5 = 5400px width. The height remains 1080px.
- Set Up Guides: In your design tool (like Canva), set up your canvas to these new dimensions (e.g., 5400x1080px). Then, add vertical guides at intervals of 1080px, 2160px, 3240px, and 4320px to mark the boundaries of each slide.
- Design with Flow: Design your content across this wide canvas, ensuring that elements, images, or text transition smoothly from one guide to the next. This allows for a narrative or visual story to unfold as users swipe through the carousel.
- Export and Slice: Export the entire wide image and then use a splitter tool or manual cropping to divide it into the individual 1080x1080px files for each slide.
- Upload in Order: When uploading to Instagram, ensure you select the sliced images in the correct order from left to right to maintain the seamless flow.
This technique is particularly effective for:
- Telling a sequential story: A step-by-step tutorial, a before-and-after comparison, or a narrative progression.
- Showcasing detailed products: Displaying different angles, features, or variations of a product across multiple slides.
- Creating immersive visual experiences: Using a panoramic image or a connected graphic that unfolds as the user swipes.
By extending the continuous collage concept to carousels, you can create highly engaging and visually impressive content that captures and holds your audience's attention, encouraging interaction and deeper exploration of your brand. This method elevates standard carousel posts into mini-visual experiences, making your content more memorable and shareable.