Adobe Photoshop, a cornerstone of digital art and image manipulation, offers a robust suite of tools for both intricate design and straightforward edits. Among its many capabilities, mirroring an image-or flipping it-is a fundamental technique used by professionals and enthusiasts alike. Whether for aesthetic purposes, correcting accidental mirror-like captures, or constructing complex visual patterns, understanding how to mirror an object in Photoshop is an essential skill. This guide delves into the various methods for flipping entire images, individual layers, and even offers creative avenues for utilizing these mirroring techniques.
Understanding the Mirroring Concept in Photoshop
Flipping an image in Photoshop is essentially creating a mirror reflection of it. This can be done either horizontally (left to right) or vertically (top to bottom). The purpose of mirroring can range from practical, such as correcting a selfie taken in a mirror, to highly creative, like building symmetrical patterns or achieving surreal visual effects. While Photoshop is renowned for its professional-grade features, it also excels at simplifying common tasks like image flipping.
Mirroring the Entire Image: Flip Canvas
When you need to mirror the entire image as a whole, Photoshop provides a direct command. This method affects the entire canvas and all its contents simultaneously.
How to Flip the Whole Image
- Open your image in Photoshop. Navigate to
File > Openand select the image you wish to work with. - Access the Image Rotation menu. In the top menu bar, click on
Image, then hover overImage Rotation. - Choose your flip option. From the dropdown, select either
Flip Canvas HorizontalorFlip Canvas Vertical.
This action will instantly mirror your entire image. It's a quick, one-click solution for when the entire composition needs to be reflected.
Mirroring Specific Elements: Flipping Layers
Often, you might only need to mirror a particular element within your image, such as a logo, watermark, text, or a specific object. In such cases, flipping the entire canvas would be counterproductive. Photoshop allows you to selectively flip individual layers.
There are several effective ways to flip a single layer:
Method 1: Using the Edit Menu
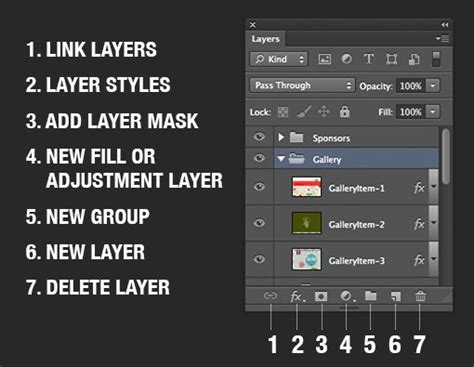
- Select the desired layer. In the Layers panel (usually found on the right side of the screen), click on the layer containing the object you want to flip.
- Access the Transform options. Go to the top menu bar and click
Edit, thenTransform. - Choose your flip option. From the submenu that appears, select
Flip HorizontalorFlip Vertical.
Method 2: Using Free Transform with a Right-Click
- Activate Free Transform. Select the layer you wish to flip. Then, go to
Edit > Free Transform. Alternatively, you can use the keyboard shortcutCtrl + Ton Windows orCommand + Ton Mac. A bounding box will appear around your selected layer. - Right-click within the transform box. Once the bounding box is active, right-click anywhere inside it.
- Select flip option. A small context menu will pop up. Choose either
Flip HorizontalorFlip Vertical.
This method is particularly useful as it allows for immediate visual feedback within the transform box.
Method 3: Keyboard Shortcuts and Right-Click
This method combines the Free Transform shortcut with the context menu for a swift operation.
- Select the layer. Choose the layer you intend to flip from the Layers panel.
- Initiate Free Transform. Press
Ctrl + T(Windows) orCommand + T(Mac). - Right-click and choose flip. With the transform box active, right-click on the image and select
Flip HorizontallyorFlip Vertically.
Important Note on Locked Layers: If you find that the transform options are unavailable, your layer might be locked. This is common with the default "Background" layer. To unlock it, simply double-click on the layer in the Layers panel. A dialog box will appear, allowing you to rename the layer (e.g., to "Layer 1") and click "OK." Once unlocked, you can proceed with transforming and flipping.
Distinguishing Flipping from Rotating
It's crucial to understand that flipping (mirroring) is distinct from rotating an image. Rotating an image involves turning it by a specific degree (e.g., 90, 180, or a custom angle), akin to tilting your head. Flipping, on the other hand, creates a reflection. While both alter the image's orientation, they produce entirely different visual outcomes.
How to Rotate an Image in Photoshop
If your goal is to rotate rather than mirror, Photoshop offers straightforward options:
- Open your image.
- Navigate to Image Rotation. Go to
Image > Image Rotation. - Select the desired rotation. You can choose from predefined angles like
90° Clockwise,90° Counterclockwise,180°, orArbitrary...for custom angles.
Crucial Distinction: The Image > Image Rotation option affects the entire canvas. If you only wish to rotate a specific layer, you must first select that layer and then use Edit > Transform > Rotate 90° Clockwise (or other rotation options within the Transform submenu).
Advanced Canvas Rotation: The Rotate View Tool
For more dynamic canvas manipulation, especially when you want to rotate your entire working view without altering the image data itself, the Rotate View Tool is invaluable. This tool is particularly useful for freehand drawing or when you need to align your workspace to a specific angle.
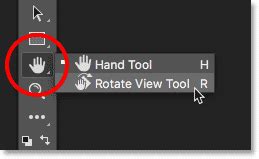
- Locate the Rotate View Tool. It's typically found in the Tools panel, often grouped with the Hand Tool and Zoom Tool. It looks like a circular arrow.
- Activate the tool. Click on the
Rotate View Toolicon. - Rotate the canvas. Place the cursor within your image window. Click and drag clockwise or counterclockwise. A visual indicator (like a compass rose) will show the rotation angle.
- Release the mouse button when you achieve the desired angle.
- Resetting the view. To return the canvas to its original, unrotated state, you can click the
Reset Viewbutton in the Options bar (which appears at the top when the Rotate View Tool is active), or useEdit > Undoor the History panel.
The Options bar also allows you to input a specific angle numerically and can be set to rotate all open windows simultaneously if needed.
Troubleshooting Common Mirroring Issues
While flipping images in Photoshop is generally straightforward, occasional hiccups can occur. Here’s a guide to resolving common problems:
Can’t Locate the Flip Option
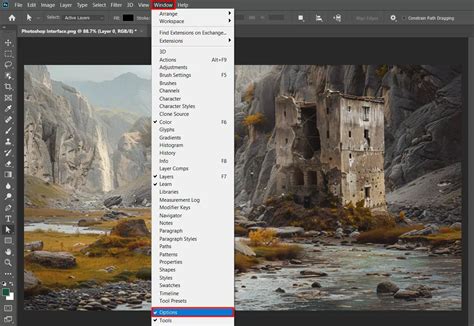
Photoshop's interface can vary slightly between versions. If you can't find the flip options where expected:
- Search the Help Menu: Click on
Helpin the top menu bar and type "flip." Photoshop will guide you to the feature's location. - Check Layer Status: Ensure the layer you want to flip is not locked.
Logo or Text Flips Unreadably
If a logo or text becomes mirrored and unreadable, it means you've likely flipped the entire canvas or a layer containing other elements alongside the text.
- Solution: Always ensure you are flipping only the specific layer containing the text or logo. Follow the "Flipping Layers" instructions above.
Image is Flipped the Wrong Way
Flipping horizontally creates a left-right reflection, while flipping vertically creates a top-bottom reflection.
- Solution: Pay close attention to whether you need a
Flip HorizontalorFlip Verticalcommand based on the desired outcome. The results are significantly different.
People Look Unnatural After Flipping
Human faces are asymmetrical, and flipping a portrait can sometimes make the subject appear unusual or "off."
- Understanding: This is less a technical issue with Photoshop and more about our perception of familiar features. Sometimes, a flipped portrait can create a compelling, unsettling effect. Other times, it might simply look incorrect.
- Solution: If the goal is a natural look, consider if mirroring is truly necessary. If it is, you might need to use advanced retouching techniques to subtly adjust features after flipping, or perhaps only flip a portion of the image and composite it back. Often, the "naturalness" comes from the subject's comfort during the original shoot rather than post-processing adjustments.
Creative Applications of Mirroring and Rotating
Beyond practical corrections, mirroring and rotating images in Photoshop open up a world of creative possibilities.
Creating Mirror Effects
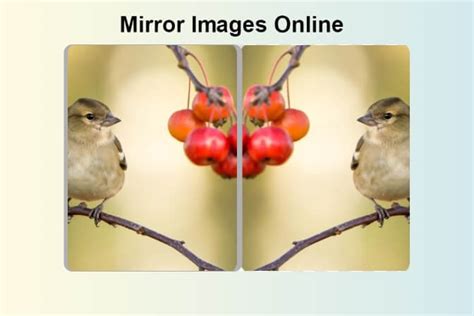
The mirror effect can transform a simple photograph into an abstract or surreal piece.
Example: Building ReflectionFlipping an image of a building horizontally can create the illusion that it extends both into the sky and into the ground, resulting in an eerie, abstract composition.
Example: Two-Headed AnimalsFlipping an image of an animal vertically can create a visually striking "two-headed" creature.
Step-by-Step: Creating a Simple Mirror Effect
- Unlock the background layer. In the Layers panel, double-click the "Background" layer and rename it (e.g., "Original").
- Add canvas space. Go to
Image > Canvas Size. Increase the canvas dimensions (e.g., to 200% width) to accommodate the mirrored portion. You can also use guides (View > New Guide) to mark a center line. - Position the original. Use the Move Tool to position your original image to one side of the new canvas space.
- Duplicate and Flip. Select the original layer, duplicate it (
Ctrl/Cmd + J). Then, select the duplicated layer and useEdit > Transform > Flip Horizontal(or Vertical). - Align the flipped layer. Position the flipped layer next to the original to create the mirror effect.
- Merge (optional). You can merge the layers (
Layer > Merge Down) if desired. - Trim and Save. Crop or adjust the canvas as needed and save your creation.
Creating Fun Patterns with Multiple Flips
Repeating the flipping process can lead to intricate and mesmerizing patterns, similar to kaleidoscopic effects.
Step-by-Step: Creating a Kaleidoscopic Pattern
- Open your image.
- Prepare the canvas. Duplicate your background layer. Increase the canvas size significantly (e.g., 200% width and 200% height) to accommodate multiple copies.
- Arrange and Flip.
- Place the original image in one quadrant.
- Duplicate it, move it to an adjacent quadrant, and flip it horizontally.
- Duplicate again, move it to another quadrant, and flip it vertically.
- Duplicate one last time, move it to the final quadrant, and flip it both horizontally and vertically (or rotate it).
- Merge Layers. Select all your image layers and merge them into a single layer (
Layer > Merge VisibleorLayer > Merge Downrepeatedly). - Further Transformations. You can now rotate this new merged layer and repeat the process to create even more complex patterns.
Leveraging Photoshop's Power: Smart Objects and Shortcuts
To enhance your workflow and maintain flexibility when mirroring or transforming images:
- Smart Objects: Convert your layer to a Smart Object (
Layer > Smart Objects > Make Smart Object) before applying transformations. This makes the edits non-destructive, meaning you can always go back and re-edit or re-transform the original content without quality loss. - Keyboard Shortcuts: Mastering shortcuts significantly speeds up repetitive tasks.
Ctrl + T/Command + T: Free TransformCtrl + J/Command + J: Duplicate LayerCtrl + Z/Command + Z: UndoX: Swap Foreground and Background ColorsSpacebar: Temporarily activate the Hand Tool for panning.
A Note on Alternative Software: Luminar Neo
While Photoshop is a powerful industry standard, some users may find its complexity daunting for simpler tasks. Alternatives like Luminar Neo offer a more streamlined and user-friendly experience. Luminar Neo can function as a standalone application or as a plugin for Photoshop, providing quick access to advanced editing features and "Looks" (presets) that can dramatically enhance images with minimal effort. For those seeking a faster workflow or a gentler learning curve, exploring Luminar Neo is a worthwhile consideration.
Trying Luminar Neo
If you're curious about Luminar Neo, you can often try it for free before committing to a purchase. This allows you to experiment with its features, including image flipping and other editing tools, to see if it aligns with your needs and preferences.
Ultimately, whether you're a seasoned Photoshop professional or a beginner exploring creative effects, the ability to mirror and manipulate images is a fundamental skill. By understanding the different methods and their applications, you can elevate your image editing capabilities and unlock new creative potential.