Achieving crystal-clear voice recordings can be a significant challenge, especially when unwanted background noise infiltrates your audio. Whether you're a streamer aiming to avoid copyright claims, a journalist enhancing interview clarity, a transcriber preparing audio for speech-to-text, or a musician capturing pristine vocals, the presence of ambient sounds can detract from the quality and professionalism of your work. Fortunately, with the advancement of technology, particularly Artificial Intelligence, there are now numerous effective methods to remove background noise from voice recordings, transforming even the most chaotic audio into studio-quality sound. This guide will delve into strategies for minimizing noise before recording and explore powerful tools and techniques for cleaning up audio in post-production.
Proactive Measures: Preventing Noise Before Recording
The most effective way to achieve clean audio is to prevent noise from being recorded in the first place. This involves careful preparation of your recording environment and mindful recording practices.
Selecting the Optimal Recording Space
The acoustics and ambient noise level of your chosen space are paramount to the sound quality of your final recording. To give yourself the best chance of producing immaculate audio, prepare your environment in advance by selecting a room that is:
- Free of street-facing windows: These windows can allow in significant traffic noise and other external disturbances.
- Not home to noisy appliances: Appliances like refrigerators, air conditioners, or washing machines can generate continuous, low-frequency hums that are difficult to remove later.
- Well-insulated: A well-insulated room will naturally block out more external noise.
- Far from loud roommates, co-workers, or neighbors: Proximity to sources of intermittent or constant noise can be a major obstacle.
- Filled with sound-absorbing materials: Soft furniture, thick curtains, rugs, and even tapestries can help to absorb sound reflections, reducing echo and reverberation within the room.
Understanding Your Room's Tone
Even in a seemingly quiet space, there are often subtle sounds that can impact your recording. It's crucial to understand the "tone" of your room before you begin recording. Start by setting up your equipment as you would for the final recording. Then, take a 10- to 20-second audio recording of the empty space. Listen back to this recording with headphones to clearly identify any inherent sounds, such as an air conditioner, an electrical hum, or noises from adjacent rooms. Following this, record a brief vocal introduction and listen back, noting how your voice sounds. Is it distorted by new ambient noise? Does it sound distant or echoey? Documenting these observations will help you make necessary adjustments.

Adjusting Your Environment for Clarity
Once you've identified the ambient sounds in your chosen space, you can take steps to mitigate them. This might involve turning off the air conditioner during the interview, ensuring children or pets are occupied elsewhere, or giving a heads-up to noisy neighbors or colleagues. For issues related to echo and reverberation, adding more sound-absorbing materials is key. Close curtains, add a soft chair, or drape a blanket over hard surfaces. If an electrical hum is present, try plugging your recording equipment into a different electrical outlet or shutting off other demanding appliances on the same circuit during your recording session.
Minimizing Noise During the Recording Process
Even with a well-prepared environment, external factors can introduce noise. Employing these techniques during recording can significantly reduce the amount of post-production cleanup needed.
Ensuring Clear Articulation
A fundamental yet often overlooked tip is to ensure that everyone involved in the recording speaks clearly and enunciates their words properly. Mumbling can introduce a type of "noise" that is far more challenging to rectify in post-production than many external sounds.
Strategic Microphone Placement
Background noise becomes more problematic when the desired audio source is distant or quiet. Therefore, it's essential to keep the microphone close to the speaker. For solo recordings, position the microphone a consistent, relatively close distance from your mouth. If recording multiple speakers, place the microphone centrally between them, ensuring it's close enough to capture their voices clearly.
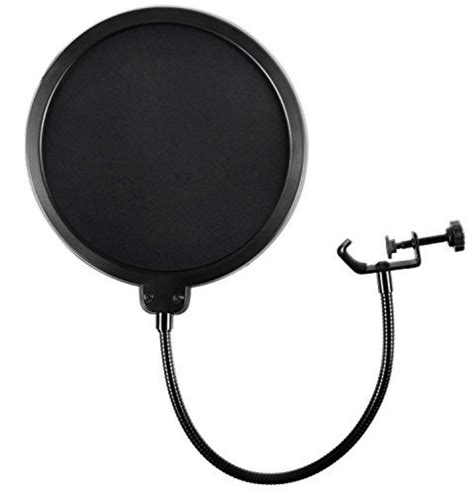
Be mindful that placing a microphone too close can amplify certain sounds, such as plosive consonants like "p" and "b" (often referred to as "popping" sounds). To counteract this, consider using a pop filter - a thin fabric screen placed between the microphone and the speaker - which effectively catches these bursts of air.
Leveraging Mobile Recording Apps
For those frequently recording on the go or seeking a simple, high-quality solution, dedicated mobile applications can be invaluable. Apps like the Rev mobile app allow users to capture conversations with minimal background noise directly from their smartphone. These applications often offer features such as real-time transcription or the ability to submit recordings for later AI or human transcription, ensuring a high-quality audio output from your mobile device.
Investing in Better Recording Equipment
For professional-grade results, investing in improved recording equipment can yield significant benefits.
- Dynamic Microphones: These microphones generally have a better speech-to-noise ratio compared to some other types, meaning they are more effective at capturing voice while minimizing ambient sound.
- Recording Software with Built-in Noise Filtration: Some recording software includes noise filtration tools that can be activated during the recording process, offering an initial layer of noise reduction.
- Multichannel Mixers: For more complex setups, a multichannel mixer allows for the separation of audio tracks. This not only leads to greater clarity but also simplifies the editing process significantly, making it a valuable tool for podcasters, video editors, and even court reporters.
Advanced Techniques: Cleaning Up Audio in Post-Production
Despite all preventive measures, background noise can sometimes infiltrate your recordings. Fortunately, a variety of powerful tools and techniques are available to clean up your audio after the fact.
Utilizing Built-in Editing Tools
Many devices and basic recording applications come with rudimentary noise reduction capabilities. If you recorded on a computer or smartphone, explore the settings of your recording software. For instance, the Voice Memo app on iPhones and Macs includes an "Enhance Recording" option. Similarly, some Windows computers offer a "Noise Suppression" feature within the Control Panel's Hardware and Sound settings. Even specific third-party recording apps might have basic noise suppression tools that can be applied post-recording.
Employing Professional Audio Editing Software
For more significant noise issues or for achieving a truly professional sound, dedicated audio editing software is indispensable. These tools offer a range of sophisticated features for noise reduction.
Audacity: This free, open-source software is an excellent starting point for beginners. It's compatible with Windows, macOS, and Linux and is known for its user-friendly interface, making it accessible for those new to audio editing. Audacity offers a "Noise Reduction" effect that allows you to sample the background noise and then apply it to the entire track to remove it.
How To Apply Noise Reduction in Audacity
Adobe Audition: For a more comprehensive and powerful noise-reduction solution, Adobe Audition is a top-tier choice. It's widely used by professionals for its extensive capabilities in restoring heavily distorted audio files and achieving crisp, clear sound. Its advanced tools can isolate and remove a wide array of unwanted sounds.
iZotope RX: This software is renowned for its ability to fine-tune audio recordings to an exceptional degree. iZotope RX utilizes advanced spectral analysis to precisely identify and remove specific noises. It even allows for the filtering of breath sounds and the enhancement of vocal intonation.
VEED.io: VEED offers an online video and audio editing suite that includes a powerful AI noise remover. This tool is designed for instant background noise removal, automatically detecting and eliminating distractions like AC hums, traffic noise, breath sounds, and static. It aims to make every recording sound as if it were made in a studio, without the need for manual tweaking of equalizer settings. VEED's AI noise remover is powered by Dolby Technology, promising broadcast-quality audio enhancement while preserving voice quality. Beyond noise removal, it offers a suite of enhancement tools, including Magic Cut for removing filler words, fade-ins/fade-outs, and the ability to add royalty-free background music.

Voice Cleaner (Online Service): This online service provides an effortless solution for noise reduction and background music removal. Its unique algorithm is designed to cancel out unwanted sounds, resulting in tracks with crystal-clear voices. It caters to various users, including streamers who need to remove background music to avoid copyright claims, journalists looking to enhance interview clarity, transcribers requiring clean audio for speech-to-text, and musicians aiming to reduce mic noise during vocal recordings. Voice Cleaner offers different plans based on usage, including minutes in a relaxed or fast queue and upload size limits. Its "Voice Isolator" feature uses advanced AI to remove ambient noise, mic feedback, and street sounds, leaving only clean, professional audio. It supports multiple audio formats (WAV, MP3, FLAC, OGG, AAC) and offers features like background noise removal (ambient sounds, reverb, interference) and studio-quality voice isolation.
Cleanvoice: Cleanvoice is another AI-powered tool specifically designed for cleaning up audio, particularly for podcasts. It automatically detects and eliminates unwanted background noise such as cafe noise, traffic sounds, and white noise. For podcasts with multiple tracks, Cleanvoice can process each track individually, ensuring that everything remains in sync. It emphasizes providing the cleanest sounding podcasts without requiring manual audio cleanup or complex editing tutorials.
Krisp: Krisp stands out as a real-time noise cancellation application for Windows 10. It leverages AI and machine learning to focus on the speaker's voice and filter out background noise during the recording process itself. This results in a clear, focused recording that requires minimal post-production editing.
Understanding Different Types of Background Noise
To effectively combat background noise, it's helpful to understand the common categories it falls into:
- Broadband Noise: This is the most common type, characterized by hissing or buzzing sounds that span a wide range of frequencies. Sources can be varied, including air conditioning, fan noise, or general ambient environmental sounds.
- Narrowband Noise: This type of noise occurs over a smaller, more specific range of frequencies. A common example is the consistent hum produced by a poorly grounded electrical circuit.
- Impulse Noise: These are sudden, short-duration sounds like pops, crackles, or clicks. They can result from loud consonants, audio feedback, or the physical act of plugging or unplugging equipment.
- Irregular Noise: These are intermittent sounds that appear and disappear unexpectedly within the recording environment, such as rain hitting a window or sounds from a neighbor.
The Impact of Your Platform and Hardware
The software and hardware you use play a significant role in the quality of your audio recordings and the ease with which you can remove background noise.
- Software: As mentioned, professional audio editing software like Adobe Audition and Krisp are equipped with advanced tools for producing high-quality recordings and performing sophisticated noise reduction. Online services like VEED.io and Voice Cleaner offer AI-driven solutions accessible through a web browser.
- Hardware: While smartphone microphones have improved, dedicated recording devices and external microphones generally provide superior audio quality and capture less background noise. Recording on a laptop or desktop computer typically offers more control over software, especially for multi-track recordings, and allows for the connection of multiple microphones and other recording equipment. Ultimately, the microphone you choose will have the most substantial impact on your overall audio quality.
Final Touches and Enhancements
After successfully removing background noise, you may wish to further refine your audio. Many editing tools allow for adjustments to volume levels, the addition of fade-ins and fade-outs for smooth transitions, or the layering of background music from royalty-free libraries. These enhancements can elevate your final product, whether it's for a podcast, voiceover, or video project, ensuring a polished and professional listening experience.
Even when meticulous planning and advanced tools are employed, sometimes the background noise proves stubborn. In such cases, services like Rev offer highly accurate automated or human transcription, which can be invaluable for understanding even heavily garbled audio. The ability to take background noise out of audio at every stage of the recording and editing process is now more accessible than ever, empowering creators to produce content with exceptional sound clarity.