Removing unwanted backgrounds from images is a fundamental skill for anyone venturing into graphic design or photo editing. GIMP, a powerful and free open-source image editor, offers a variety of tools and techniques to achieve this, catering to different levels of complexity and desired outcomes. Whether you're a beginner looking for a quick fix or an advanced user aiming for precise results, understanding these methods is crucial for professional-looking edits.

The Crucial Alpha Channel: Enabling Transparency
Before delving into specific removal techniques, it's vital to understand a core concept in GIMP: transparency. GIMP doesn't automatically set layers to include transparency; therefore, adding an alpha channel to the layer is essential. This channel essentially acts as a transparency map, dictating which parts of the image are opaque and which are see-through.
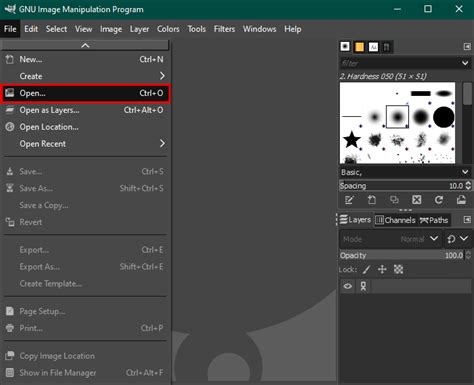
To add an alpha channel, locate the layer you're working with in the Layers Panel. Right-click on the layer, or Control + click if you're on a Mac. From the context menu that appears, select "Add Alpha Channel." Once this is done, the layer is ready to support transparent areas, allowing you to effectively remove backgrounds.
Simple Selection and Deletion: A Direct Approach
For straightforward backgrounds with distinct color differences from the subject, a simple selection and deletion method can be highly effective. After ensuring your layer has an alpha channel, you can begin by selecting the areas you want to remove from the photo.
One common tool for this is the Fuzzy Select Tool (often referred to as the "magic wand"). This tool is ideal for selecting contiguous areas of the same or similar color. Before making your selection, it's important to adjust the tolerance value in the Tool Options. A lower tolerance will select only very similar colors, while a higher tolerance will encompass a broader range of shades. Click on a background color to select it.
Another useful tool for color-based selection is the Select by Color Tool. Unlike the Fuzzy Select Tool, this tool selects all instances of a particular color throughout the entire image, whether they are connected or not. Similar to the Fuzzy Select Tool, you can adjust the Threshold setting in the Tool Options to fine-tune the selection. Click on the color you want to select, and GIMP will highlight all pixels of that hue.
Once you have selected the areas you wish to remove (the background), you can make the background transparent. With the background selected, simply press the Delete key on your keyboard. The selected area will be replaced by transparency, often indicated by a checkerboard pattern.
It's important to note that this method is simple but can be destructive. If you accidentally delete parts of your subject or make an incorrect selection, you can’t easily bring the background back at a later stage without reverting to an earlier save.
If your initial selection targets the subject instead of the background, you can easily invert it. Go to Select > Invert on the menu bar. This action will change the selection to encompass the background areas.
To deselect everything once you're finished, press Control + Shift + A on Windows or Command + Shift + A on Mac.
Leveraging Paths for Precision: The Outline Method
For more complex subjects with intricate edges, the Paths Tool offers a superior level of control and precision. This method is non-destructive and allows you to refine your selection iteratively, making it an excellent choice when accuracy is paramount.
Begin by selecting the image layer in the Layers Panel by clicking on it. Then, activate the Paths Tool. You will create the path outline by carefully tracing the outline of the object you want to keep. To do this, click to create anchor points along the edge of your subject. You can adjust the curves between these anchor points to meticulously follow the contours of your subject.
Once you have created a closed path that accurately outlines your subject, you need to convert this path into a selection. Right-click on the path you've created and navigate to Select > From Path in the context menu. This action will transform your path into a precise selection.
With your subject now selected, you'll want to remove the background. You have two primary options here: the Delete method or the Layer Mask method.
Using the Delete Method: With the subject selected, invert the selection to select the background (Select > Invert or Control + I on Windows / Command + I on Mac). Then, press the Delete key to remove the background, revealing transparency. As mentioned before, this is a destructive approach.
Using the Layer Mask Method (Non-Destructive): This is generally the preferred method for its flexibility. With your subject selected, instead of deleting, you'll add a layer mask. Right-click on your layer in the Layers Panel and select "Add Layer Mask." In the dialog box, choose "Selection" and click "Add." GIMP will create a mask where the selected area (your subject) is revealed, and everything else is hidden (transparent). The advantage here is that you can later edit the mask by painting on it with black to hide more or white to reveal more, effectively refining your background removal without permanently deleting pixels.
The Foreground Select Tool: An Intelligent Assistant
GIMP's Foreground Select Tool offers an intelligent and semi-automatic approach to background removal, particularly useful when the subject and background have some color overlap.
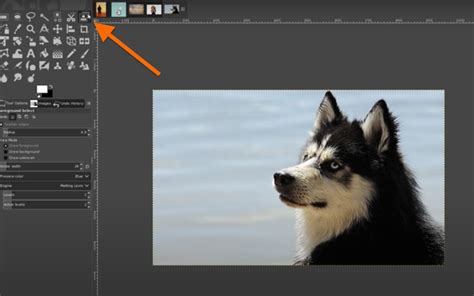
First, ensure you have the right pixels selected. Select the image layer in the Layers Panel by clicking on it. Activate the Foreground Select Tool. Draw a rough outline around the subject you want to keep. It doesn't need to be perfectly precise at this stage. Double-click inside the outline to create masks for the background and foreground. You will notice a dark blue mask on the background and a light blue mask around your selection, which represents an unknown area at this stage.
Next, GIMP enters a painting mode where you refine the selection. Paint over all the colors that should be included in the foreground selection. Use your brush to broadly cover the subject matter. GIMP will then analyze the colors and textures within your rough outline and the painted areas to differentiate the foreground from the background.
Turn on the Preview Mask option in the Foreground Select Tool pop-up window. You should now see the foreground in color, allowing you to check whether the correct areas were selected. If parts of the background are still visible within your subject, or vice-versa, continue painting to refine the mask. Once you are satisfied with the preview, press Enter to finalize the selection.
You can now use a method to delete the background, as described previously. You can invert the selection (if you plan to delete the background using the delete method) using Control + I on Windows or Command + I on Mac, and then press the Delete key. Alternatively, you can apply this selection as a layer mask for a non-destructive workflow.
Exporting with Transparency: Preserving Your Work
Once you have successfully removed the background, the final step is to export your image in a format that supports transparency. The most common and widely supported format for this purpose is PNG.
In the file export panel, select PNG Image from the "Select File Type" menu. GIMP will then export your image with the transparent background preserved, ready to be used in other designs or projects.
How to use layer mask in gimp (Latest Update)
Mastering background removal in GIMP opens up a world of creative possibilities. By understanding and practicing these different techniques, you can achieve professional results and elevate your photo editing and graphic design work. Remember to experiment with the various tools and settings to find the workflow that best suits your needs and the specific image you are working with.