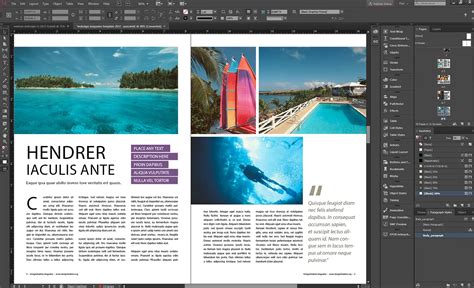
Adobe InDesign stands as a cornerstone in the world of desktop publishing and typesetting, a powerful application from Adobe Systems that empowers professionals to craft everything from intricate magazines and newspapers to impactful billboards and compelling books. Its sophisticated layout capabilities are indispensable for both print and digital media. However, when the ambition extends to reaching a global audience, the inherent complexities of InDesign documents present unique challenges for translation. Merely translating the text is insufficient; the integrity of the design, layout, and formatting must be meticulously preserved across languages. This article delves into the essential best practices for preparing and translating Adobe InDesign files, ensuring that your multilingual content is not only accurate but also visually cohesive and professionally presented.
Understanding the InDesign File Format and Its Translation Implications
Adobe InDesign utilizes a proprietary file format, .indd, which is central to its design and layout capabilities. While this native format is excellent for creating visually rich documents, its exclusivity poses a significant hurdle for translation workflows. The .indd file cannot be directly opened or edited by standard translation tools or by translators who may not possess an Adobe subscription. This incompatibility necessitates a conversion to a more universally accessible format.
The InDesign Markup Language, or .idml, emerges as the recommended solution. This legacy format is more amenable to translation workflows, as it exposes the document's content in a structured, plain-text format through coding and tags. Most computer-assisted translation (CAT) tools and translation management systems (TMS) are compatible with IDML, allowing for efficient text extraction, translation, and re-importation while largely preserving the original layout and formatting. Exporting to IDML is a straightforward process: navigate to File > Export, and select "InDesign Markup (IDML)" as the file type.
While IDML is the preferred format, it's crucial to understand its limitations. IDML files do not typically include linked images or embedded fonts. This means that any graphics containing text, or indeed any linked visual assets, must be localized separately. Similarly, ensuring that translators have access to the correct fonts is paramount to avoid character substitution or display issues in the translated document.
The Pitfalls of Common Translation Approaches
Many organizations, often unaware of the specialized requirements for translating InDesign documents, resort to inefficient methods that lead to increased costs, delays, and errors.
The Copy-Paste Approach: A Recipe for Disaster
One of the most common, yet highly inefficient, methods involves manually copying text from InDesign into a Word document or spreadsheet for translation, and then pasting the translated text back into the InDesign layout. This approach is fraught with peril:
- Omissions and Errors: The manual transfer of text significantly increases the risk of missing entire sections or introducing typographical errors, particularly with non-Latin scripts.
- Formatting Nightmares: Reintegrating translated text often requires extensive manual reformatting due to variations in text length and character sets, leading to broken layouts and time-consuming DTP work.
- Time and Cost Inefficiency: This labor-intensive process is not only slow but also significantly more expensive due to the extensive manual intervention required at each stage.
Text Embedded in Graphics: A Hidden Translation Barrier
Text that is part of a linked graphic, rather than being in a dedicated text frame, presents another significant challenge. When an InDesign file is exported to IDML, text within linked graphics is often excluded from the export. This means that such text will not be captured by the translation process, leading to untranslated content in the final output. To mitigate this, it is best practice to create text boxes layered over graphics, ensuring the text is extractable. Alternatively, graphics containing text must be localized separately, adding to project complexity and cost.
Adobe InDesign - Translation using AI with document large amount of text and multiple style changes
Strategic Design for Multilingual Content
Proactive design choices made during the creation of the source InDesign document are critical for a smooth and cost-effective translation process.
Mastering Styles for Consistency and Efficiency
Adobe InDesign's Character and Paragraph Styles are indispensable tools for managing multilingual content.
- Consistency: Applying styles ensures consistent formatting across the document, from font type and size to indents and spacing. This consistency is preserved during the translation process when using appropriate file formats like IDML.
- Efficiency: When text expansion or contraction occurs in translation, styles allow for rapid adjustments. For instance, if a translated language requires more space, font sizes within a paragraph style can be slightly reduced globally, rather than adjusting each text box individually.
- Avoiding Inline Formatting: Relying on inline formatting (applying formatting directly to selected text) is a common mistake. This is time-consuming and difficult to manage during translation. Styles provide a centralized and easily updatable method for applying formatting.
Text Expansion and Contraction: Planning for Fluidity
Languages naturally vary in length. For example, German text can be 20-35% longer than English, while Chinese text can be up to 30% shorter. Failing to account for this text expansion is a primary cause of post-translation layout issues.
- Proactive Design: Design text frames with ample white space. For headlines, aim for 40% extra space; for body text, 30%; and for buttons and UI elements, 50%. This "breathing room" accommodates linguistic growth.
- Auto-Sizing Text Frames: Utilizing InDesign's auto-sizing text frame options (under Object > Text Frame Options) allows frames to grow or shrink vertically as needed, preventing text overflow. However, ensure the surrounding layout can accommodate this vertical expansion.
- Flexible Grid Layouts: Employ modular grid systems with flexible spacing between elements. This allows for compression or expansion of modules without disrupting the overall design.
- Responsive Text Sizes: Design with scalable font sizes. While maintaining hierarchy, ensure font sizes can be slightly reduced (e.g., body text from 10pt to 9pt) if necessary to fit translated content.
- Avoiding Narrow Text Constraints: Refrain from placing text in very narrow columns or curved shapes, as linguistic expansion can lead to excessive line breaks and alignment issues.
Handling Right-to-Left (RTL) Languages
For languages like Arabic and Hebrew, which are written from right to left, specific formatting adjustments are required. While some translation platforms automatically adjust for RTL text, the DTP team will still need to ensure text, paragraphs, and design elements are correctly aligned and formatted for the target language's reading direction.
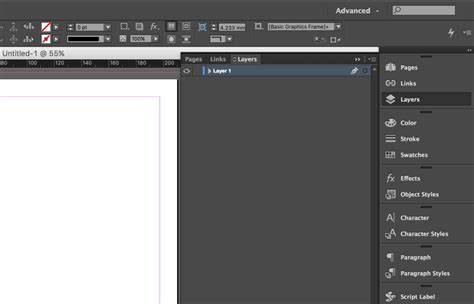
The Importance of Layers
Instead of embedding text within graphics, a more effective approach is to utilize InDesign's layering system. Create text boxes on separate layers that are positioned over graphics. This ensures that the text is treated as an independent element, exported correctly with the IDML file, and can be translated without needing to manipulate the graphic itself.
Proper List and Table Management
- Lists: Use InDesign's built-in bulleted and numbered list features, ideally through paragraph styles. Manually creating lists with spaces or tabs can lead to incorrect segmentation and formatting issues during translation.
- Tables: Avoid manually creating tables with individual text frames and lines. InDesign's robust table package automatically adjusts cell sizes to accommodate text expansion, preventing manual rework.
Pre-Translation File Preparation: Essential Steps
Before exporting your InDesign file for translation, several critical checks and preparations are necessary to ensure a smooth workflow and high-quality results.
Show Hidden Characters
Invisible characters, such as paragraph breaks (hard returns) and line breaks (soft returns), play a crucial role in how text is segmented by translation tools.
- Hard Returns vs. Soft Returns: A hard return signifies the end of a paragraph and creates a new segment in translation software. A soft return (Shift + Return) creates a line break within the same paragraph, maintaining a single segment. Using hard returns unnecessarily within a sentence can lead to incomplete or disordered sentence fragments for translators, negatively impacting translation memory efficiency and consistency.
- Viewing Hidden Characters: To effectively manage these characters, enable "Show Hidden Characters" via Type > Show Hidden Characters. This visual aid allows you to identify and correct improper use of hard returns.
Avoiding Inline Formatting
As mentioned earlier, inline formatting is detrimental to translation workflows. Always use Character and Paragraph Styles to apply formatting. This ensures that styles are consistently applied and can be easily updated or modified by translators if language-specific adjustments are needed.
Font Selection and Glyphs
- Glyph Coverage: Ensure that the fonts you use contain all the necessary glyphs for your target languages. A glyph is a specific visual representation of a character. If a font lacks a required glyph (e.g., a specific accent mark), InDesign will display a red square, indicating a missing character.
- Font Libraries: When designing for multiple languages, select fonts that have comprehensive character sets and are available in the target languages. This avoids font substitution issues and ensures readability. For East Asian languages like Chinese, Japanese, and Korean, specific font recommendations exist to ensure proper character rendering.
Language Attributes
Assigning the correct language attribute to text (via Character Styles or Paragraph Styles) is crucial. This enables InDesign's spell-checking and hyphenation features to function correctly for the specific language, improving accuracy and readability.
Threading Text Frames
If a sentence or narrative spans multiple text frames, "thread" them together. This creates a continuous flow of text, ensuring that the entire sentence is treated as a single unit by translation tools, maintaining order and context.
The Power of Packaging
When sending your InDesign file for translation, providing a complete InDesign Package (File > Package) is highly recommended. This package bundles the INDD file, linked images, and used fonts into a single folder. This ensures that translators and DTP specialists have all the necessary assets to accurately recreate the layout and design in the target language. This is particularly important for linked graphics and fonts that might not be universally available.
Leveraging Translation Technology for InDesign
Modern translation workflows benefit greatly from specialized software and tools designed to handle the intricacies of desktop publishing files.
IDML as the Industry Standard
The IDML format is widely recognized as the industry standard for InDesign translation. Its compatibility with CAT tools and TMS platforms facilitates an efficient and accurate localization process. Platforms like Smartling, Taia, and Redokun are built to handle IDML files seamlessly.
Translation Memory (TM) and Computer-Assisted Translation (CAT) Tools
Translation Memory is a database that stores previously translated segments (sentences or phrases). When translating an updated document, the CAT tool compares new text against the TM.
- Cost Savings: Identical segments (100% matches) are often translated for free or at a significantly reduced rate. Similar segments (fuzzy matches) receive discounts. This dramatically reduces translation costs for recurring content.
- Consistency: TM ensures consistent terminology and phrasing across projects, which is vital for brand messaging and technical accuracy.
- Efficiency: By automating the reuse of translations, TM accelerates the overall translation process.
Translation Management Systems (TMS)
A TMS, such as Smartling, Taia, or Redokun, streamlines the entire localization workflow. These platforms often integrate directly with InDesign (e.g., via plugins), allowing for direct file uploads, translation management, and seamless re-importation of translated content back into InDesign. They manage TM, glossaries, and collaboration between translators and designers.
Pseudo-Translation for Pre-Layout Testing
Before committing to actual translation, downloading a pseudo-translated file from your TMS can be invaluable. This process replaces source text with simulated translated text that mimics the length and character set of target languages (e.g., using German characters for a German pseudo-translation). This allows designers to identify potential layout issues caused by text expansion or contraction early in the process, before incurring translation costs.
Collaboration Between Translators and Designers
Successful InDesign translation hinges on effective collaboration between linguistic experts and graphic designers.
- Clear Briefs: Provide translators with comprehensive project briefs that include context, target audience, and specific instructions regarding design elements.
- Open Communication: Foster open channels for communication. Designers should understand the implications of linguistic changes, and translators should be able to flag any design-related concerns.
- Defined Roles: Clearly delineate responsibilities. Designers are responsible for the final layout and DTP, while translators focus on linguistic accuracy and cultural appropriateness.
- Final Review: A crucial step involves a native speaker or reviewer familiar with the InDesign file to perform a final check of the translated and typeset document. They can catch subtle errors that might be missed by either the translator or the designer alone.
Managing Updates and Revisions
When original InDesign content is updated, managing the translated versions requires a systematic approach.
- Version Control: Maintain clear version control for both source and translated files. This prevents confusion and ensures that the correct versions are being worked on.
- Incremental Updates: Whenever possible, update translated content incrementally rather than re-translating the entire document. Leveraging Translation Memory is key here. If only a few sentences have changed, only those segments need re-translation, drastically reducing costs and time.
- Centralized Platforms: Using a TMS with versioning capabilities simplifies the process of tracking changes and managing updates across multiple languages.
By adhering to these best practices, organizations can transform the complex process of InDesign translation into a streamlined, efficient, and cost-effective operation, ensuring that their message resonates clearly and beautifully across the globe.
tags: #adobe #indesign #translation