Ever dreamed of photographing a breathtaking landscape, only to find it full of unwanted tourists? Or perhaps you've captured a perfect product shot, only to have a stray logo or distracting power line mar the image. In today's digital photography landscape, the ability to meticulously refine an image is paramount. Fortunately, sophisticated tools are now available that can help you reclaim the serenity of your scenes and restore the focus to your intended subject. Photoshop, a long-standing leader in image editing, has introduced powerful AI-driven features that make removing people and objects from photos surprisingly easy, catering to both novice and experienced users alike.
The Rise of AI in Image Retouching
The advent of Artificial Intelligence (AI) has revolutionized many creative fields, and photo editing is no exception. Gone are the days when removing a person or object required complex selections, multiple layers, and extensive cloning. Modern AI tools, like those found in Adobe Photoshop and Adobe Firefly, work by intelligently analyzing the surrounding pixels and generating new content that seamlessly blends with the existing image. This means you can eliminate anything that pulls focus away from your subject, from unsightly trash cans and inconvenient tourists to intrusive power lines, wires, and street signs. Even persistent elements like random logos, watermarks, or stray text that threaten to ruin an otherwise perfect photo can now be brushed away in seconds, all while preserving the authentic details that make your image compelling.
Photoshop's Remove Tool: A Direct Approach
Photoshop's new Remove Tool, powered by AI, offers a remarkably straightforward method for cleaning up your images. This tool functions as a brush, eliminating the need for intricate selections or confusing dialog boxes. You simply paint over the person or object you wish to remove, and the AI takes care of the rest.
To begin using the Remove Tool:
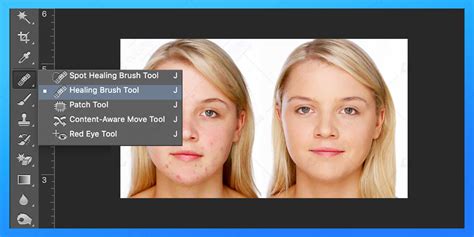
- Locate the tool in the same group as other healing tools within the Photoshop toolbar. If you've used it recently, you can often simply click its icon.
- Resize your brush using the left and right bracket keys (
[and]) on your keyboard to best match the size of the area you need to cover. - Simply paint over the person or object you want to remove. By default, the tool will process the removal as soon as you release your mouse button.
- Release your mouse button once the area is completely covered by the brush.
The results can be astonishing, with the AI intelligently filling the void with content that blends seamlessly with the background. In many cases, the Remove Tool significantly outperforms traditional methods like the Spot Healing Brush, which might incorrectly incorporate parts of the object being removed into the new fill.
Working Non-Destructively with the Remove Tool
A crucial aspect of professional photo editing is maintaining the integrity of the original image. Initially, using the Remove Tool directly on the Background layer would make permanent changes, meaning the removed person or object is gone forever from that specific image file. However, the Remove Tool can also operate non-destructively by working on a separate layer.
To achieve this:
- Ensure you have a new, empty layer selected in your Layers panel.
- Select the Remove Tool from the toolbar.
- In the Options Bar at the top of the screen, check the box for "Sample all layers."
- Now, paint over the area you want to remove. The AI will analyze all visible layers and generate the fill on your active, empty layer.
This approach allows you to remove objects without altering your original image data, providing flexibility to refine or revert changes later.
Advanced Control with the Remove Tool
For larger or more complex removals, the Remove Tool offers advanced options:
- "Remove after each stroke": By default, this is checked, meaning the AI acts immediately after you release the mouse button.
- Unchecking "Remove after each stroke": This allows you to make multiple brush strokes to cover a larger area before the AI processes the removal. This is particularly useful when you need to meticulously paint around intricate edges or cover a significant portion of the image. You then press Enter or click the checkmark in the Options Bar to finalize the removal.
- Repairing Edges: The Remove Tool's AI can also be used to repair and align edges, a task that traditionally required the Clone Stamp Tool. By using short, deliberate strokes and enabling "Remove after each stroke," you can guide the AI to snap sections of edges into alignment, creating a more polished and believable result. Patience and multiple short strokes are often key to achieving the best outcome for complex edge repairs.
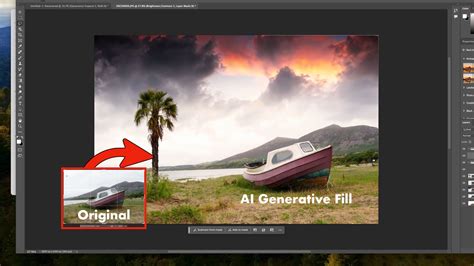
Generative Fill and Generative Remove: The Power of AI Generation
Adobe Photoshop's Generative Fill and Adobe Firefly's Generative Remove features represent a significant leap forward in object removal, leveraging generative AI to create entirely new content based on textual prompts or the surrounding image data.
Generative Fill in Photoshop
Generative Fill, integrated directly into Photoshop, offers a highly intuitive way to remove unwanted elements. The process is remarkably simple:
- Select the Unwanted Subject: Use any selection tool (like the Lasso Tool or Marquee Tool) to draw an outline around the person or object you wish to remove. For precise control, you can even enter Quick Mask Mode by pressing the keyboard shortcut
Q, and then use a brush to carefully paint over the subject. PressQagain to exit Quick Mask Mode. - Activate Generative Fill: Once your subject is selected, a contextual taskbar will appear. Click on "Generative Fill."
- Leave the Prompt Blank: Crucially, for removal, you do not need to type any text into the prompt box. Simply leave it empty. This tells Photoshop to analyze the selection and its surroundings and generate content to fill the area based on the existing image context.
- Click "Generate": Photoshop will then process the request, creating a new Generative Layer that replaces the selected area with AI-generated content that seamlessly matches the background. You'll often be presented with a few variations to choose from.
It's important to understand that Generative Fill works by removing the opposite of what’s selected. By leaving the prompt blank, you're essentially telling the AI to remove the selected object and fill the space with what should be there, based on its understanding of the image.
How to Remove IMPOSSIBLE STUFF in Photoshop!
Generative Remove in Adobe Firefly
Adobe Firefly is a web-based creative suite that also boasts powerful AI image editing capabilities, including Generative Remove. This feature is designed for quick and easy object removal, accessible to users without needing to download and install Photoshop.
To use Generative Remove in Firefly:
- Log In: Access the Firefly image editor by logging in with your Adobe ID or creating a free account.
- Select Generative Remove: From the Quick Actions Menu, choose "Generative Remove."
- Brush Over the Object: Use the brush tool to paint over the unwanted object or person. You can adjust the brush size and hardness using the toolbar to refine your selection.
- Click "Generate": Once you've painted over the area, click the "Generate" button. Firefly's AI will then analyze the area and automatically fill it with natural-looking results, keeping your visuals clean and polished.
- Refine and Download: After generation, you can review the results. If satisfied, you can download the edited image, copy it to your clipboard, or share it directly.
Generative Remove in Firefly is particularly effective for removing photobombers, crowds, distracting signage, trash cans, wires, and other elements that detract from your intended subject. The AI models used in Firefly are commercially safe, having been trained on licensed content like Adobe Stock and public domain material.
Beyond Removal: Enhancing Your Workflow
These AI-powered tools are not just about removing unwanted elements; they are about enhancing your creative control and efficiency.
- Preserving Details: When removing text or logos, these tools are adept at preserving the surrounding details that make your image authentic.
- Commercial Safety: For professionals, the commercial safety of Adobe Firefly's generative AI models provides peace of mind, knowing the training data is ethically sourced.
- Speed and Ease: The best AI object removal tools help creators go from a prompt (or a simple brush stroke) to a polished image fast, without sacrificing creative control. No design skills are required to achieve impressive results.
Advanced Techniques and Scenarios
While AI tools have simplified many tasks, understanding traditional methods and alternative approaches can still be beneficial, especially for complex scenarios or when working with specific constraints.
Scenario 1: Using a Clean Background Plate
In some professional workflows, especially when shooting with a model, photographers might capture a "clean background plate" - a separate shot of the same scene without the subject. This provides an ideal source for filling in the area where the person was.
- Obtain a Clean Plate: If you have a second photo from the same shoot that lacks the unwanted person, you can use it.
- Combine Images: Drag the clean background plate into the same Photoshop document as your main photo.
- Layer and Blend: Position the clean background layer over the area where the person was removed. Use layer masks and blending techniques to seamlessly integrate the background plate, ensuring color and lighting match.
- Address Discrepancies: You might need to use tools like the Clone Stamp or Healing Brush to address any minor discrepancies, such as shadows or slight variations in the background.
Scenario 2: Working with a Single Image
Often, you'll only have a single image to work with, making AI tools or traditional cloning techniques essential.
- Generative Fill/Remove: As detailed above, these AI tools are excellent for single-image removals.
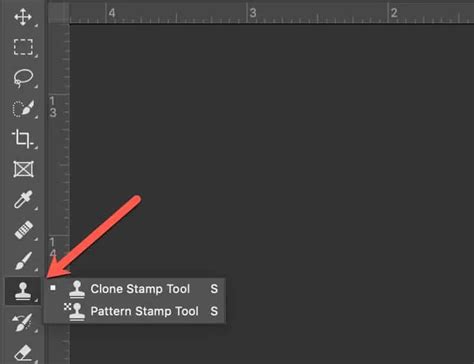
- Clone Stamp Tool: For more manual control or when AI struggles with intricate details, the Clone Stamp Tool remains a powerful option.
- Sampling: Press and hold
Alt(Windows) orOption(Mac) to sample a source area of the image. - Cloning: Release the modifier key and paint over the area you want to cover. The tool will copy pixels from the sampled area.
- Working on a New Layer: It's highly recommended to use the Clone Stamp Tool on a new, empty layer with "Sample all layers" enabled in the Options Bar. This allows for non-destructive editing and easier adjustments.
- Addressing Issues: If the clone appears repetitive or unnatural, re-sample from different areas and adjust brush opacity and flow. Sometimes, you may encounter problems like misaligned edges or unwanted artifacts, which require careful cloning to correct.
- Sampling: Press and hold
Comparing Tools: Remove Tool vs. Spot Healing Brush
When comparing Photoshop's Remove Tool with its long-standing counterpart, the Spot Healing Brush, the advantages of the AI-powered Remove Tool become evident, especially for larger or more complex objects. While the Spot Healing Brush is effective for minor blemishes and small imperfections, it can sometimes struggle with larger areas, occasionally incorporating parts of the object being removed into the fill or creating unnatural patterns. The Remove Tool, by contrast, generally provides cleaner, more contextually appropriate fills, demonstrating the power of AI in understanding and reconstructing image data.
Conclusion: Reclaiming Your Vision
Whether you're a seasoned professional or a budding enthusiast, the ability to effortlessly remove unwanted people and objects from your photographs is an invaluable skill. With the advancements in Photoshop and Adobe Firefly, this process has become more accessible and efficient than ever before. By leveraging tools like the Remove Tool, Generative Fill, and Generative Remove, you can transform cluttered scenes into pristine compositions, ensuring your photographic vision is realized without distraction.