As digital artists, the security and accessibility of our creations are paramount. Procreate, a powerful and intuitive art application for iPad, offers a robust suite of tools for saving and exporting your artwork, ensuring your digital masterpieces are preserved and shareable across various platforms and formats. Understanding these options is crucial for a streamlined workflow, safeguarding your creative efforts from potential loss and enabling you to present your work professionally to the world.
Understanding Procreate's Native File Format: The .procreate Advantage
The .procreate file format is Procreate's native file type, and it's the most comprehensive way to save your artwork. When you share your artwork using the .procreate format, you are essentially creating a complete archive of your project. This means that all data associated with your artwork is kept intact, including every layer, mask, adjustment, and effect you've applied. This level of preservation is invaluable if you intend to revisit and edit your artwork within Procreate at a later stage. Furthermore, the .procreate format also carries over information like the recipient's ability to view your signature, adding a personal and authenticated touch to your shared files.
It's important to note that Procreate 5.3 introduced improvements to file compression. While this benefits users by potentially reducing file sizes, it also means that files exported from Procreate 5.3 will not open in older versions of Procreate or Procreate Pocket. This is a forward-looking change that ensures compatibility with the latest features and optimizations within the Procreate ecosystem.
Exporting for Universal Compatibility: Common Image Formats
Beyond its native format, Procreate allows you to export your artwork in a variety of industry-standard image formats, each with its own strengths and ideal use cases. This flexibility ensures your art can be viewed, shared, and utilized across different applications and platforms.
Adobe® Photoshop® PSD: Preserving Layers for Collaborative Workflows
Exporting your artwork as a layered Adobe® Photoshop® PSD file is an excellent choice for artists who collaborate with others or use Photoshop in their workflow. This format preserves your layers, layer names, opacity, visibility, and blend modes. This meticulous retention of layer information allows for seamless editing and manipulation in Photoshop, maintaining the integrity of your creative process. This is also carried over in this file format.
JPEG: The Versatile Choice for Web and General Sharing
The JPEG (Joint Photographic Experts Group) format is a 'lossy' format, meaning it achieves smaller file sizes by discarding some visual information. While this can lead to a slight reduction in image quality compared to lossless formats, it is often imperceptible to the average viewer. JPEG is ideal for general sharing online, on social media, or when a smaller file size is a priority. Your artwork is flattened into a single layer in this format.
PNG: High Quality and Transparency for Web and Graphics
PNG (Portable Network Graphics) is a 'lossless' format, which means it preserves the full image quality of your artwork without any degradation. While PNG files are typically slightly larger than JPEGs, they offer superior visual fidelity. PNGs also have the significant advantage of supporting transparency, making them ideal for graphics that need to be placed over other backgrounds, such as logos or web elements. Like JPEGs, PNG export flattens your artwork into a single layer.
TIFF: The Professional Standard for Print and Archiving
TIFF (Tagged Image File Format) is a format that has been used for decades in print and is compatible with all major software. Exporting to TIFF flattens your layers but perfectly preserves your image quality. If you were to export with layers, the TIFF files would be considerably larger. TIFF is a robust format often favored for its high quality and suitability for professional printing and long-term archiving.
Advanced Export Options: Sharing Layers and Animations
Procreate offers sophisticated options for sharing not just your final artwork, but also its constituent parts, making it a powerful tool for both individual artists and collaborative teams.
Sharing Layers Individually or as Multi-Page Documents
The "Share Layers" section within Procreate's Actions menu provides granular control over how your layers are exported.
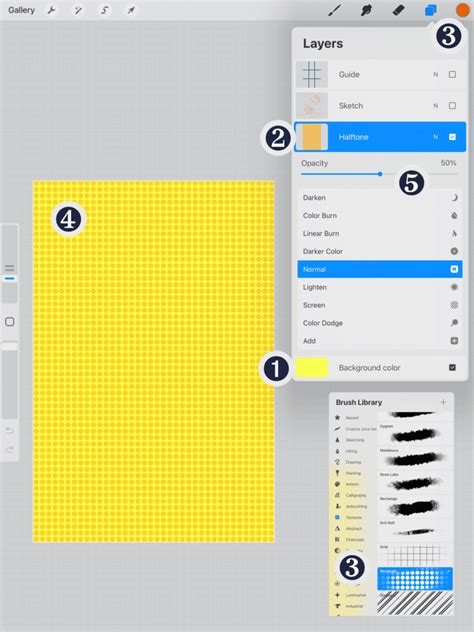
Multi-Page PDF: You can export all layers together into a single multi-page PDF document. In this format, each layer becomes a separate page, which is ideal for digital distribution where a layered breakdown is desired. To access this, tap Actions > Share. Under the Share Layers section of the Share menu, you’ll find a complete list of layer export formats. You can tap Modify > Actions > Share > Share Layers > PDF, then choose from Good, Better, or Best quality.
Individual PNG Files: Alternatively, you can treat each layer as a separate PNG file. This results in a folder filled with individual PNG images, each representing a single layer of your artwork. This is achieved by tapping Modify > Actions > Share > Share Layers > PNG Files. Each PNG is assigned a filename formed of the artwork name plus a sequential number. For example, if your artwork is called Masterpiece, your PNG files will be named Masterpiece-1, Masterpiece-2, and so on.
Creating Animations from Your Layers
Procreate can also transform your layered artwork into simple animations.
Animated GIF: This format treats each layer as a frame in a looping animation. If your canvas has five layers, your animation will loop through five frames. GIF is the most common and versatile format for web animations.
Animated PNG: Animated PNGs offer a higher visual quality than animated GIFs and are ideal for animations with transparent elements.
Animated MP4 and HEVC: Procreate also supports exporting animations as MP4 and HEVC files. Animated MP4s offer similar functionality to animated GIFs and PNGs but cannot have transparent backgrounds due to their use of JPEG encoding for each frame. Animated HEVCs offer similar functionality to animated MPEGs but can have transparent backgrounds.
For all animation exports, you can tap Export Settings to choose between "Max Resolution" (better quality, larger file size) or "Web Ready" (lower quality, smaller file size). You can also use the Frames per second slider to adjust the speed of your animation.
How I Make Animated Gifs on Procreate 🌼
Protecting Your Work: Backup Strategies for Procreate Files
A critical aspect of any digital artist's workflow is ensuring their work is safely backed up. Procreate saves all data, including artwork, locally on your iPad’s internal storage. This means that your artwork can be lost permanently if you delete the Procreate app, overwrite your internal storage, or lose access to your iPad. Procreate does not automatically back up your artwork anywhere outside the app. Therefore, it is essential to implement a proactive backup strategy.
The Files App: Your Centralized Cloud and Local Storage Hub
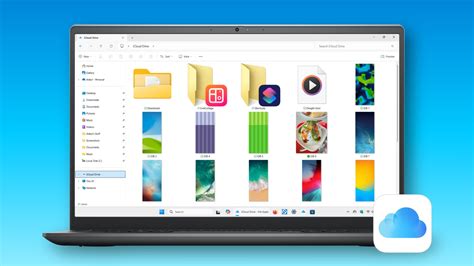
The Files app, a native iOS application, is an invaluable tool for managing your digital assets, including Procreate files. It provides access to cloud storage services like iCloud Drive and allows for local storage management on your iPad.
iCloud Drive: By default, you receive 5GB of free storage with iCloud Drive. Anything you edit, upload, or delete from iCloud Drive is updated across all your Apple devices. You can manage your iCloud Drive from any device or at iCloud.com. To save your Procreate files to iCloud Drive, open the Files app, go to iCloud Drive, and create a new folder named "Procreate." You can then save your files from Procreate into this folder.
On My iPad: This section within the Files app shows files saved locally on your iPad. If you're a Procreate user, you'll find a Procreate folder here, which can also be used for saving files.
Third-Party Cloud Services (Dropbox, Google Drive): You can also manage files from external cloud services like Dropbox and Google Drive within the Files app. Download the respective app onto your iPad, and it should appear under the Locations section in the Files app. The process for saving Procreate files to these services is similar to using iCloud Drive: create a dedicated "Procreate" folder within the service's directory in the Files app.
To save Procreate files using the Files App:
- Open the Files App.
- Go to iCloud Drive (or your preferred cloud service/local storage).
- Create a new folder called "Procreate."
- Save your files from Procreate into the "Procreate" folder in iCloud Drive.
To bulk export Procreate files using the Files App:
- Open the Procreate app.
- Hit "Select" in the upper right-hand corner of your Gallery view.
- Select the files you'd like to save.
- Hit "Share" and select "Procreate" as your Image Format (or choose your desired export format).
- Choose "Save to Files" and select your preferred storage location from the left sidebar.
You also have the option to simply drag and drop your files individually or in stacks.
iCloud Backup: A Comprehensive Device Snapshot
iCloud Backup creates a complete clone of your iPad, encompassing apps, settings, and data. This is a crucial safety net for your entire device, ensuring that even if something happens to your iPad, you can restore your Procreate files and all other data.
To utilize this, go to your iPad's Settings app, navigate to your Apple ID at the top, then tap "iCloud," and ensure that "Procreate" is toggled on under the list of apps using iCloud. This will include Procreate's data in your regular iCloud backups. You can perform a backup manually by tapping "Back Up Now" over Wi-Fi or by connecting your iPad to a computer.
It's important to understand that iCloud Backup is designed for restoring an entire device, not individual files. Therefore, while it provides a comprehensive safety net, it's best used in conjunction with more targeted backup methods for specific artwork.
Manual Backups and Best Practices
Beyond automated backups, manual backups offer a more direct and controlled approach to safeguarding your artwork.
Procreate Format Backups: While
.procreatefiles only work within Procreate, they retain all layers and settings. Manually exporting your work as.procreatefiles to a secure location like iCloud Drive or Dropbox is a good practice.Multiple Format Backups: As a rule of thumb, it's important to not only have a Procreate version of your work saved but also a
.jpg,.png, or.pdf. This is because Procreate art files can only be read by Procreate, and without the app, you won't be able to preview what the art within the file looks like. Plus, you’ll want to have access to a printable version of your files if needed in the future. To speed up this process, after saving your files in Procreate format, you can switch the setting to PSD and drag them into a separate PSD Backup folder.Organization: Procreate's default naming conventions, such as "Untitled," can make backups confusing. Take the time to rename your artworks descriptively before backing them up to ensure easy identification.
Regular Routine: The most effective backup strategy is consistency. Sticking to a routine, whether it's daily, weekly, or after completing a significant piece, can prevent you from becoming a cautionary tale of lost work.
Important Considerations:
- Procreate doesn’t save the files that you’ve deleted, so be careful when managing your files in your Gallery.
- If you are running macOS prior to Catalina, you can still use iTunes to back up your iPad. Connect your device, open a Finder window in macOS, click on your iPhone, select "Files," then "Procreate" to access the directory and share files to iTunes.
By understanding and implementing these various saving, exporting, and backup strategies, you can ensure your digital art in Procreate is not only preserved but also readily available for sharing, collaboration, and future creative endeavors.