Adobe Photoshop, a titan in the realm of digital imaging and graphic design, offers a powerful and versatile Brush Tool that serves as the cornerstone for countless creative endeavors. From laying down foundational outlines to painting intricate details and applying subtle textures, the Brush Tool is an indispensable asset for both novice and seasoned professionals. Its adaptability extends to a wide spectrum of applications, including the editing of images, posters, banners, logos, invitation cards, and various other graphic design projects. This guide aims to demystify the Brush Tool, providing a thorough understanding of its functionalities, settings, and creative potential.
Understanding the Fundamentals of the Brush Tool
At its core, the Brush Tool in Photoshop functions much like a traditional paintbrush on a physical canvas. It applies color to an image or document through strokes. When you click and drag with the Brush Tool active, it lays down a series of marks based on the selected brush tip and its associated settings. This creates a stroke, and by continuing to press the mouse button or a stylus on a drawing tablet, you build up color until you release the pressure.
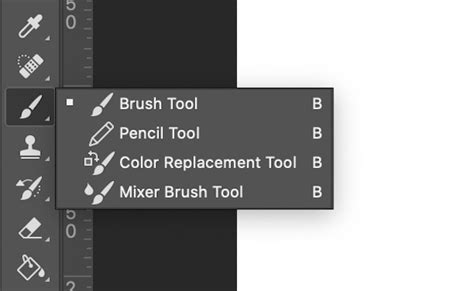
The Pencil Tool, often found nestled within the Brush Tool's dropdown menu in the toolbar, functions similarly but with a critical difference: it creates hard-edged lines and does not blend with existing pixels. It's essentially a sub-tool of the Brush Tool, offering a more precise, pixel-based application of color.
Installing and Accessing Brushes
Before you can harness the full power of Photoshop's brushes, you may need to install new ones. Photoshop brushes are typically distributed as .abr files. To install a brush set, navigate to the location where you have extracted the brush files and select the .abr file. Photoshop will then add these brushes to your Brush Presets library.
Once brushes are installed, they become accessible through the Brush Preset Picker, which can be found in the Options Bar at the top of the screen when the Brush Tool is selected. You can also access a more comprehensive set of brush options and manage your brushes through the Brush Settings panel, which can be opened by navigating to Window > Brush Settings.
Navigating the Brush Tool Options Bar
The Options Bar, located at the top of the Photoshop interface, provides immediate access to several key settings for the Brush Tool. These settings allow for quick adjustments to how your brush behaves.
Brush Size and Hardness
The Brush Size directly controls the diameter of the brush tip. You can adjust this by clicking on the brush picker dropdown in the Options Bar or by right-clicking directly on your canvas. A slider or numerical input box allows you to increase or decrease the brush size. Shortcut keys, such as the [ and ] keys, offer a rapid way to adjust brush size incrementally.
Brush Hardness dictates the strength of the brush tip's edge. A brush set to 100% hardness will produce clean, crisp lines, while a brush with a lower hardness setting (e.g., 10%) will have blurred, feathered edges, creating softer transitions. This setting is also adjustable within the brush picker dropdown.
Opacity and Flow
Opacity determines the transparency of the color you apply. A brush set to 100% opacity will be fully opaque, while a lower opacity setting means the color will be more transparent, allowing the underlying pixels to show through. Crucially, opacity does not exceed the set level no matter how many times you paint over an area until you release the mouse button. If you stroke over the same area again after releasing the mouse button, you apply additional color, equivalent to the set opacity.
Flow controls the rate at which color is applied as you move the pointer over an area. With a high flow, color builds up quickly, similar to how paint is sprayed from an airbrush. A lower flow rate means color is applied more gradually, allowing for more subtle build-up and control, especially useful for achieving soft gradients or mimicking traditional airbrush techniques.
Blending Modes
The Blending Mode setting dictates how the color you paint interacts with the existing pixels on the layer. These modes function similarly to layer blending modes and offer a vast array of creative possibilities. For instance, modes like "Multiply" can be used to darken areas, while "Screen" or "Color Dodge" can be used to lighten them. Experimenting with different blending modes is key to achieving unique effects.
Exploring the Brush Settings Panel
For more intricate control over brush behavior, the Brush Settings panel (Window > Brush Settings) is essential. This panel offers a deep dive into a multitude of options that can drastically alter how a brush stroke is rendered.
Brush Tip Shape
This setting allows you to select from a wide range of predefined brush tip shapes, including round, square, and various textured or specialized shapes. You can also create your own custom brush tips from images or selections.
Spacing
Spacing determines the distance between individual brush tip stamps as you drag the brush across the canvas. A lower spacing value results in a continuous stroke, while a higher value creates a series of discrete marks, useful for effects like spray paint or dotted lines.
Shape Dynamics
Shape Dynamics offers a wealth of options to introduce variation into your brush strokes.
- Size Jitter: Controls the randomness of the brush tip size within a stroke.
- Angle Jitter: Introduces random rotation to the brush tip.
- Roundness Jitter: Varies the roundness of the brush tip.
- Control Options: Settings like Pen Pressure, Pen Tilt, Stylus Wheel, and Fade can be used to link these variations to input from a drawing tablet, allowing for more organic and responsive brushwork.
Scattering
The Scattering setting allows you to distribute brush marks randomly or in a scattered pattern along a stroke.
- Scatter: Controls the degree to which the brush marks are spread out from the center of the stroke.
- Count: Determines the number of marks that appear within a stroke.
- Both Axes: Enables scattering along both the X and Y axes for a more dispersed effect.
Texture
Applying texture to your brush strokes can simulate painting on different surfaces like canvas or textured paper. You can select from a range of built-in patterns or import your own. The Pattern Scale setting adjusts the size of the texture, and the Depth slider controls how strongly the texture affects the stroke.
Dual Brush
This advanced setting allows you to combine two different brush tips to create a single, more complex brush stroke. The areas where the two brush tips intersect will be painted, leading to unique and interesting results.
Color Dynamics
Color Dynamics allows for variation in the color of your brush strokes.
- Foreground/Background Jitter: Varies the color between your foreground and background colors.
- Hue Jitter: Introduces randomness to the hue of the paint.
- Saturation Jitter: Controls the variation in color saturation.
- Brightness Jitter: Modifies the brightness of the paint applied.
Transfer
The Transfer settings combine aspects of Opacity and Flow Jitter to create more nuanced brush strokes. This can simulate the way paint is applied by traditional tools, with variations in opacity and flow across a single stroke.
Other Settings
- Noise: Adding noise to your brushwork can create a more textured and visually interesting effect, simulating grain or subtle imperfections.
- Build Up: Simulates traditional airbrushing, where holding down the mouse button for longer results in a more intense mark.
- Smoothing: This setting is particularly useful when painting with a mouse, as it helps to produce smoother curves and cleaner lines by delaying the brush stroke's response to your input. Photoshop CC 2018 introduced significant advancements in this area.
- Protect Texture: Ensures that the same pattern and scale are applied to all brush presets that utilize texture, even if they have different settings.

Creating Custom Brushes
One of the most powerful features of Photoshop's Brush Tool is the ability to create your own custom brushes. This allows for unique artistic styles and the creation of specialized effects.
- Choose your image or shape: Select the image or shape you wish to convert into a brush. This could be anything from a photograph of a texture to a hand-drawn element.
- Select and edit the image: Using selection tools like the Marquee or Lasso tools, isolate the part of the image you want to use as your brush tip. You can then make any necessary edits, such as adjusting contrast or cleaning up edges.
- Define the brush: Navigate to Edit > Define Brush Preset. A dialog box will appear, allowing you to name your new brush.
- Save and use the brush: Click OK to save your new custom brush. It will then appear in your Brush Preset Picker and Brush Settings panel, ready to be used in your projects.
This process is invaluable for creating brushes that simulate specific natural elements like rain, snow, smoke, or clouds, or for replicating unique artistic styles.
Practical Applications and Techniques
The Brush Tool's versatility shines in its numerous applications:
Laying Down Outlines and Sketching
The Brush Tool is excellent for creating initial sketches and outlines for illustrations, character designs, or any project requiring a foundational drawing.
Painting and Digital Art
For digital painters, the Brush Tool is the primary instrument for applying color, blending, and creating painterly effects.
Layer Masks and Selections
The Brush Tool is fundamental when working with layer masks. By painting with black on a mask, you hide parts of a layer, and by painting with white, you reveal them. This allows for precise control over the visibility of adjustments and effects, enabling targeted edits to specific areas of an image. Using a soft brush with low opacity on a mask can create gradual transitions and subtle blending.
Photoshop Layer Masks Explained in 2 Minutes
Photo Retouching and Manipulation
Beyond artistic creation, the Brush Tool plays a vital role in photo retouching. It can be used to:
- Dodge and Burn: By painting with white or black on a separate layer set to a blending mode like "Overlay" or "Soft Light," you can selectively lighten (dodge) or darken (burn) areas of an image to enhance contrast and direct the viewer's eye.
- Color Correction: Apply color adjustments to specific areas by painting on adjustment layers with masks.
- Adding Effects: Create realistic effects like light rays, atmospheric fog, or subtle textures.
Creating Realistic Effects
Photoshop offers a wealth of pre-made brush sets designed for specific effects, but creating your own custom brushes can yield even more personalized results. For instance, custom brushes can be invaluable for:
- Painting Realistic Hair: When replacing backgrounds or compositing subjects, custom brushes can help recreate the fine details of hair strands for a seamless blend.
- Simulating Natural Elements: Brushes designed from real clouds, smoke, or water can add a layer of photorealism to your work.
- Adding Textures: Brushes can apply textures that mimic canvas, paper, or fabric, giving digital artwork a more tactile feel.
Best Practices for Using the Brush Tool
To maximize the effectiveness and avoid repetition in your work, consider these best practices:
- Use Brushes Sparingly: Overreliance on a single brush type or style can make your artwork appear repetitive and uninspired. Diversify your brush usage to maintain visual interest.
- Choose the Right Brush for the Job: Not all brushes are created equal. Select brushes that are suited to the specific task at hand, whether it's laying down a broad stroke, creating fine detail, or applying a particular texture.
- Practice Regularly: Like any skill, proficiency with Photoshop's Brush Tool comes with practice. Experiment with different settings, techniques, and brush types to discover what works best for your creative process.
- Leverage Layer Masks and Blending Modes: Combine the Brush Tool with layer masks and blending modes to achieve sophisticated and nuanced effects that would be difficult to attain otherwise.
- Utilize Drawing Tablet Features: If you use a drawing tablet, explore how pen pressure, tilt, and rotation can be mapped to brush settings like size, opacity, and flow for a more dynamic and intuitive painting experience.
Beyond the Basics: Advanced Techniques and Considerations
The Brush Tool's true power lies in its adaptability. While pre-made brush sets are a great starting point, understanding how to modify and create your own opens up a universe of creative possibilities.
Working with Brush Presets
Photoshop includes several sample brush presets that can serve as excellent starting points. You can modify these presets to produce entirely new effects. Furthermore, you can save specific combinations of brush settings as custom presets for quick access to frequently used brush characteristics. This includes not only the brush tip shape but also options like opacity, flow, and color.
The Mixer Brush Tool
Activated by Ctrl/right-clicking on the Brush Tool icon, the Mixer Brush Tool offers a unique approach to painting. It allows you to blend colors on your canvas, simulating the way paint mixes on a palette or on a canvas. This is invaluable for achieving smooth color transitions and realistic painting effects. You can control the amount of paint loaded onto the brush, the wetness of the paint, and how much color is mixed from the underlying pixels.
Utilizing Brush Tools for Selections and Masking
Beyond direct painting, brushes are crucial for refining selections and layer masks. When working with complex selections, such as hair or fur, a soft brush with low opacity can be used to meticulously refine the edges, making the selection appear more natural. This fine-tuning is essential for professional-looking composites.
Combining Brushes for Unique Effects
Don't hesitate to experiment with combining different brush types and settings. For instance, using a textured brush in conjunction with a scattering brush can create complex organic patterns. Similarly, layering strokes from different brushes with varying blending modes can lead to rich and complex visual outcomes.
Brush Smoothing for Mouse Users
For those who primarily use a mouse, brush smoothing is a game-changer. This feature effectively "drags" the brush stroke, creating a smoother line by delaying its application. This can significantly improve the quality of brushwork when precise pen control is unavailable.
Conclusion: Unleashing Creative Potential
The Brush Tool in Adobe Photoshop is far more than a simple painting instrument; it is a gateway to limitless creative expression. From its fundamental applications in drawing and painting to its sophisticated use in photo manipulation, masking, and special effects, the Brush Tool empowers artists and designers to bring their visions to life. By understanding its myriad settings, mastering the art of custom brush creation, and embracing experimental techniques, users can unlock the full potential of this essential tool and elevate their digital artwork to extraordinary levels. The journey of learning Photoshop brushes is one of continuous exploration and discovery, where every click and drag can lead to a new artistic revelation.