When creating digital art, the ability to maintain transparent areas in your finished design is often a crucial requirement. This is particularly true for artists who work with Procreate on their iPads and need to transfer their creations to other platforms or integrate them into different projects. A common frustration arises when artwork intended to have a transparent background unexpectedly appears with a solid white background after saving or syncing across devices. This article delves into the intricacies of exporting Procreate artwork while ensuring that those valuable transparent areas remain precisely that - transparent.
The Crucial Role of File Formats
The secret to successfully saving your Procreate artwork with a transparent background lies fundamentally in understanding and utilizing the correct file format. While Procreate itself allows you to create and view transparent backgrounds within the app, the export process is where many users encounter difficulties. The key lies in choosing a file format that inherently supports transparency.
Every Procreate document, by default, comes equipped with a dedicated background layer that is pre-filled with white. This serves as a visual canvas for your artwork. However, to achieve transparency upon export, this background layer needs to be rendered invisible, not deleted. The app provides a straightforward method to achieve this temporary invisibility.
The most critical step in preserving transparency is to export your work as a PNG file. PNG, which stands for Portable Network Graphics, is the universally recognized standard for rasterized image files that explicitly allows for transparent backgrounds. Files saved in this format will have a file extension that ends in “.png“. Unlike other formats, such as JPEG, which will always fill transparent areas with a solid color (typically white), PNG files retain the transparency information, making them ideal for web graphics, logos, and any design element that needs to be layered over other content without a distracting background.
The Step-by-Step Export Process
Mastering the export of transparent PNGs from Procreate is a relatively simple process once you understand the workflow. The steps are designed to be intuitive, guiding you through the necessary actions to ensure your transparency is maintained.
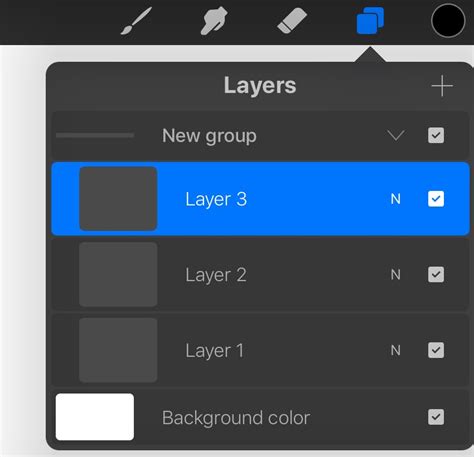
First, within the Procreate app, you need to ensure that the background layer is not visible. To do this, open the Layers menu. You will see a list of all the layers in your artwork. Locate the background layer, which is often at the bottom of the stack and may have a white thumbnail. Tap the checkbox next to this background layer to turn off its visibility. This action effectively makes the background transparent within the Procreate environment. It's important to note that this is a temporary change; the background layer itself has not been deleted, only hidden for the purpose of export.
Once you have confirmed that the background layer is invisible, you need to initiate the export process. Navigate to the Actions menu, which is consistently represented by a wrench icon located in the top-left corner of the Procreate screen. Tapping this icon will reveal a comprehensive index of options and tools within Procreate.
Within the Actions menu, select the "Share" tab. This will present you with a variety of file export options. From this list, you must choose "PNG" as your desired export format. This is the pivotal step that tells Procreate to prepare the file with transparency information intact.
After selecting PNG, Procreate will prompt you to choose a name for your file and designate a specific location on your iPad's storage or connected cloud services (like Google Drive) where you wish to save it. Take a moment to give your file a descriptive name that will help you identify it later.
Finally, tap the "Save" button, typically found in the top-right corner of the export screen. Once this button is tapped, Procreate will process your artwork and generate the PNG file. Your newly-created artwork, with all its intended transparent areas preserved, should now be ready for use across your various digital workflows.
Troubleshooting Common Transparency Issues
Despite following the correct procedure, some users report persistent issues with transparent backgrounds appearing as white after export, especially when syncing across devices or downloading from cloud storage. Understanding the potential causes of these glitches can help in resolving them.
One common culprit, as mentioned by users, is the "Optimize iPad Storage" feature. This iCloud setting can sometimes cause files to be stored in a compressed or optimized format, which may interfere with the integrity of transparent background data when the file is accessed or re-downloaded. While fiddling with these settings might seem like a solution, it's often the file format and export method that need attention.
Another scenario involves downloading images from cloud storage services like Google Drive. While Google Drive itself generally handles PNG transparency well, the issue might arise from how the file is re-saved or accessed on the iPad after downloading. If, for instance, the file is opened in an app that doesn't fully support PNG transparency or is saved in a different format during the process, the transparency can be lost. The user's experience of saving to Google Drive and then back to the iPad, only to find the background white, highlights this potential pitfall. The key is to ensure that the PNG is saved directly from Procreate to a location, and then opened or imported into other applications without an intermediate conversion or re-saving step that strips transparency.
The attempt to use a "convert image to transparent thing" also suggests a misunderstanding of the core issue. If the initial export from Procreate is not a transparent PNG, then attempting to "make it transparent" afterwards is often an inefficient and sometimes ineffective workaround. It's far more reliable to get the transparency right at the source - during the export from Procreate.
The crucial takeaway is that knowing how to save with a transparent background in Procreate is simply a matter of exporting your work in the correct file format. The PNG format is specifically designed for this purpose, and Procreate's export options make it readily accessible.
Advanced Considerations for Transparency
For those who require a deeper understanding or encounter more complex scenarios, several advanced points are worth considering.
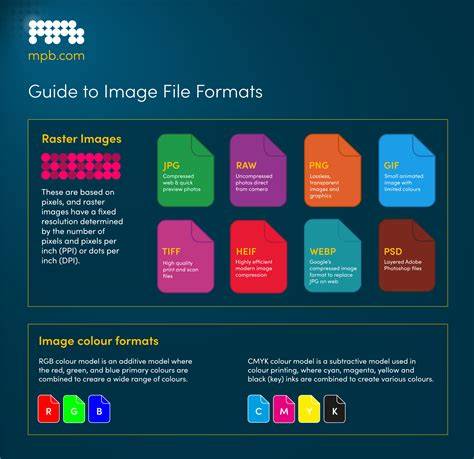
Understanding Raster vs. Vector: Procreate is a raster-based application. This means it works with pixels. PNG is a raster format. Vector graphics, on the other hand, are based on mathematical equations and can be scaled infinitely without loss of quality. While Procreate doesn't directly export to vector formats, understanding the distinction is important if you plan to use your Procreate artwork in applications that handle vector files (e.g., Adobe Illustrator). In such cases, you might need to export a high-resolution PNG from Procreate and then use a tracing function in vector software, or recreate the artwork in a vector program from scratch.
Color Profiles and Color Spaces: While less common for basic transparency issues, the color profile of your artwork and the target application can sometimes influence how colors and transparency are interpreted. Procreate typically works in the Display P3 color space. Ensuring compatibility with the color space of the software where you will be using the transparent PNG can prevent unexpected color shifts.
File Size and Optimization: PNG files can sometimes be larger than other formats like JPEG, especially for images with many colors and complex details. However, the benefit of transparency often outweighs the slight increase in file size. Procreate's PNG export is generally well-optimized. If file size becomes a critical concern for web use, consider using online tools or image editing software to further optimize the PNG after export, potentially reducing file size without compromising transparency.
Layered Exports: For more advanced workflows, you might need to export individual layers with transparency. Procreate allows you to export your work as a layered PSD (Photoshop Document) file, which preserves layers and transparency when opened in compatible software like Adobe Photoshop. This is an alternative to exporting a flattened PNG if you need to retain the ability to edit individual elements later.
Ensuring Seamless Synchronization and Cloud Integration
The issue of transparent backgrounds appearing white after syncing or cloud transfer often stems from how these services handle file previews or temporary storage.
When you save a transparent PNG from Procreate to a cloud service like Google Drive, Dropbox, or iCloud Drive, the service might generate a preview image for quick viewing. These preview images sometimes do not accurately represent transparency and may default to a white background. However, when you download the actual file and open it in an application that correctly interprets PNG transparency, the transparency should be present.
The key is to always verify the transparency by opening the downloaded file in a capable image viewer or editor, rather than relying solely on the cloud service's preview. If the downloaded file consistently shows a white background across multiple applications, then the issue is likely with the export from Procreate or an intermediary step in the saving process.
Exporting Procreate to Photoshop with Layers
The experience of saving a transparent PNG to Google Drive, then downloading it back to the iPad and finding it has a white background, suggests that either the download process or the subsequent saving action on the iPad might be re-compressing or converting the file. To avoid this, try opening the PNG directly from Google Drive in an app that supports transparency (like Procreate itself, or a photo editor) and then use that app's "Save As" or "Export" function to save it to your iPad's local storage. This bypasses any potential automatic conversion that might be happening during a simple download and save operation.
Ultimately, understanding that Procreate's PNG export is designed to preserve transparency is the first and most crucial step. By diligently following the export process and being mindful of how files are handled after they leave Procreate, artists can confidently maintain the integrity of their transparent artwork across all their devices and platforms. Gaining a complete understanding of your favorite design apps and their export capabilities is essential for a smooth and professional workflow.