ibisPaint offers a powerful suite of tools designed to elevate digital art, with its color filters and adjustment features playing a crucial role in refining an artwork. From subtle tweaks to dramatic transformations, understanding these functions allows artists to achieve a polished and professional look. This guide delves into the intricacies of ibisPaint's color manipulation capabilities, exploring tools like the Tone Curve, Extract Line Drawing, Wet Edge, and efficient color selection methods.
Precision Adjustments with the Tone Curve
The Tone Curve is an advanced feature within ibisPaint, primarily available as a premium option, that provides granular control over a picture's overall brightness and color balance. This tool is indispensable for artists aiming to correct imperfections or intentionally alter the mood of their work.
To access the Tone Curve, navigate to your "My Gallery," tap on the desired artwork, and then select "Import Picture." Once the image is loaded, open the "Tool Selection" window and choose "Filter." Within the filter options, you will find "Tone Curve."
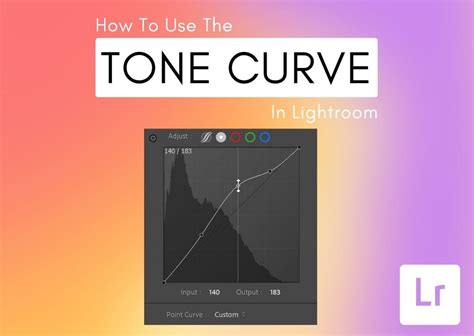
The Tone Curve operates on a graph where the horizontal axis represents the input tonal values (from black to white) and the vertical axis represents the output tonal values. By default, a diagonal line signifies a linear relationship, meaning no tonal alteration. Artists can manipulate this line by adding "knobs" or anchor points. Dragging these knobs up or down alters the brightness of specific tonal ranges.
Adjusting Brightness with the RGB Tab
Within the Tone Curve interface, the "RGB" tab allows for the adjustment of overall brightness. A single knob on the diagonal line can be dragged to make the image brighter or darker. For more intricate control, additional knobs can be placed by tapping on empty spaces within the graph. The right side of the graph controls the brightness of the highlights, while the left side influences the shadows. Moving a knob upwards increases brightness, and moving it downwards decreases it.
Fine-Tuning Color Balance
After adjusting brightness, the photograph might exhibit an unwanted color cast due to the lighting conditions of its origin. This is where the "Color Balance" aspect of the Tone Curve becomes vital. If an image appears too red, for instance, selecting the "R" (Red) channel allows for specific adjustments. Moving the curve upwards will intensify the red tones, making the image redder. Conversely, moving it downwards will shift the balance towards blue, making the image cooler. Similar adjustments can be made for the Green and Blue channels to achieve the desired color harmony.
From Sketch to Digital: Extracting Line Drawings
ibisPaint's "Extract Line Drawing" function is a remarkable tool for digitizing traditional sketches. It allows artists to capture the linework from a physical drawing made on paper, transforming it into a clean, digital format ready for further coloring and manipulation.
The process begins with creating a rough sketch using a pencil or similar medium. Once the outline is finalized, it's recommended to go over the lines with a pen to ensure clear, defined edges. After completing the drawing, take a clear photograph of it using your smartphone's camera.

Next, open the ibisPaint app, go to "My Gallery," and tap the "+" icon to "Import Picture." After selecting the photograph of your drawing, the app will prompt: "Would you like to extract the line drawing?" Tap "OK" to proceed.
Refining the Extracted Lines
Once the initial extraction is performed, you'll be presented with sliders to fine-tune the result. The "White" slider is used to make the paper background completely white, effectively removing any stray marks or shadows from the scan. Simultaneously, the "Black" slider can be adjusted to increase the contrast of the drawing, making the lines bolder and more defined if the initial drawing appears a bit dull.
The relationship between the Black and White values is key to the final aesthetic. When the Black and White values are further apart, the drawing takes on a more natural, analog feel, preserving subtle variations in line weight. Conversely, when these values are close together, the drawing appears more digital and binary, with stark black lines against a white background.
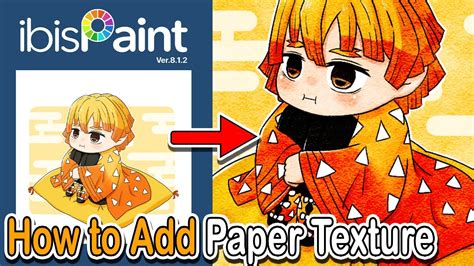
Emulating Watercolor with Wet Edge
The "Wet Edge" filter in ibisPaint is designed to replicate the unique aesthetic of watercolor paintings, adding a distinctive border effect to your artwork. This filter is particularly effective when applied over illustrations that have a painted base.
To utilize this feature, prepare an illustration with a painted base. Navigate to the "Material" tool and select "Material Patterns (Color)." For this example, let's assume the "hemp" pattern is chosen. To achieve the texture of paper, ensure the "Repeat" option is turned on, and then shrink the material to make the pattern appear finer. Tap the checkmark to apply the material.
After applying the material, open the "Layer" window. In the "Blend Mode" settings, select "Soft Light." This blend mode will integrate the texture seamlessly with the underlying artwork.
Next, open the "Brush" window and select the "Watercolor (Point)" brush. Go back to the "Layer" window and add a new layer below the line drawing layer. Set the opacity of this new layer to approximately 25%. Turning on "Clipping" for this layer is crucial, as it ensures that any shadows you paint will remain confined within the boundaries of the line drawing, preventing them from spilling outside. Gently paint shadows onto this layer.
Once the shadows are added, open the "Layer" window again. Above the shadow layer you just created, add another new layer and turn on "Clipping" for this layer as well. Now, from the "Tool Selection" window, select "Filter" and then choose "Wet Edge."
Controlling the Watercolor Border
The "Wet Edge" filter provides "Width" and "Strength" sliders. Dragging these sliders allows you to adjust the thickness and intensity of the watercolor-like border effect, giving your artwork a distinctive, hand-painted feel.
Efficient Color Selection: The Eyedropper Tools
In the dynamic workflow of digital art, frequently switching between tools to select colors can disrupt creative flow. ibisPaint offers two efficient "Eyedropper" tools to quickly sample colors directly from the canvas or layers, streamlining the process.
The Standard Eyedropper
The standard "Eyedropper" tool is accessed through the "Tool Select" window. Once selected, tapping on any color on your canvas will instantly pick it up as the active drawing color. A key setting for the Eyedropper is the "Reference layer."
- Canvas: When set to "Canvas," the Eyedropper considers all layers together. This means the selected color will be influenced by the blending modes and opacities of each individual layer, reflecting how the colors appear on your screen.
- Current Layer: If "Current Layer" is selected as the reference, the Eyedropper will only sample the color from the currently active layer, disregarding any blending modes or opacities applied to other layers.
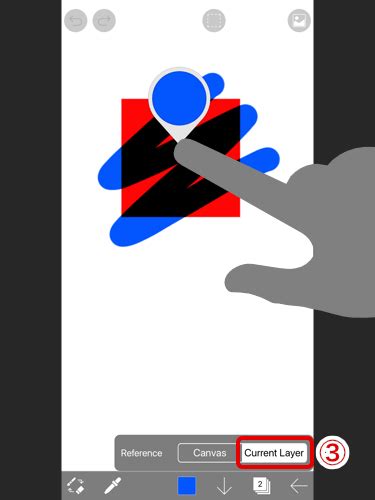
Consider a scenario with a red rectangle and a blue circle. If the blue circle's layer has a "Multiply" blending mode applied, and the Eyedropper reference is set to "Canvas," you will sample the resulting color after the blending mode has taken effect. However, if the reference is changed to "Current Layer," you will sample the original blue color of the circle, unaffected by the blending mode. This distinction is vital for precise color selection, especially when working with complex layer arrangements.
The Quick Eyedropper
The "Quick Eyedropper" offers an even more streamlined approach. By performing a long press of your finger on the screen, a magnifying glass appears, allowing you to select the color directly beneath your fingertip without needing to open the "Tool Select" window. This is an incredibly convenient tool for rapid color sampling during the painting process.
To cancel the Quick Eyedropper while it's active, simply keep your finger held down and use another finger to tap elsewhere on the screen. For users who prefer not to use this feature, it can be disabled. Navigate to "Return," then "Settings," select "Quick Eyedropper," and toggle it to "Off," followed by pressing the checkmark to close the settings.
*Must Watch* - how to fix the quick eye dropper glitch in ibis paint x
By mastering these color adjustment and selection tools, artists can significantly enhance their workflow and achieve a wider range of artistic expressions within ibisPaint. The ability to precisely control tone, color balance, extract linework, emulate traditional media, and efficiently sample colors empowers creators to bring their visions to life with greater ease and sophistication.