This tutorial delves into the intricate process of creating sophisticated lace-inspired text effects within Adobe Photoshop. We will embark on a journey from the fundamental creation of a custom lace brush using geometric shapes to its sophisticated application for text styling, incorporating various layer styles, filters, and adjustments. The aim is to equip users with the knowledge to transform simple text into an elegant, lace-adorned masterpiece, suitable for a range of design applications.
Laying the Foundation: Creating a Custom Lace Brush
The genesis of our lace effect lies in the creation of a unique brush. This process begins not with traditional brush strokes, but with geometric shapes that will be meticulously manipulated to form the intricate patterns characteristic of lace.
First, it's essential to have a clear workspace. If you need to show or hide guidelines, you can simply press the Command-; keys. In the Options bar, ensure that "Align vertical centers" and "Align horizontal centers" icons are selected. This ensures precise placement and alignment of our shapes.
We will begin by constructing the basic elements of our lace pattern. Select the polygon tool. Set the Width and Height values to 450 and the Number of Sides to 12. Crucially, check the "Smooth Corners" and "Star" boxes. Then, set the "Indent Sides By" to 10%. This configuration will create a twelve-pointed star shape.
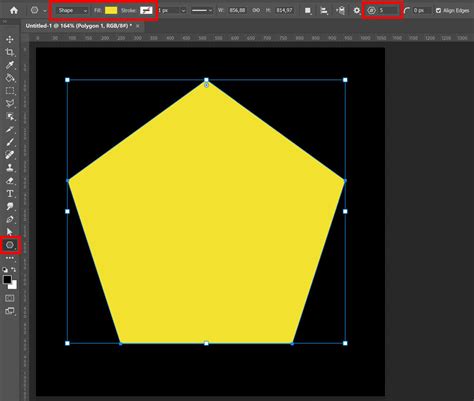
Next, we refine this star. Press Command-T to activate the Free Transform tool. Now, press and hold the Shift-Option keys simultaneously. While holding these keys, click and drag the shape inwards. This action will scale the star uniformly while maintaining its center, effectively creating an indented star shape, a foundational element for our lace.
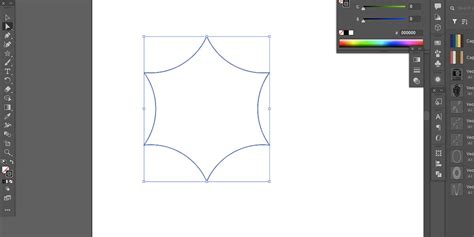
To create a more intricate lace pattern, we will duplicate and manipulate this shape. Duplicate the line you have, and move the copy below the original. This duplication and strategic positioning will be key to building complex lace motifs.
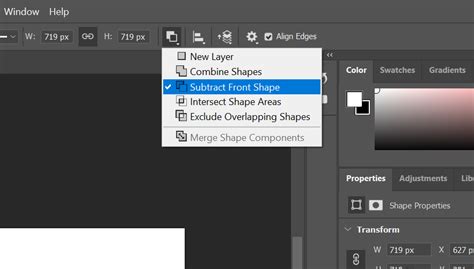
Once the desired shape is achieved, it’s time to merge these components. Pick the Direct Selection Tool. In the Options bar, click the "Path operations" icon and select the "Merge Shape Components" command. This action consolidates the individual shapes into a single, cohesive path, which is vital for defining our brush.
The next step involves creating the finer details of the lace. We will use the Ellipse tool to add circular elements, a common feature in many lace designs. Ensure that "paths" is selected in the Options bar. Draw a path for an ellipse. Then, navigate to the "Paths Panel" and click on the "Make Work Path from Selection" button at the bottom of the Panel. This converts the elliptical path into a workable path for stroking.
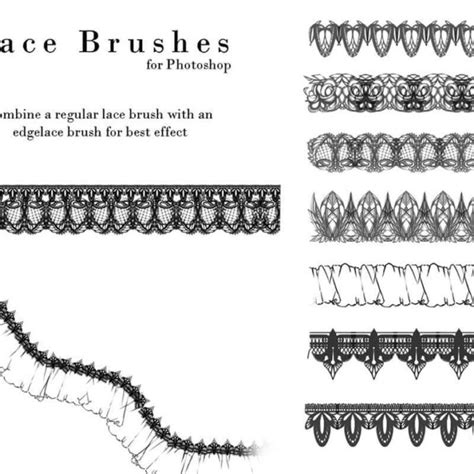
With the path ready, select the Brush Tool (B). A hard round brush is generally suitable for this purpose. In the "Brush Presets Panel," click the Menu on the Top-Right corner and choose "Load Brushes." Navigate to where you have saved your desired lace brush file (typically a .abr format) and select it to load.
Now, select one of your loaded lace brushes. Adjust its size so it is proportional to the elements you intend to create. In the "Brush Panel," under "Brush Tip Shape," set the "Spacing" to 150%. This spacing will create distinct, repeating elements rather than a solid line.

With the brush selected, and your elliptical path active, go to the "Paths tab" in the Options bar. Drop down the pop-out menu and select "Stroke Path." Choose "Brush" from the menu. Ensure the "Simulate Pressure" box remains unchecked. This action will apply the selected lace brush along the elliptical path, creating a delicate, curved lace element.
Repeat this process, creating new elliptical paths and stroking them with different lace brushes or adjusting brush sizes to build a more complex and organic-looking lace component. You can also use the Polygon tool again with different settings to create varied star-like elements, then merge them and stroke paths with your lace brush. Remember to duplicate and strategically position these elements to achieve a dense, intricate lace pattern.
Once you have created a satisfactory lace pattern, you can define it as a brush preset. Click on "Edit" → "Define Brush Preset." Give your new brush a descriptive name, such as "Custom Lace Brush." Now, this unique lace pattern can be selected from the brush tab and used in future projects.
Applying Lace to Text: Stroke and Fill Techniques
With our custom lace brush created and saved, we can now apply it to text, bringing our lace-inspired text effect to life.
Begin by opening your chosen background image in Photoshop. This will serve as the base for our text effect. For this tutorial, we are going to use a Fabric Texture as "Background."
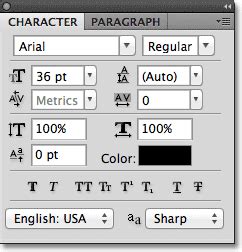
Next, select the "Type Tool" (T). Choose your desired font. For this example, we've selected the "Mothica" font from Rabbittype. Type your text and fill it with White. In the "Character Panel," adjust the "Tracking" to bring the letters closer together, creating a more cohesive text block.
To precisely control where the lace is applied, we will convert our text into a path. While holding the "Command/Control" key, click on top of your Text Layer in the "Layers Panel" to make a selection. Then, head to the "Paths Panel" and click on the "Make Work Path from Selection" button at the bottom of the Panel. This converts the text selection into a precise work path.
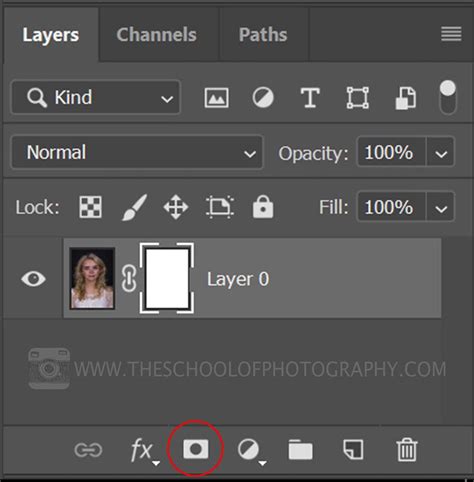
Create a "New Layer" on top of everything by clicking the small button at the bottom of the "Layers Panel." Name this layer "Outline." You can now "Turn Off" your Text Layer’s visibility by clicking the small eye icon on the left side of its thumbnail. This ensures that only the lace will be visible.
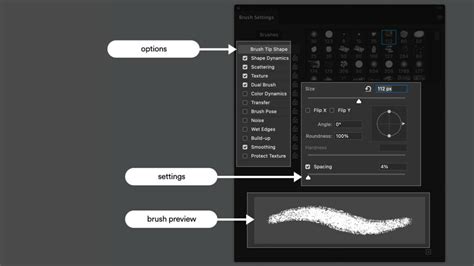
Select the "Brush Tool" (B). Ensure you have loaded your custom lace brushes as described previously. In the "Brush Panel," choose one of your lace brushes. Adjust its size so it is proportional to your text. Then, apply the following values:
- Brush Tip Size: This will depend on the scale of your text and the desired detail of the lace. Experiment to find a size that fits your design.
- Shape Dynamics: Adjustments here, such as "Size Jitter," "Angle Jitter," and "Roundness Jitter," can add variation and a more organic feel to the lace strokes. For example, setting "Angle Jitter" to a higher percentage will rotate the lace elements randomly, mimicking natural lace imperfections.
- Other Dynamics: Consider "Transfer" settings for opacity and flow variations, which can add depth and subtle shading.
With the "Outline" layer active and your work path selected, hit the "Return/Enter" key. This will "Stroke the Path" using your selected lace brush. Now, deselect the "Path" by clicking anywhere on the canvas. Make a selection of your text again (click on top of its original Text Layer's thumbnail while holding the "Command/Control" key). With the "Outline" layer still active, delete the portion of the lace that is inside of the text selection. This effectively creates a lace outline around your text.
Next, we will fill the text with lace. Select another lace brush from your loaded presets. Use similar brush settings as before, but you may want to adjust the "Brush Tip Size" for the fill to be denser or more spread out, depending on your preference.
Create a "New Layer" by clicking the small "Create New Layer" button at the bottom of the "Layers Panel" and name it "Fill." Position this layer beneath your "Outline" layer. Click on the top-left side of your canvas, just on top of your text, hold the "Shift" key, and click on the top-right side to create a straight line filled with your brush. This is the beginning of our lace fill.
Duplicate the "Fill" Layer (Command/Control + J) and move the duplicate down using your "Arrow" keys. Place it so it slightly overlaps the bottom of the first layer. Select your "Fill" Layers, duplicate them again, and move them down. Repeat this process until you have covered all the text with lace. This layered approach allows for a dense and complete fill.
Once you have covered the entire text area with lace, select all your "Fill" Layers. Click on the small "Folder" button at the bottom of the "Layers Panel" to "Group" them together and name the group "Fill."
To ensure the lace only appears within the text, make a selection of your text once more. With the "Fill" Group selected, click on the "Add Layer Mask" button at the bottom of the "Layers Panel." This will "Mask" the lace so it only appears within the boundaries of your text selection.
Now, let's add depth and dimension to our lace fill. Open the "Fill" Folder and double-click on the thumbnail of one of the layers to apply "Layer Styles."
- Bevel & Emboss: Use settings like "Style: Inner Bevel," "Technique: Smooth," "Depth," "Size," and "Soften" to create a raised, sculpted appearance. Adjust the "Shading" angles and "Gloss Contour" for realistic lighting.
- Contour: Choose a "Ring - Double" contour to add subtle variations in depth and highlight.
- Texture: Apply a "Texture" overlay. "Extra Heavy Canvas" can provide a subtle, fabric-like texture that complements the lace.
Right-click on top of the layer's thumbnail where you applied the layer styles. Choose "Copy Layer Style." Then, select all the other "Fill" Layers within the group, right-click on them, and choose "Paste Layer Style." This ensures a consistent look across all the lace fill elements.
Enhancing the Effect: Smart Objects and Filters
To further refine and stylize our lace text, we will leverage the power of Smart Objects and Photoshop's extensive filter gallery.
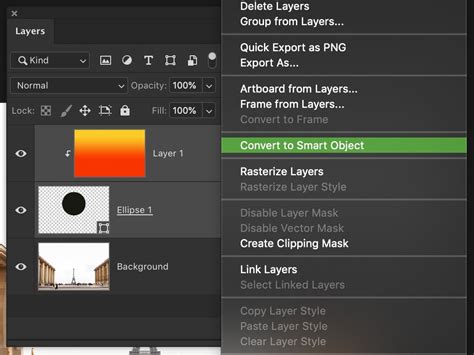
Select the "Fill" Group and the "Outline" Layer. Right-click on top of their thumbnails and choose "Convert to Smart Object." This consolidates these layers into a single, editable Smart Object, allowing us to apply filters non-destructively.
Double-click on top of the Smart Object's thumbnail to open it in a new window. Here, you can apply additional "Layer Styles" for more advanced effects.
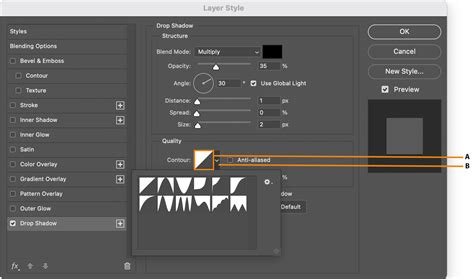
- Drop Shadow: Apply a subtle drop shadow to give the lace text a sense of depth and separation from the background. Use a dark gray color, such as #706d6d, with appropriate settings for "Opacity," "Distance," "Spread," and "Size."
Close the Smart Object window and save the changes. Back in your main document, ensure that "Fill" (which is now your Smart Object containing the outline and fill) is selected. Press "Shift + Alt/Option + Command/Control + E." This creates a "Stamp" - a merged copy of all visible layers. Convert this "Stamp" layer into a new Smart Object as well. This will be our canvas for applying global filters.
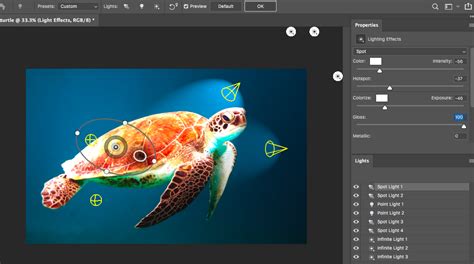
Now, let's add some atmospheric lighting and focus. Go to "Filter" > "Render" > "Lighting Effects." Choose a "Spot" light effect. Experiment with the intensity, direction, and color of the light to create a dramatic or soft illumination for your lace text. Use values similar to the example provided to achieve a focused glow.
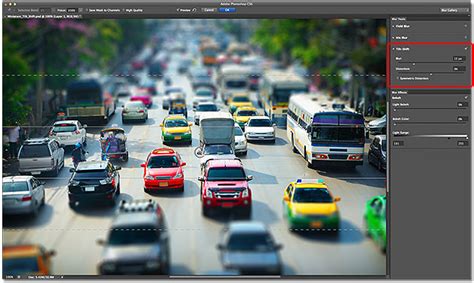
Next, we'll introduce a subtle depth-of-field effect. Go to "Filter" > "Blur Gallery" > "Tilt Shift." This filter can simulate the shallow depth of field often seen in miniature photography. Adjust the "Blur Center," "Blur Amount," and "Focus Area" to selectively blur parts of the image, drawing attention to the lace text. Use settings similar to the example to create a pleasing blur.
To enhance the overall contrast and luminosity of the effect, we will use adjustment layers. In the "Adjustments Panel," create a "New Levels Adjustment Layer." Move the input levers inwards to increase the contrast and luminosity. Crucially, "Clip" this layer to your "Stamp" Smart Object by clicking the small button at the bottom of the "Adjustments Panel" (it looks like a downward-pointing arrow within a square). This ensures the adjustment only affects the layer below it. Finally, reduce the "Fill" of your "Stamp" Smart Object to around 55%. This allows the background to subtly show through, creating a more integrated look.
As a final touch, create a "New Layer," name it "Line," and place it on top of your "Fill" Layer (the Smart Object containing the outline and fill) and under the "Stamp" (or "Layer 1") Layer. This layer can be used for adding fine details, subtle highlights, or further decorative elements to enhance the lace effect. You could, for instance, use a fine brush with a lighter color to trace some of the lace edges, adding a subtle sheen.
Create a Bold 3D Text Effect — Photoshop Tutorial
This comprehensive approach, from brush creation to intricate filter application, allows for the development of highly detailed and visually stunning lace-inspired text effects in Photoshop. The combination of custom brushes, precise path manipulation, layer styles, and smart filters provides immense creative control, enabling designers to craft unique and elegant typographic treatments.