Adding a background to your Adobe InDesign document can significantly enhance the overall impact of your printed project. Whether you aim to infuse a sense of visual dynamism or to draw attention to specific design elements scattered across your pages, the ability to create custom backgrounds is a fundamental yet powerful skill. InDesign offers flexible methods to achieve this, accommodating both solid color backgrounds and intricate image-based designs. This guide will walk you through the essential steps, from initial document setup to advanced customization, ensuring your backgrounds serve your design intentions effectively.
Setting Up Your InDesign Document and Layers
The journey to a well-designed background begins with the proper setup of your InDesign document. When you first open Adobe InDesign, you'll be prompted to create a new document. Click "Create New" on the left-hand side. Here, you can define the precise dimensions of your project by entering the height and width, or you can opt for one of the many pre-existing document templates that InDesign offers, which can streamline the initial setup process for common project types like brochures, posters, or magazines.
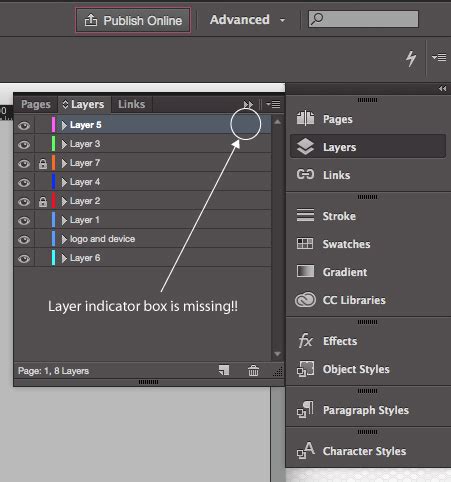
A crucial aspect of organized InDesign workflow, particularly when dealing with backgrounds, is the strategic use of layers. It is highly recommended to maintain separate layers for distinct elements of your design. This means dedicating one layer specifically for your background, another for your primary text content, and additional layers for any other images or graphic assets you plan to incorporate. This hierarchical organization not only keeps your workspace tidy but also facilitates easier editing and manipulation of individual design components without affecting others.
To create a new layer for your background, navigate to the Layers panel. If you don't see the Layers panel readily available, you can access it by going to the menu bar at the top of your screen, clicking "Window," and then selecting "Layers." Within the Layers panel, you'll find an option to create a new layer, often represented by a small icon resembling a folded piece of paper. Click this icon, and a new layer will appear in your panel. It's good practice to rename this layer to something descriptive, such as "Background," to clearly identify its purpose.
Incorporating Image Backgrounds
One of the most visually engaging ways to create a background is by using an image. This can transform a plain page into a rich and textured canvas that complements your content. To place an image into your InDesign document, start by ensuring your background layer is selected in the Layers panel. Then, go to the menu bar at the top of your screen, click "File," and select "Place." This action will open a dialog box allowing you to navigate through your computer's file system. Locate the image file you wish to use as your background and double-click its name to select it.
Once the image is loaded, your cursor will transform into a loaded graphic icon. Move this cursor to the desired location on your InDesign page where you want to position the image. A single click will place the image at its original size, centered on your cursor's position. Alternatively, you can click and drag your cursor to draw a bounding box of a specific size before releasing the mouse button. This allows you to pre-define the dimensions of the image frame as you place it, offering more control over its initial scale.
It is vital that the image you select possesses a sufficiently high resolution to match the dimensions of your page. Using a low-resolution image will result in a pixelated and unprofessional appearance when printed or viewed at high magnification. If your chosen image is larger than your entire page, you can easily crop it to fit. To do this, first select the image frame using the Selection tool (the black arrow icon in the toolbar). Then, click and drag the edges or corners of the image frame inward until it conforms to the boundaries of your page.
Adjusting the size of an image after it has been placed is also straightforward. Select the image frame using the Selection tool (shortcut "V"). To resize proportionally, preventing distortion, click and drag one of the corner handles of the image frame while holding down the Shift key. On a Mac, this combination is Shift + Command. For even more precise control, or to resize from the center outwards, you can hold down the Shift + Alt keys (Shift + Option on a Mac) while dragging a corner. This ensures the image scales evenly from its center point.
Adjusting Image Opacity for Readability
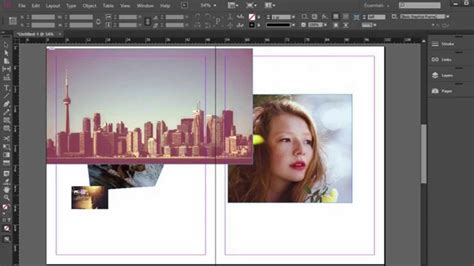
When text or other crucial design elements are placed on top of an image background, readability can become a significant challenge. The visual complexity of the image can obscure the text, making it difficult for the viewer to comprehend. A common and effective technique to overcome this is by reducing the opacity of the background image. Lowering the opacity makes the image more transparent, allowing the underlying elements, such as text or page color, to show through more clearly.
To adjust the opacity of your image background, first ensure that the image frame is selected using the Selection tool (the black arrow). Then, open the Effects panel. You can access this panel by going to the menu bar at the top, clicking "Window," and then selecting "Effects." Within the Effects panel, you will find an "Opacity" setting. You can reduce this value using the slider or by typing in a specific percentage. A common practice is to lower the opacity to 50% or even less, depending on the image and the contrast needed for your foreground elements. Experiment with different opacity levels to find the optimal balance between visual appeal and legibility.
Applying Solid Color Backgrounds
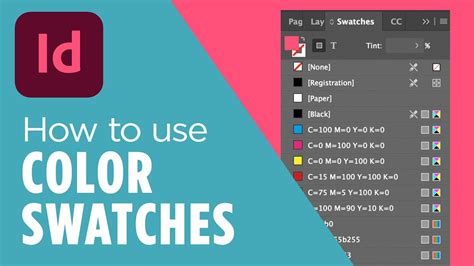
For projects that require a simpler aesthetic or where a specific brand color needs to be prominent, solid color backgrounds are an excellent choice. InDesign provides robust tools for managing and applying colors. The Swatches panel is your primary resource for this. You can typically find the Swatches panel icon, which resembles six shaded squares, in the menu to the right of your workspace. If it's not visible, navigate to "Window" in the menu bar, hover over "Color," and then click "Swatches."
Within the Swatches panel, you'll notice two primary color boxes in the upper-right corner. One represents the Fill color, and the other, distinguished by a border, represents the Stroke color. To apply a color to a shape or your background, you'll primarily be concerned with the Fill color.
There are several ways to introduce new colors into your Swatches panel. One method involves creating a new color swatch. Click the icon with four horizontal lines in the upper-right corner of the Swatches menu, and then select "New Color Swatch" from the fly-out menu. This opens a dialog box where you can define your color using CMYK sliders (ideal for print) or other color models. Adjust the sliders to achieve your desired hue, saturation, and brightness, and then click "OK" to add it to your swatches.
Alternatively, for a quick way to sample colors directly from an image or another element on your page, you can utilize the Eyedropper tool. Select the Eyedropper tool (shortcut "I"). Then, if you want to sample a color from an existing image, hold down the Alt key (Option on a Mac) and click on the specific color within the image. This selected color will become your active fill color.
To apply a color swatch to your background shape, first, you need a shape to apply it to. You can use the Rectangle tool (found by clicking and holding the rectangle tool icon in the toolbar on the right) to draw a rectangle that covers your entire page. Once the rectangle is drawn, select it using the Selection tool ("V"). Then, simply click on the desired color swatch in the Swatches panel. The selected color will be applied as the fill for your rectangle, effectively creating a solid color background.
If the majority of your publication will feature a single background color, consider an alternative to printing the color on each page. You might find it more efficient and cost-effective to print on colored stock paper. In InDesign, you can simulate the color of your paper stock by using the "Paper" swatch. It's important to note that the "Paper" swatch itself is not a printable element; it's a visual guide within InDesign to help you design with your chosen paper color in mind.
Advanced Background Techniques and Considerations
Beyond simple color fills and image placements, InDesign offers more sophisticated ways to craft compelling backgrounds. For instance, you can create gradients that transition smoothly between two or more colors, adding depth and dimension to your pages. Gradients can be applied using the Gradient Swatch tool or directly within the Gradient panel.
Another powerful technique is using patterns. Patterns can be created from existing objects or imported as image files. These can range from subtle textures to bold, repeating motifs, offering endless creative possibilities. To apply a pattern, you would typically create a frame, fill it with the pattern swatch, and then place this frame on your background layer.
When working with complex backgrounds, especially photographic ones, consider the overall hierarchy of your design. The background should support, not overpower, your main content. This is where fine-tuning opacity, as discussed earlier, becomes critical. You might also consider blurring the background image slightly to reduce its visual noise and make foreground elements stand out more clearly. This can be achieved through the Effects panel by applying a Gaussian Blur.
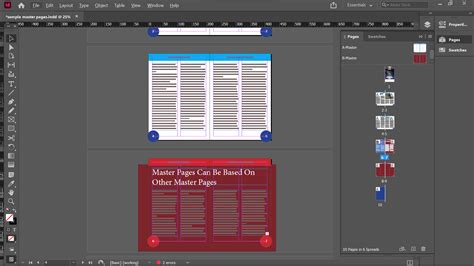
For multi-page documents, consistency in your background design is often key. If you are using a repeating background element or a specific color scheme, consider using Master Pages. Master Pages allow you to create a reusable template for your pages, ensuring that your background (and other consistent elements like page numbers or headers) appears identically on all designated pages. To access Master Pages, open the Pages panel, and double-click on a master page (e.g., "A-Master") to edit it. Any elements you add to the master page will automatically appear on the document pages based on that master.
Furthermore, think about the implications of your background choice on print production. Highly detailed photographic backgrounds or those with very dark, solid color areas can consume a significant amount of ink, potentially increasing printing costs. They can also present challenges in terms of ink drying times and potential for smudging, especially on certain types of paper. If you are printing a publication with a very dark or photographic background throughout, discuss these considerations with your print provider beforehand. They can offer advice on paper types, ink coverage, and finishing options that will yield the best results.
When designing for digital distribution, such as interactive PDFs, your background choices might differ. For web-based documents or screen-viewed PDFs, consider the impact of background colors on screen contrast and accessibility. Ensure that text remains legible across various screen sizes and resolutions. For these applications, you might also incorporate subtle animations or interactive elements within the background itself, though this moves beyond the scope of traditional print background design.
Ultimately, the process of changing or creating a background in InDesign is an integral part of the design workflow. It requires a combination of technical proficiency with the software and a keen eye for aesthetics. By understanding the tools available and considering the purpose of your design, you can effectively leverage backgrounds to elevate your InDesign projects from simple layouts to visually compelling communications. The flexibility of InDesign ensures that whether you're aiming for a minimalist color wash or a richly detailed photographic backdrop, the tools are at your disposal to bring your vision to life.