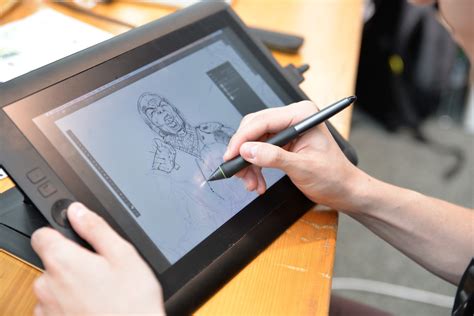
Struggling with pen pressure in Clip Studio Paint can be a frustrating experience for digital artists. This vital feature controls stroke thickness and opacity, directly impacting the finesse and expressiveness of your artwork. When pen pressure isn't functioning correctly, your art may lose its intended dynamism and subtlety. Fortunately, Clip Studio Paint, a powerful software renowned for its intuitive drawing experience and abundant features, is particularly ideal for manga and comic creation, and offers robust solutions to ensure your pen pressure works seamlessly.
Understanding Pen Pressure and Its Importance
Pen pressure sensitivity is the ability of a drawing tablet and stylus to detect how much force is being applied to the surface. This information is then translated by the software, such as Clip Studio Paint, into variations in line thickness, opacity, or other brush parameters. For digital artists, mastering pen pressure is akin to a traditional artist mastering the pressure of their brush or pencil. It allows for:
- Dynamic Line Weight: Creating varied line thicknesses within a single stroke, adding depth and visual interest.
- Controlled Opacity: Fading lines out naturally or building up color density gradually.
- Expressive Strokes: Mimicking the organic feel of traditional media, from delicate sketches to bold, confident lines.
- Subtle Shading: Achieving nuanced tonal transitions that are difficult to replicate with a fixed-width brush.
Without proper pen pressure functionality, your digital art can appear flat and lifeless, lacking the sophisticated touch that makes artwork truly engaging.
Setting Up Pen Pressure in Clip Studio Paint
Clip Studio Paint offers compatibility with different tablet driver APIs, primarily WinTab on Windows OS. "WinTab" is specifically designed for pen tablets and pen displays that connect to a computer, ensuring optimal performance for stylus input. However, some Windows tablets and touchscreen 2-in-1 laptops might utilize "Windows Ink."
Choosing Between WinTab and Windows Ink
The first troubleshooting step for many users experiencing pen pressure issues is to switch between WinTab and Windows Ink.
- Navigate to File > Preferences (or use the shortcut Ctrl+K).
- In the Preferences window, locate the Tablet tab.
- Here, you will find an option to select the Tablet driver option. You can choose between WinTab and Windows Ink.
- Select one, click OK, and then restart Clip Studio Paint. Test your pen pressure. If it's still not functioning correctly, repeat the process and select the other option.
While some may choose to use Clip Studio Paint with a computer mouse, this is not recommended for artists who rely on pen pressure, as a mouse lacks this fundamental input capability.
Tablet Driver Considerations
The performance of pen pressure is also heavily dependent on your drawing tablet's drivers. Ensure you have the latest drivers installed for your specific tablet model. Outdated or corrupted drivers are a common cause of pen pressure malfunctions.
- Wacom Users: Visit the Wacom support website to download the latest drivers for your device.
- XPPen Users: Download drivers from the XPPen support page.
- Huion Users: Find the latest drivers on the Huion website.
After installing or updating drivers, it's often a good idea to restart your computer.
Adjusting Pen Pressure Settings
Once your tablet and Clip Studio Paint are communicating correctly, you can fine-tune the pen pressure to match your drawing style.
Global Pen Pressure Adjustment
Clip Studio Paint allows you to adjust the global pen pressure sensitivity for the entire software. This setting affects all brushes and tools.
- After launching Clip Studio Paint, create a new canvas (the specific settings here aren’t important).
- Select the File menu.
- Choose Adjust pen pressure settings.
- This feature allows you to draw on a test canvas while adjusting the pen pressure level for the entire software. You can observe how your strokes change with varying pressure.
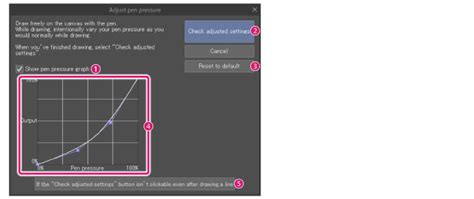
Understanding the Pen Pressure Graph
Within the "Adjust pen pressure settings" or within individual brush settings, you'll often encounter a graph. This graph typically plots pressure input against brush output (e.g., size, opacity).
- Default State: The graph is often a straight diagonal line by default, meaning pressure increases linearly with brush output.
- Adjusting the Curve: You can adjust this graph to change how pen pressure affects your brush.
- Steeper Curve (closer to the top): A higher curve means less pressure is required to achieve the maximum brush size or opacity. This can make it easier to get thick lines with a light touch.
- Shallower Curve (closer to the bottom): A lower curve means more pressure is required to achieve the maximum brush size or opacity. This allows for a wider range of subtle variations and finer control over lighter strokes.
- Custom Curves: You can create S-shaped curves or other custom shapes to achieve specific effects, like having a very small brush size at low pressure and then a rapid increase.
Analogy: Think of the graph like a volume control or a video editing fade. A steep curve is like a quick fade-in, where the volume (or brush size) rapidly reaches its maximum. A shallow curve is like a slow fade-in, allowing for more gradual changes.
Brush-Specific Pen Pressure Settings
Beyond global settings, many brushes in Clip Studio Paint have their own unique pressure dynamics.
- Select a brush tool.
- Click on the small button at the right end of the Brush Size option (or other relevant settings like Opacity). This will open a dialog, such as "Brush Size Dynamics."
- Here, you can further customize how pen pressure affects that specific brush. You might find options to:
- Adjust the curve: Similar to global settings, but only for that brush.
- Set minimum/maximum values: Define the smallest and largest possible brush size or opacity.
- Turn pressure sensitivity off: For brushes that should have a uniform appearance regardless of pressure.
For lining pens used in detailed work, you might set lower minimum size values. For large painting brushes, you might keep the pressure sensitivity static or have it increase more gradually.
Hardware Considerations for Pen Pressure
The quality and type of your drawing tablet and stylus can significantly impact your pen pressure experience.
Choosing a Drawing Tablet
For beginners in digital drawing, consider an affordable option that still offers good pen pressure capabilities.
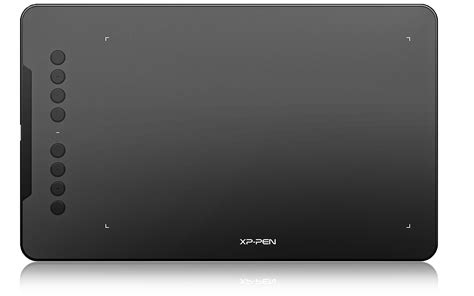
- XPPen Deco 01 V2: Priced under $60, this tablet offers a spacious 10 x 6.25-inch drawing area, making it suitable for use with large screens up to 27 or 32 inches. It provides a good entry point for experiencing pen pressure functionality.
- XPPen Artist 12 3rd Gen: For newcomers looking for a pen display (a tablet with a screen), this model with the X4 Smart Chip Stylus is recommended. It offers the advantage of drawing directly on the screen, which can improve hand-eye coordination.
Stylus Pens and Pressure Levels
Modern drawing tablets typically offer 8192 levels of pressure sensitivity, which is a significant improvement over older models (e.g., 2048 levels). While more levels generally mean finer control, there comes a point where the difference becomes imperceptible to the human eye. The key is not just the number of levels, but how well the tablet and software translate those levels into a smooth, responsive experience.
Important Note: Always ensure your stylus pen has pen pressure support. Some basic styluses may not offer this functionality.
Smartphone and Android Devices
When using stylus pens with pen pressure support on a smartphone or with pen tablets on Android devices, pen pressure sensitivity can often be adjusted within the device's settings or the drawing app itself. For Wacom stylus pens, specifically check for any "If you use a Wacom stylus pen" options before drawing on the canvas.
Enhancing the Drawing Experience
Beyond software settings, several hardware and technique adjustments can improve your pen pressure experience.
Tablet Feel and Friction
- Slippery Surfaces: Drawing tablets are often made of slippery materials, offering less friction than paper. If the screen feels too slippery, consider applying protective overlay sheets, also known as surface films or tablet covers. These can increase friction and better mimic the feel of drawing on paper.
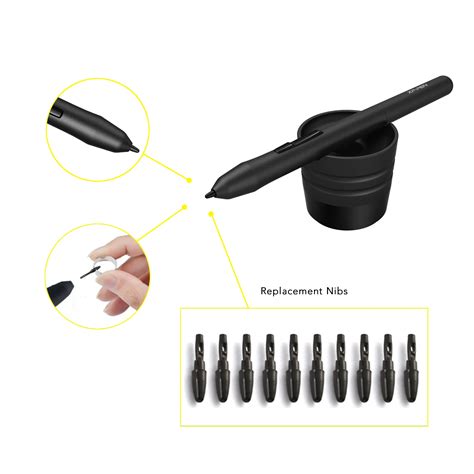
- Pen Nibs: Some pen nibs offer a rougher feel, increasing friction. For example, Wacom Intuos Pro's "Felt pen nibs" provide a more textured experience. Note that the availability of these consumables varies by manufacturer and model.
- "Tip Feel" Adjustment: Some tablet drivers allow you to adjust the "Tip feel" of the pen. Moving a slider to the left might soften the pen's response, while moving it to the right makes it firmer. Advanced customization options are often available by clicking a "Customize" button.
Angle Mismatch and Hand-Eye Coordination
If you place the tablet at a slanted angle from your monitor, you might experience an "angle mismatch" between your hand's movement and the cursor's movement on screen. While experienced artists can often compensate for this, it can be a source of frustration for some. Ensuring your tablet is positioned comfortably and aligned with your viewing angle can help.
Ergonomics and Fatigue
- Less Friction, Less Fatigue: Many artists who switch from traditional to digital drawing find their hands don't get tired as quickly. The reduced friction on pen tablets requires less physical effort to move the pen, which can be beneficial for long drawing sessions.
- Consumables: Protective sheets and pen nibs are consumables that wear down over time. If protective sheets deteriorate, they lose friction. These parts may need to be replaced periodically. Replacement parts can often be purchased online from the manufacturer's store or retailers like Amazon.
- Pen Grip and Tension: The amount of tension and pressure required in your pen grip is highly personal. Some artists prefer a firmer grip, while others prefer a lighter touch. Experiment to find what feels comfortable and allows for the most control without causing strain.
Shortcut Keys and Customization
Streamlining your workflow with shortcut keys can significantly reduce frustration and save time.
- Tablet Driver Settings: Most tablet drivers (e.g., Wacom Tablet Properties) allow you to assign frequently used commands to the side switches on your stylus or the express keys on your tablet. Common assignments include Undo, Redo, Eyedropper, Brush Size, and Eraser.
- Clip Studio Paint Modifier Keys: Clip Studio Paint has a "Modifier Key Settings" feature. You can customize keys like Shift, Ctrl, Alt, and the space bar to temporarily change tools (e.g., holding Alt to temporarily activate the Eyedropper). You can even set combinations of modifier keys for even more functions.
- On-Screen Controls: On devices like the iPad, you can use on-screen controls with many customizable menus (Radial, Pull-down). These allow you to register a multitude of tools and operations, further speeding up your workflow.
Troubleshooting Common Pen Pressure Issues
When pen pressure isn't behaving as expected, consider these troubleshooting steps:
- Check Tablet Drivers: Ensure you have the latest drivers installed and that they are not corrupted. Reinstalling drivers can often resolve issues.
- Switch Tablet Driver API: As mentioned earlier, try switching between WinTab and Windows Ink in Clip Studio Paint's preferences.
- Restart Software and Computer: A simple restart can often clear temporary glitches.
- Reset Preferences: In Clip Studio Paint, you can reset preferences to their default settings. Be aware that this will reset all your custom settings.
- Reinstall Clip Studio Paint: As a last resort, consider uninstalling and then reinstalling the software.
- Test on Another Application: Try using your drawing tablet with another art application (e.g., Photoshop, Krita) to see if the pen pressure issue is specific to Clip Studio Paint or a broader hardware/driver problem.
- Check Tablet Hardware: If possible, test your tablet and stylus on another computer to rule out hardware failure.
Specific Scenarios
- "Ever feel that you are pressing down extremely hard to get lines or that just touching the screen will result in thick lines?" This indicates your pressure curve might need adjustment. If the pen is too firm, you might need to soften the response in your tablet driver or Clip Studio Paint settings. Conversely, if even light touches create thick lines, you may need to steepen the curve or adjust the minimum brush size.
- Smartphone/Android Issues: Pen pressure sensitivity on these devices can sometimes be adjusted within the device's specific stylus settings or within Clip Studio Paint's tablet settings for mobile.
Advanced Pen Pressure Techniques
Once you have a stable pen pressure setup, you can explore advanced techniques:
- Brush Size Dynamics Graph: Experiment with different curve shapes in the "Brush Size Dynamics" settings. A curve that starts very low and then rapidly rises can give you very thin lines at light pressure and quickly build to thicker lines.
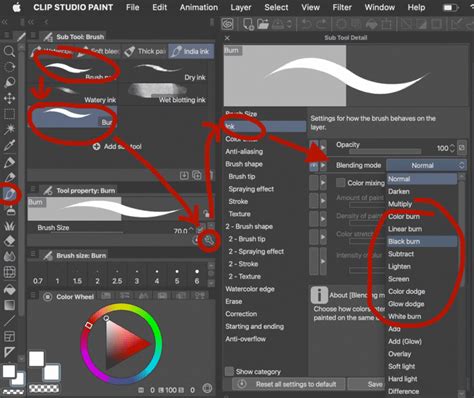
- Brush Opacity and Other Dynamics: Pen pressure can also control brush opacity, density, color mixing, and more. Explore the Sub Tool Detail palette for each brush to unlock these possibilities.
- Tilt and Bearing Sensitivity: Some advanced styluses support tilt and bearing sensitivity, which can further influence brush strokes, mimicking the way a real brush or pencil behaves when angled.
Conclusion
Mastering pen pressure in Clip Studio Paint is an ongoing process of adjustment and experimentation. By understanding the interplay between your hardware, software settings, and personal drawing style, you can unlock the full potential of your digital art tools. Whether you're adjusting global settings, fine-tuning individual brushes, or optimizing your tablet's feel, the goal is to create a seamless and intuitive connection between your artistic intent and the final output on your canvas. Now armed with these solutions, dive into your artistic journey and let your creativity flow with precise and expressive pen pressure!