Concept art is the cornerstone of visual development for a multitude of creative projects, including animation, film, visual effects, and video games. It's the process where ideas are brought to life visually, laying the groundwork for the final product. Concept artists and designers employ powerful digital drawing applications like Clip Studio Paint to tackle diverse visualization tasks, ranging from the intricate design of small props to the creation of compelling character concepts and expansive environmental paintings. This guide aims to equip beginners with the foundational knowledge and practical steps to navigate the world of concept art, with a specific focus on leveraging the robust features of Clip Studio Paint.
Understanding the Concept Art Workflow
The journey of concept art is inherently iterative, characterized by a process of trial and error that involves multiple stages of revisions and refinements. This dynamic approach is crucial for incorporating feedback from art directors or creative teams, ensuring the final vision aligns with project goals. Efficiency is paramount, particularly in the early stages, where the primary objective is to concisely visualize ideas through small, clear thumbnails.
The typical concept art process begins with a brief from the art director or creative director, outlining the specific requirements and purpose of the concept art. Following this, the concept artist embarks on gathering reference materials, seeking inspiration and guidance from existing imagery. In some instances, a mood board or a style guide may be provided by the creative team to establish a visual direction.
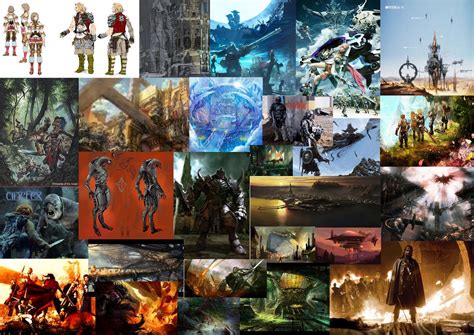
The initial phase of visualization often involves creating very simple thumbnails. These can take the form of basic line sketches, black-and-white value studies, or even silhouettes, all designed to rapidly explore different artistic approaches to the brief. Once the most promising thumbnails are selected, the concept is then refined with increasing detail. These details are shaped by both practical considerations and the overall mood of the project. At this juncture, the artist begins to form a more concrete understanding of how the envisioned place, object, or character will interact within its intended setting.
As the overall concept design and shape solidify, a final design is chosen for the detailed concept artwork. For this final piece, concept artists may utilize a range of tools, such as 3D models, perspective rulers, or specialized texture materials, to achieve a realistic and accurate concept illustration. The culmination of this process is the presentation of the completed concept art to the art director and team members for their review and approval.
The Role of Clip Studio Paint in Concept Art
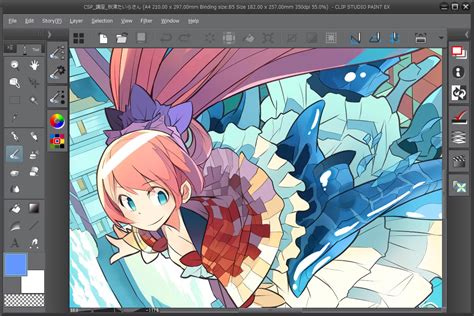
Digital drawing tools have become indispensable in the realm of concept art due to their inherent efficiency and flexibility, particularly when it comes to accommodating revision requests. Clip Studio Paint stands out as a particularly powerful and versatile application, offering a sophisticated brush engine alongside a suite of tools specifically beneficial for concept art. These include features like perspective rulers, 3D models for objects and characters, and layer comps, all of which streamline the creative process.
Upon installing the Clip Studio Paint application on your computer, you'll notice the Clip Studio icon appearing on your desktop. This serves as a gateway to the software's various functionalities.
Navigating the Clip Studio Paint Interface
The user interface of Clip Studio Paint, while initially appearing somewhat complex with its array of menus and buttons, quickly becomes intuitive with a bit of exploration. The software offers a parent launcher, Clip Studio, which provides access to different applications within the suite, such as the Modeler App, useful for posing 3D figures for reference. Within Clip Studio Paint itself, users can select tools from various tool groups, and a color set palette offers a range of standard colors to choose from. The main canvas area is where the drawing, painting, and editing of your image takes place. For user comfort, the color of the user interface can be adjusted from light gray to dark gray. To revert to the default layout prior to version 5.0, navigate to the Window menu > Workspace > Ver. The palette dock, which houses various panels like the Layer palette, can be opened and closed using arrows at the top.
The concept of layers is fundamental to digital art, and Clip Studio Paint implements this robustly. Each layer functions akin to a transparent film, allowing artists to work on different elements of their artwork independently. For instance, using separate layers for line art and colors, or for characters and backgrounds, greatly facilitates adjustments in later stages of the creative process. Layers are stacked in the order they appear in the Layer palette. On a PC, the Layer palette is typically located on the right side of the screen. To add new layers, click the "New Raster Layer" button at the top of the Layer palette. Renaming layers is as simple as double-clicking "Layer 1" (or any default layer name) and typing in a desired name.
Essential Tools for Beginners
When starting with Clip Studio Paint, it's beneficial to understand the core tools available. The Tool palette is organized into various categories, including selection tools, drawing tools, and transformation tools.
Drawing Tools: The primary tools for drawing and painting include the Pen, Pencil, Brush, and Airbrush tools. Generally, the Pen tool is favored for creating clean line art, while the Pencil tool is excellent for sketching. However, the flexibility of digital art allows for line art creation with the Pencil tool as well, encouraging artists to use whichever tool feels most natural for their desired outcome. The Brush tool offers a more painterly feel, and the Airbrush provides soft transitions for gradients. The Blend tool, particularly its blur sub-tool, is highly regarded for its natural blending capabilities, reminiscent of traditional media like watercolors or oils.
Selection Tools: These tools are crucial for isolating areas of your artwork for editing. The Lasso selection tool is particularly useful for freehand selections.
Transformation Tools: Tools like "Transform" (often accessed via Ctrl+T) allow you to resize, rotate, and skew selections or entire layers. Holding down the Control key while transforming a selection enables skewing, offering greater control over perspective and distortion.
Fill Tools: The Smart Bucket Tool is a powerful asset for quickly filling areas with color. It's especially useful when working on separate layers from your line art, as it can recognize and fill enclosed shapes. To enable this functionality when coloring on a layer different from your line art, you must enable "Refer to other layers" in the tool's Sub tool palette. This might require closing up line art shapes or adjusting the tool's settings for optimal recognition.
Working with Layers and Colors
The layer system in Clip Studio Paint is a cornerstone of its functionality, mirroring the robust layer capabilities found in software like Adobe Photoshop. Layers enable non-destructive editing, allowing artists to work on different elements of their artwork independently.
Layer Management: You can create multiple layers, each with its own opacity and blending mode settings. Layer folders can be used to group related layers, keeping your project organized.
Clipping Layers: A particularly useful feature is "Clipping Layers," which functions similarly to Photoshop's "Create Clipping Mask." When a layer is clipped to another, its content is restricted to the pixels of the layer below it. This is invaluable for applying shading or texture only within the boundaries of a specific element, such as a character's clothing or hair. To use this feature, right-click on the layer you wish to clip and select "Clip to layer below."
How to Use LAYERS to your Advantage! (clipping masks, alpha lock, layer modes)
Color Selection and Adjustment: Clip Studio Paint offers a comprehensive suite of color tools, including a color wheel, color palettes, and a color picker. You can create custom color palettes and adjust color transparency. The Eyedropper tool allows for sampling colors directly from the canvas. The software supports various color spaces, such as RGB and CMYK, and also offers the HSV (Hue, Saturation, Value) color space, which can be beneficial for artists who prefer to think in terms of foundational color theory. Switching between HSV and HSL color wheels is easily accessible.
Beyond basic color selection, Clip Studio Paint provides powerful color adjustment layers. These can be created by right-clicking a layer and selecting "New Correction Layer," offering options like Tone Curve (to adjust brightness and contrast) and Gradient Map (to unify colors). These adjustment layers are non-destructive, meaning they can be modified or removed at any time without altering the original artwork.
Enhancing Your Artwork with Materials and Brushes
Clip Studio Paint's asset library, accessible through Clip Studio ASSETS, is a treasure trove of resources that can significantly speed up and enrich the concept art process. These "materials" encompass custom brushes, textures, and 3D models.
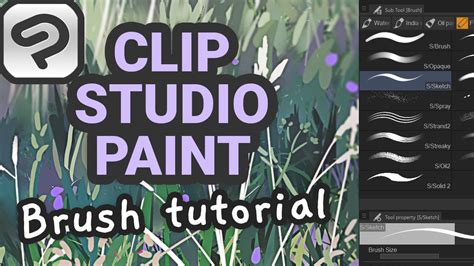
Custom Brushes: While Clip Studio Paint comes with a vast array of built-in brushes, the ability to create and customize your own brushes is a significant advantage. By duplicating an existing brush and adjusting its settings in the Sub tool palette, you can tailor its behavior to your specific needs. Experimenting with parameters like size, shape, texture, and blending modes can lead to unique artistic effects. Many artists find they can replicate the feel of traditional media with these customizable brushes.
3D Models: The inclusion of 3D models for objects and characters is a game-changer for concept artists. These models can be imported into the canvas and posed to serve as accurate references for perspective, anatomy, and lighting. This is particularly helpful for complex poses or intricate machinery that might be challenging to sketch from imagination alone. The Modeler App, accessible via the Clip Studio launcher, is dedicated to assisting with the setup and posing of these 3D assets.
Textures and Materials: A wide variety of texture materials can be downloaded and applied to your artwork to add depth and realism. These can range from fabric textures to grunge effects, enhancing the overall visual appeal of your concept pieces.
Essential Workflow Tips for Concept Artists
To maximize efficiency and artistic quality when using Clip Studio Paint for concept art, consider these workflow tips:
Utilize Perspective Rulers: For architectural concept art or environments, the perspective ruler tools are invaluable. These allow you to create accurate perspective grids, ensuring consistency and realism in your drawings of buildings, landscapes, and complex structures. Access these via Layer > Ruler â Frame > Create Perspective Ruler.
Leverage Layer Comps: Layer comps are a feature that allows you to save different states of your layers. This is incredibly useful for quickly showcasing variations of a design or for experimenting with different color schemes without having to manually toggle layers on and off.
Master the "Flip Horizontal" Shortcut: Constantly flipping your canvas horizontally (Edit > Rotate/Flip > Flip Horizontal) is a crucial practice for identifying and correcting drawing errors, particularly with symmetry and proportions. Setting up a custom shortcut for this action (e.g., Command + F) will significantly speed up your workflow.
Organize with Layer Folders: As your projects grow in complexity, use layer folders to group related elements such as character details, background elements, or lighting effects. This keeps your Layer palette tidy and makes it easier to manage your artwork.
Utilize the Navigator Palette: The Navigator palette provides a thumbnail view of your artwork, allowing you to see the overall composition at a glance. It also offers the convenient "Flip Horizontal" function and can be used to quickly zoom and pan around your canvas.
Experiment with Blending Modes: Understanding and utilizing various layer blending modes (Multiply, Screen, Overlay, etc.) can dramatically impact the mood and depth of your artwork, allowing for sophisticated color interactions and lighting effects.
Save Incrementally and Use Cloud Sync: Regularly save your work and consider using Clip Studio Paint's cloud service to sync your artwork across multiple devices. This ensures you have backups and can continue working seamlessly from different locations or on different hardware.
Exploring Advanced Features
While this guide focuses on beginner-friendly aspects, Clip Studio Paint offers a wealth of advanced features that concept artists can explore as they progress:
Animation Tools: Clip Studio Paint boasts robust animation tools, including timeline, keyframe animation, and onion skinning. This makes it a powerful tool not only for static concept art but also for creating animated sequences, storyboards, or even short animated films. The ability to animate with vectors is another advanced feature that can lead to cleaner, more scalable animations.
How to Use LAYERS to your Advantage! (clipping masks, alpha lock, layer modes)
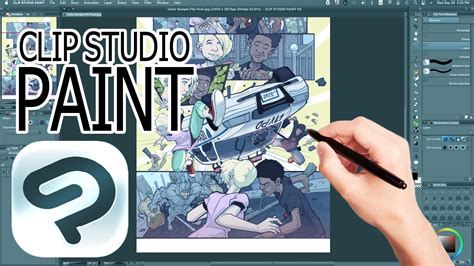
Comic and Manga Tools: The software is renowned for its specialized tools for comic and manga creation, such as panel layout tools and word balloon creation. These can be adapted for concept art presentations or storyboarding.
Vector Layers: Beyond raster layers, Clip Studio Paint supports vector layers, which allow for scalable artwork without loss of quality. This is particularly useful for line art that might need to be resized significantly.
3D Model Import and Manipulation: Beyond using pre-made 3D models, advanced users can import their own custom 3D assets for unique prop or environment design.
The Path to Becoming a Concept Artist
There isn't a single, fixed path to becoming a concept artist. Both art school and self-study offer distinct advantages and disadvantages. Art school can provide structured learning, access to instructors, and a network of peers. Self-study, on the other hand, offers flexibility and the ability to focus on specific areas of interest, often supplemented by online resources and tutorials. Regardless of the educational route, building a strong online portfolio is crucial for showcasing your drawing abilities and your capacity to convey ideas effectively to potential employers or clients.
Clip Studio Paint, with its comprehensive feature set and user-friendly interface, provides an excellent platform for aspiring concept artists to develop their skills and bring their visions to life. By understanding the fundamental principles of concept art and mastering the tools within Clip Studio Paint, beginners can embark on a rewarding journey of visual creation.