It can be a real headache to perfectly arrange text, images, and shapes in Photoshop. Misaligned elements can detract from even the most brilliant design concepts, leading to a cluttered and unprofessional final product. Fortunately, Adobe Photoshop offers a robust set of alignment tools designed to streamline this process. While these tools are conveniently located in multiple places within the application, and sometimes even appear dynamically, you may find yourself moving your cursor back-and-forth from your artwork to the alignment panel more often than you'd like. This constant back-and-forth can significantly slow down, or even disrupt, your workflow. The solution? Leveraging keyboard shortcuts for the most common alignment actions.
Understanding Photoshop's Alignment Options
At its core, Photoshop provides a variety of object alignment tools, including options like left align, right align, align top edges, and horizontal align middle, among others. These tools are fundamental for achieving precision and balance in your designs. One of the most underrated features in Adobe creative apps are the various object alignment tools. If you’re anything like me, you use these tools regularly.
Accessing Alignment Tools
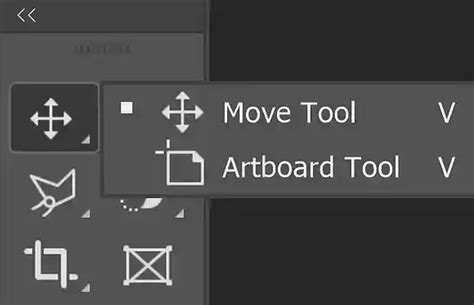
The primary way to access alignment options is through the Move Tool.
- Select the Move Tool: This can be done by pressing the keyboard shortcut “V”.
- Reveal Alignment Options: Once the Move Tool is selected, the alignment options will appear in the top bar of the Photoshop interface.
Aligning to Selections for Precision
For ultimate control, you can align elements to specific areas of your canvas using selections. This is particularly useful when you need to align objects within a particular section of your design, rather than to the entire canvas or a single layer.
- Creating a Selection:
- Select the Marquee Tool (Keyboard Shortcut “M”) and drag to draw a marquee around the desired area.
- Alternatively, hold down Ctrl/Cmd and click on any layer’s thumbnail in the Layers panel. This will turn that layer's transparency or content into a selection.
Once you have an active selection and your desired layer or group is selected, the alignment tools will now align your content relative to that active selection. This eliminates the struggle with misaligned elements and provides a much more targeted approach to arrangement.
Grouping Layers for Unified Alignment
When you want multiple elements to act as a single unit for alignment-for example, aligning text within a rectangle-it's best to create a group.
- Select the Desired Layers: In the Layers panel, select all the layers you wish to group.
- Create a Group: Press Ctrl/Cmd + G.
Now, when you apply alignment tools to this group, all the elements within it will move and align together as a cohesive unit.
The ULTIMATE Guide To Layers In Photoshop (FREE Masterclass)
The Challenge of Inconsistent Naming and Shortcuts
A significant hurdle when working with alignment tools across Adobe applications, and even within Photoshop itself, is the inconsistency in naming conventions. Adobe uses different names for the same action in different locations within the same app. For instance, when you position your cursor over the first button in the Alignment panel, the tooltip might say “Align left edges,” but when you go to set up keyboard shortcuts, the name for this action is “Horizontal Align Left.” Why Adobe would use two names for the same action is beyond me, but this is what we have to work with. And, if that isn’t bad enough, these same alignment actions get different names in different Adobe apps. This lack of standardization can lead to confusion and frustration, especially for users who regularly switch between different Adobe products.
Understanding that Adobe apps are developed by app-specific teams helps us understand why each app handles very similar tasks so differently. Organizations the size of Adobe cannot have an entirely flat org. structure, so silos exist, and this affects how we interact with their apps. For example, Adobe InDesign doesn’t list the object alignment actions anywhere in the app’s menus, which is why, when setting up the shortcuts, you must find them in Product Area: Object Editing. The Adobe Illustrator shortcut setup is a bit different than that of InDesign. Adobe XD, on the other hand, doesn’t allow you to create custom or modify existing keyboard shortcuts, which further complicates achieving a consistent workflow.
Setting Up Custom Photoshop Alignment Shortcuts
To overcome the workflow disruptions caused by manual cursor movement, setting up custom keyboard shortcuts for your most frequently used alignment actions is highly recommended. Adobe apps come chalk full of keyboard shortcuts, so finding a combination of keystrokes that are not already designated to a shortcut can be tricky, and you’ll likely need to press several keys to employ any new shortcut.
Important Note: For ease of research, writing, and reading this tutorial, Mac keys are used as examples. Windows users will need to adjust accordingly.
The Process of Customizing Shortcuts
- Navigate to Keyboard Shortcuts:
- Go to the top menu bar and click on “Edit.”
- Scroll down and select “Keyboard Shortcuts…”
- Create a New Set (Optional but Recommended):
- It is recommended to create a new set of shortcuts. This acts as a backup. If something goes wrong, you can revert to the default set. Or, like in the case of the latest InDesign release, when settings don’t migrate, you can simply select your set to restore all of your keyboard shortcuts!
- Click the "Save" icon (often a floppy disk or similar) next to the "Set" dropdown menu to save your current shortcuts as a new set. Give it a descriptive name.
- Locate Alignment Commands:
- In the Keyboard Shortcuts dialog box, under "Shortcuts For:", select "Application Menus."
- Scroll down to find "Panel Menus."
- Expand "Panel Menus" and navigate to "Window > Toolbars > Options." (The exact path might vary slightly depending on your Photoshop version, but look for options related to toolbars or panels).
- Alternatively, and often more directly, you can find alignment commands under "Product Area: Object Editing" or similar categories when customizing shortcuts in other Adobe apps like Illustrator. Photoshop does allow you to use the Command key, but doesn’t allow you to use Arrow keys in keyboard shortcuts.
- Assign Your Shortcuts:
- This is where the naming inconsistency becomes a challenge. You need to match the action you want to perform with its corresponding name in the shortcut editor. For example, "Align left edges" in the panel might be listed as "Horizontal Align Left" in the shortcut editor.
- Strategy for Naming: A common and effective strategy, similar to what's used in Adobe Illustrator, is to use the first letter from each action’s directional component. For example:
Cfor CenterLfor LeftRfor RightTfor TopBfor Bottom
- Example Shortcut Assignments:
- Horizontal Align Left: You might assign
Ctrl/Cmd + Alt + L(usingLfor Left). - Horizontal Align Center:
Ctrl/Cmd + Alt + C(usingCfor Center). - Horizontal Align Right:
Ctrl/Cmd + Alt + R(usingRfor Right). - Vertical Align Top:
Ctrl/Cmd + Alt + T(usingTfor Top). - Vertical Align Center:
Ctrl/Cmd + Alt + M(usingMfor Middle/Center, to differentiate from Horizontal Center). I use the letter M for the Vertical Align Center shortcut to differentiate between C for Horizontal Align Center and M for Vertical Align Center Middle. - Vertical Align Bottom:
Ctrl/Cmd + Alt + B(usingBfor Bottom).
- Horizontal Align Left: You might assign
- The "Align to Selection" Context: It's important to note that these shortcuts will typically apply to the currently active alignment setting in the Options bar, which is often "Align to Selection" by default. In InDesign, each of the alignment actions can be modified further by setting the Align to: option in the Align panel. We created our shortcuts based on the default option: Align to Selection, but you may find yourself aligning objects to Key Object, Margins, Page or Spread more often than Selection. In this case, you can change your designated actions and/or setup additional shortcuts for multiple Align to settings. I find I use Selection, Key Object and Page most often.
- Accept and Save:
- Once you have assigned your desired shortcuts, click "OK" to close the dialog box.
- You will likely be prompted to save the changes to your shortcut set.
Addressing "Align and Distribute" Actions
All these Adobe apps’ alignment panels also include Distribute Spacing actions. These are crucial for ensuring even spacing between multiple objects. Like the alignment tools, these can also be assigned custom shortcuts for enhanced efficiency.
Centering Text in Photoshop: A Deeper Dive
The concept of "centering" text can be surprisingly nuanced in Photoshop. There isn’t just one simple way to center text, and there are a variety of meanings when it comes to making the text centered. Do you want the words centered on the whole canvas? Or do you want it center aligned within its own bounding box? Does it work the same way as it does in Illustrator?
Preparing Your Document and Text
First, let’s prepare a new Photoshop document to add some text to the file.
Two Ways to Add Text:
- Point Text: With the Type Tool selected, bring your cursor over roughly where you want your text to be on your Photoshop document and click. This method allows you to quickly type in your text. However, you can’t resize the text box without changing the size of the text itself.
- Paragraph Text (Area Type): Click the Type Tool and draw a box on the canvas before typing your text. The benefit with this bounding box is that you will be able to let the text flow with the shape and size of the text box. The downside is that the text is aligned to the top of the text box. If you want all the lines of text to be horizontally centered to the text box, that can be done. But the lines of text can’t be centered vertically to the text box in one click. This is because there are times when you have more than just a few words, and they can’t fit in one line. And you are not sure how many lines you want the words to split into yet.
Centering Text Using Alignment Options
Once you have your text layer created (preferably as paragraph text for more control):
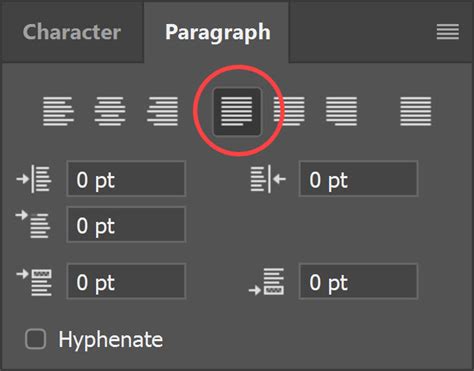
- Locate the Paragraph Panel:
- If you don’t have it opened yet, go to the top menu bar and click “Window,” then scroll down the submenu and click “Paragraph.” This panel contains various text alignment options.
- Access "Align and Distribute" in the Options Bar:
- Go to the three dotted lines that say “Align and Distribute” on the Options bar (this bar is usually located just below the top menu bar). Click on that.
- Under the section “Align to,” choose your desired alignment context (e.g., Canvas, Selection).
- Apply Horizontal and Vertical Centering:
- Click the align tool that says “horizontal centers” option.
- Next, click the function that says “vertical centers” option.
Centering to the Entire Canvas:
- To select the entire canvas, go to the top menu and click “Select All” (or press
Ctrl/Cmd + A). - With the text layer selected and the canvas selected as the alignment target, click the "Align horizontal centers" and "Align vertical centers" options in the Options bar.
Centering to a Specific Selection:
- In this case, you can use a selection instead to center the text. Sometimes the area you want your text to be centered to is flattened on another layer, or you don’t wish for the text to be centered to the whole layer but only a selection of a layer.
- Create your selection using the Marquee Tool or by Ctrl/Cmd-clicking a layer thumbnail.
- With your text layer selected and the selection active, use the alignment options in the Options bar. They will now align your text relative to that selection.
Text Size and Spacing Considerations
When creating centered text in Photoshop, to produce excellent results, it’s important to pay attention to both the size and spacing of your text. If your text is too large or too small, it can throw off the entire look of your document. So, when in doubt, err on the side of caution and go with a slightly smaller font size and tighter spacing.
Beyond Built-in Shortcuts: Third-Party Solutions
While customizing Photoshop's built-in shortcuts is highly effective, some third-party applications offer even more advanced control. Certain third-party apps allow you to set up app-specific keyboard shortcuts, which enable you to create more consistent keyboard shortcuts for like actions across multiple Adobe apps. I have used BetterTouchTool for such purposes and have no affiliation with it. This can be particularly useful for bridging the inconsistencies between different Adobe software.
Remember, give yourself time and grace to learn these new skills. By understanding and implementing Photoshop’s alignment tools, grouping features, selection-based alignment, and custom keyboard shortcuts, you can effortlessly create balanced, professional-looking designs and significantly enhance your overall workflow efficiency.