Adding textural depth and character to photographs has a rich history, predating the advent of digital editing software like Photoshop. In the analogue era, photographers employed a variety of ingenious techniques to impart texture. These methods included physically scratching negatives with pins, abrading them with sandpaper, staining photographic paper with fixer before exposure to create unique tonal variations, layering two negatives together in the enlarger to composite different elements, or pushing film ISO to deliberately increase grain and introduce a gritty feel. These analogue approaches laid the groundwork for the digital manipulation techniques we utilize today.
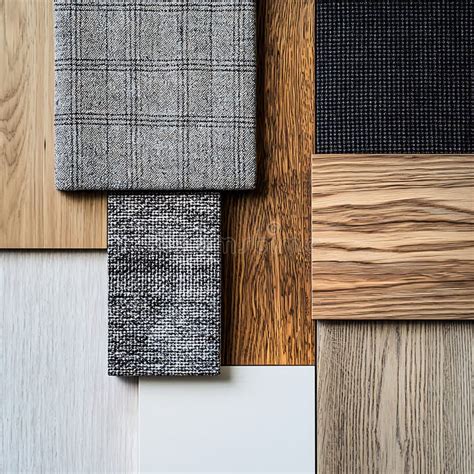
In the realm of digital photography, applying a texture overlay is akin to adding another layer to your existing photograph within an editing program. This overlay is typically an image of a textural surface, such as paper, wood, concrete, or indeed, any visual element that can be captured or created. The judicious application of the right texture overlay can imbue a photograph with an enhanced level of depth and emotional resonance.
One of the most compelling applications of texture overlays is their ability to rescue a photograph that might otherwise fall short of its potential. While it's often said that no texture overlay can salvage a truly terrible photograph, they can undeniably elevate images that are merely "not quite working." Textures can be integrated into virtually any type of image, offering a versatile tool for creative expression.
Sourcing and Creating Your Textures
For those new to the practice, the good news is that you don't need to create your own textures from scratch to get started. A vast array of pre-made, free textures are readily available on the internet. A simple Google search will reveal numerous websites dedicated to offering free textures. When selecting these, it's crucial to ensure that the texture you choose comes with the appropriate copyright permissions for your intended use. Platforms like deviantart.com host many stock textures generously offered by artists for personal use. These artists often request a simple courtesy in return: a link to the image you created using their work.
However, the process of creating your own textures is surprisingly straightforward and rewarding. It can be as simple as taking a photograph. While the availability of free downloads is convenient, the act of creating your own textures offers distinct advantages. It is an enjoyable process, ensures your work is entirely original, and allows you to tailor textures specifically to complement your existing images.
One such example of a self-created texture involves scanning the underside of an old baking tray. This particular texture, born from an everyday object, has proven its versatility over many years. It was effectively utilized in an image of a cello player, where it was combined with a scanned manuscript of the music she performed on the day of the photograph. Furthermore, this baking tray texture was employed in a series of images created collaboratively for album artwork with Canadian singer-songwriter Sora. Despite some of the photographs in the album being taken by different photographers, the consistent use of this texture helped to unify the entire collection visually, creating a cohesive aesthetic across the album's visual presentation.

The Digital Workflow: Applying Texture Overlays in Photoshop
You don't need to possess an in-depth understanding of complex Photoshop processes to quickly and easily apply a texture overlay. The fundamental steps are accessible even to beginners. The initial creation of a texture, if you choose to make your own, can be remarkably simple. One method involves painting in some colors, applying the "Render Clouds" filter to generate a base pattern, followed by adjustments to contrast and color, and potentially adding a vignette for depth.
The application of your chosen texture is equally straightforward. In your editing software, locate the texture file and simply click and drag its thumbnail onto your original image within the Layers palette. The texture will then appear as a new layer, typically labeled as Layer 1, above your original photograph.
The degree of influence the texture has on your image is controlled by the Opacity Slider. By adjusting this, you can determine how transparent the texture appears, allowing it to blend subtly or assert itself more prominently. The Free Transform Tool offers further control, enabling you to reposition the texture, rotate it, scale it up or down, or even stretch it to fit your composition.
Once the basic placement and scale are established, the process becomes one of fine-tuning. This often involves further adjustments to the Opacity. Additionally, you might employ the Eraser Tool, set to a low opacity, to carefully paint out any areas of the texture that are distracting or detract from the main subject of your photograph.
1-Minute Photoshop - Add Cool GRUNGE Texture!
The true magic of texture overlays lies in experimentation. Have fun with the process and explore different possibilities. Try applying a few different layer blend modes (such as Multiply, Screen, Overlay, or Soft Light) to see how they interact with your original image. Consider layering multiple textures on top of each other, perhaps with each layer having a slightly different hue or opacity, to create more complex and nuanced effects. You can even apply the same texture image multiple times, with each instance adjusted differently, to build up a rich and multifaceted surface.
Beyond the Basics: Advanced Techniques and Resources
For those seeking to elevate their texture overlay work, exploring more advanced techniques can yield professional-level results. Experimenting with different blending modes is a key area for creative exploration. Each mode interacts with the underlying layers in a unique way, altering color, contrast, and luminosity to create distinct visual outcomes. For instance, the Multiply blend mode tends to darken the image and is excellent for adding grunge or weathered effects. Screen mode, conversely, lightens the image and can be useful for adding subtle glows or ethereal qualities. Overlay and Soft Light modes blend the texture in a way that preserves both the highlights and shadows of the original image while enhancing contrast and color saturation.
To create a different style of photo overlay, one might delve into specific texture types. For example, a grunge texture overlay can be made more prominent by strategically applying it to specific areas of the image, perhaps using layer masks to control its visibility. For the final layers of a grunge effect, one might intensify the texture's appearance to achieve a more pronounced vintage or distressed look.
The journey of mastering texture overlays is ongoing, and the possibilities are virtually limitless. For those who wish to delve deeper into professional texture overlay creation, there are numerous resources available. Envato Elements, for instance, offers a subscription service that provides access to an extensive library of unlimited Photoshop paper texture overlays, along with a wide array of other design assets. This can be an efficient way to access high-quality, ready-to-use resources that can save significant time while still achieving professional results.
For individuals who prefer not to commit to a subscription model, professional Photoshop background textures can be purchased individually from platforms like GraphicRiver, which is part of Envato Market. These marketplaces offer a curated selection of high-quality assets, often created by professional designers.
Curated Collections and Creative Inspiration
When exploring pre-made texture packs, certain categories stand out for their utility and impact. Grunge texture overlay packs are particularly essential for achieving vintage effects. A pack containing dust and scratch textures, for example, can be an invaluable tool for imparting a faded or aged appearance to photographs. Such packs often contain a variety of intensities and styles of grunge, allowing for subtle or dramatic transformations.
For those seeking more unconventional or artistic applications, packs of cool photo overlays that incorporate geometric and grunge elements can offer unique creative avenues. These might blend abstract patterns with distressed textures, leading to visually intriguing and contemporary results.
A paper texture overlay Photoshop bundle that consolidates numerous textures within a single PSD template can significantly streamline the selection process. This allows for easier comparison and application of different paper textures, from rough, handmade papers to smooth, aged documents.
The utility of textures extends beyond photographic images. If you aim to apply overlay textures not only to your photos but also to your text and vector graphics, specialized grunge texture overlay packs that include smart PSD templates are particularly useful. These templates often allow for non-destructive editing, meaning you can easily modify the texture's appearance or replace it entirely without degrading the quality of your original artwork.
For creating a vintage photo overlay, a pack of soft grunge textures can be a fantastic tool. These textures often provide a more subtle and refined version of the grunge aesthetic, ideal for achieving a nostalgic and artistic feel without overwhelming the subject matter.
When specifically looking for a paper texture overlay Photoshop pack, a collection of photo overlays that focuses on various paper typesâfrom fine art papers to newsprint and cardboardâcan be an excellent choice. These packs often feature high-resolution scans that capture the intricate details of paper fibers, ink variations, and subtle imperfections.
Crafting Your Own Vintage Paper Texture
For those who prefer a hands-on approach to creating their own unique textures, the process of making an old paper texture in Photoshop can be a rewarding endeavor. This often begins with physical materials. One method involves using actual paper, coffee, and a scanner. The paper can be manipulated to achieve desired textures; for instance, crumpling it can create interesting creases and folds. Once the paper has been prepared and potentially stained with coffee to simulate aging, it is then placed in a scanner. The scanner captures a high-resolution image of the paper's surface, preserving its unique characteristics.
This scanned image then serves as the base for your paper texture overlay. In Photoshop, you can further enhance this scanned texture by adjusting its levels, curves, and color balance to achieve the exact aged or distressed look you desire. You can also add subtle imperfections like foxing (brown spots common in old paper) or simulated water stains.
Once you have created your custom paper texture, you can then apply it to your images using the same layering and blending techniques described earlier. This hand-crafted approach ensures that your textures are entirely unique and perfectly suited to your artistic vision. The result is a truly personalized touch that sets your work apart.
The journey of learning how to add a texture overlay in Photoshop is a continuous one, filled with opportunities for creative exploration and skill development. Whether you choose to utilize readily available pre-made textures or embark on the satisfying process of creating your own, the impact of texture overlays on your photography can be profound. They offer a powerful means to add depth, character, and a distinct artistic voice to your images, transforming the ordinary into the extraordinary.
The photographic philosophy espoused by artists like Lea Hawkins, an Australian photographer specializing in portraiture, fine art, and press photography, emphasizes that it is not the equipment but rather what one does with it that truly matters. This sentiment resonates deeply with the practice of texture overlaying. While powerful editing software and high-quality textures are beneficial, the artistic vision and the creative application of these tools are paramount in achieving compelling photographic results. Her work, published, exhibited, and collected internationally, is a testament to the power of creative manipulation and skillful execution, often achieved with minimal gear, underscoring the principle that artistic intent drives photographic success.