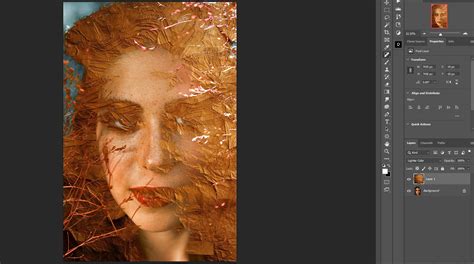
Digital image editing and computer graphics rely heavily on the sophisticated manipulation of layers to achieve compelling visual results. At the core of this manipulation lie blend modes, also known as blending modes or mixing modes. These powerful tools dictate how pixels from two layers interact and combine, opening up a vast creative landscape for artists and designers. While the concept might seem complex, understanding the fundamental principles and exploring the diverse range of blend modes can dramatically enhance your digital workflow, transforming ordinary images into extraordinary visual narratives.
Understanding the Fundamentals: Layers, Opacity, and Pixels
Before delving into the specifics of each blend mode, it's essential to grasp the underlying concepts. In digital imaging software like Adobe Photoshop, layers are stacked transparent sheets, each containing image data. The "blend layer" is the active layer you're working on, and the "base layer" is the layer beneath it. The "opacity" of the blend layer determines its transparency - a lower opacity allows more of the base layer to show through. Blend modes, however, go beyond simple transparency by applying mathematical calculations to the color channel values of both layers.
The values within each color channel (Red, Green, Blue) are typically represented numerically. In Photoshop, these values range from 0 (black) to 255 (white). However, for the complex calculations involved in blend modes, Photoshop often "standardizes" these values, converting them to a range between 0 and 1. This standardization is crucial for understanding how the mathematical operations, such as multiplication and division, behave differently within this normalized range compared to the raw 0-255 values.
Navigating the Blend Mode Categories
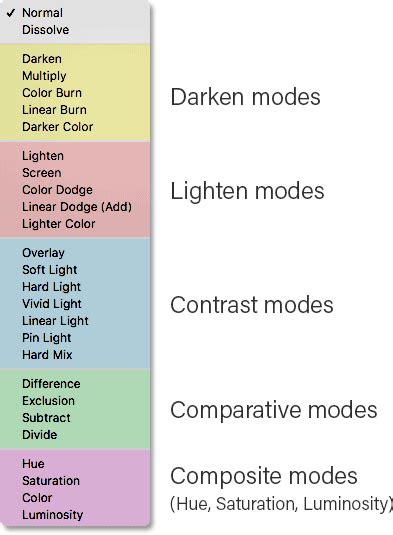
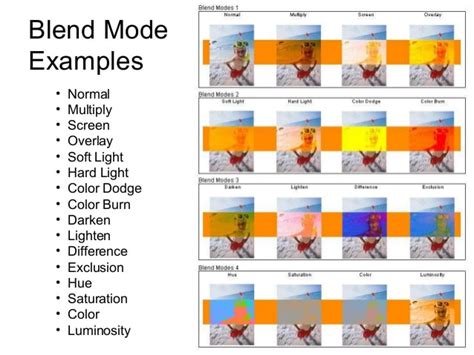
Photoshop organizes its blend modes into distinct categories, each with a general purpose. While these categories aren't explicitly labeled in the software, they are visually separated by thin lines in the blend mode dropdown menu. These categories, from top to bottom, are: Normal, Darken, Lighten, Contrast, Inversion, and Component. Understanding these broad groupings can provide a helpful framework for exploring the vast array of blend modes.
The Normal Category: Default and Dissolve
The Normal blend mode is the default. It displays the blend layer exactly as it is, with no additional interaction with the base layer. Any transparency is solely determined by the layer's opacity.
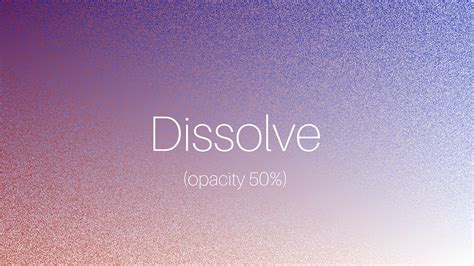
The Dissolve blend mode, also within the Normal category, offers a unique effect. Instead of blending pixels mathematically, it randomly displays pixels from either the blend or base layer. The intensity of this "dissolved" look is controlled by the layer's opacity, making it useful for creating textured or particle-like effects.
The Darken Category: Amplifying Shadows and Depth
The Darken category comprises blend modes that generally make the image darker, emphasizing shadows and darker tones. They achieve this by comparing pixel values and retaining the darker ones or by performing mathematical operations that result in darker colors.
- Darken: This mode compares the RGB color channel values of the pixels in the blend and base layers and displays the darker of the two for each channel. If the blend layer has darker pixels, they replace the base layer's pixels.
- Multiply: A highly popular mode, Multiply darkens the image by multiplying the luminosity values of the blend layer's pixels with those of the base layer. White in the blend layer becomes transparent, allowing the base layer to show through completely, while black results in pure black. This mode is commutative, meaning swapping the layers yields the same result. When applied to an image with a solid color, it acts as a linear interpolation. If both layers contain the same image, it's equivalent to applying a gamma correction of γ=2.
- Color Burn: This mode darkens the base layer by increasing the contrast between the blend and base pixels. The result is typically darker and more saturated than Multiply, and it tends to be more pronounced.
- Linear Burn: Similar to Color Burn, Linear Burn darkens the base layer but does so by decreasing its brightness to match the blend color. It results in a darker image than Multiply but with less saturation than Color Burn.
- Darker Color: This mode compares the total channel luminosity values of the base and blend layers and displays the color with the lower overall value. Unlike Darken, which operates on each channel independently, Darker Color considers the combined luminosity.
The Lighten Category: Enhancing Highlights and Brightness
In direct opposition to the Darken category, the Lighten blend modes aim to brighten the image, emphasizing highlights and lighter tones.
- Lighten: This mode compares the RGB color channel values of the pixels in the blend and base layers and displays the brighter of the two for each channel. If the blend layer has brighter pixels, they replace the base layer's pixels.
- Screen: The opposite of Multiply, Screen brightens the image by inverting the values of the pixels in both layers, multiplying them, and then inverting the result again. White in the blend layer results in pure white, while black becomes transparent. This mode is also commutative. It's akin to projecting multiple slides onto the same screen.
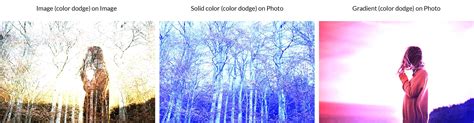
- Color Dodge: As the name suggests, Color Dodge brightens the base layer by decreasing the contrast between the blend and base pixels. This often results in a brighter and more saturated image than Screen. Blending with white results in white, while blending with black has no effect.
- Linear Dodge (Add): This mode brightens the base layer to more closely match the blend color by increasing brightness. It's similar to Color Dodge but focuses on brightness rather than contrast. It effectively adds the luminance values of the two layers.
- Lighter Color: This mode compares the total channel luminosity values of the base and blend layers and displays the color with the higher overall value. It's the counterpart to Darker Color.
The Contrast Category: Balancing Light and Dark
The Contrast category of blend modes works by combining elements of both darkening and lightening modes, often based on whether the pixel color is lighter or darker than 50% gray. These modes are excellent for adding depth and dynamism to an image.
- Overlay: This is a highly versatile and popular mode. It uses the Screen mode on brighter pixels and the Multiply mode on darker pixels of the base layer. The result preserves highlights and shadows while significantly altering the midtones, making it ideal for compositing textures or adding a gritty look. Overlay's calculations are based on the brightness of the base layer.
- Soft Light: This mode simulates the effect of a diffused light source. If the blend layer is lighter than 50% gray, the image is slightly brightened; if it's darker, the image is slightly darkened. The effect is gentler than Hard Light.
- Hard Light: Similar to Soft Light, but with a more pronounced effect, simulating a harsh spotlight. If the blend layer is lighter than 50% gray, the image is brightened; if it's darker, it's darkened. Hard Light's calculations are based on the brightness of the blend layer. Overlay and Hard Light are considered "commuted blend modes," meaning they are inverse relationships of each other.
- Vivid Light: This mode combines Color Dodge and Color Burn (rescaled so that neutral colors become middle gray). Dodge applies when values in the top layer are lighter than middle gray, and burn applies to darker values. It effectively moves the white point of the base layer down or the black point up.
- Linear Light: This mode combines Linear Dodge and Linear Burn (rescaled so that neutral colors become middle gray). Dodge is applied when the value on the top layer is lighter than middle gray, and burn applies when the top layer value is darker. The calculation simplifies to the sum of the bottom layer and twice the top layer, minus 1.
- Pin Light: This mode combines Darken and Lighten simultaneously. If the blend color is lighter than 50% gray, pixels darker than the blend color are replaced. If the blend color is darker than 50% gray, pixels lighter than the blend color are replaced.
- Hard Mix: This extreme mode sums the RGB channel values of the blend and base layers. If the sum meets or exceeds 255, it remains at 255; otherwise, it reverts to 0. This results in pixels with only maximum or minimum levels for each channel, producing images with solid blocks of red, green, blue, cyan, yellow, magenta, white, or black.
The Inversion Category: Subtracting and Differing
The Inversion category includes blend modes that work by subtracting values or finding differences between layers.
- Difference: This mode subtracts the blend color from the base color (or vice versa, whichever is brighter) for each channel. Blending with black results in no change, while blending with white inverts the base color. This mode is incredibly useful for aligning layers with similar content, as identical areas will appear black.
- Exclusion: Similar to Difference, Exclusion subtracts the lighter color from the darker color but with lower contrast. Blending with white inverts the base color, and blending with black has no effect. Identical colors result in black.
- Subtract: This mode subtracts the blend color from the base color for each channel. As the blend values increase (become lighter), the result becomes darker.
- Divide: This mode divides the RGB channel values of the base layer by those of the blend layer. Blending with white has no effect, while blending with black results in white. Similar colors cancel each other out, resulting in white. This mode can be useful for removing color casts.
The Component Category: Manipulating Color Attributes
The Component category includes blend modes that operate on specific color attributes: hue, saturation, and luminosity. These modes are particularly powerful for color correction and creative color manipulation. Unlike other blend modes that work on each color channel independently, these modes take some dimensions from the base layer and others from the blend layer.
- Hue: This mode retains the hue of the blend layer while preserving the luminance and saturation of the base layer. It's useful for changing the color of an object without altering its brightness or intensity.
- Saturation: This mode retains the saturation of the blend layer while preserving the luminance and hue of the base layer. It allows you to adjust the intensity of colors without affecting their lightness or tint.
- Color: This mode retains the hue and saturation of the blend layer but preserves the luminance of the base layer. This is excellent for colorizing monochrome images or applying a new color to an existing image while maintaining its original tonal range.
- Luminosity: This mode retains the luminosity (brightness) of the blend layer while preserving the hue and saturation of the base layer. It's commonly used for image sharpening, as human vision is more sensitive to lightness contrast than color contrast, and it can also be used to adjust brightness without changing the color.
Photoshop Just Changed Hue/Saturation! – What You Need to Know
Advanced Concepts and Practical Applications
Opacity vs. Fill Opacity
A crucial distinction in Photoshop blend modes lies between "Opacity" and "Fill Opacity." For most blend modes, adjusting either slider yields the same visual result. However, for a specific group of eight "Special" blend modes (including Hard Mix, Vivid Light, Linear Light, and others), adjusting Fill Opacity produces different results than adjusting Opacity. This distinction offers greater creative control and expands the possibilities of these modes.
Blend Modes in Tools
It's important to note that blend modes aren't limited to layers. Many painting and editing tools in Photoshop, such as the Brush Tool, also have their own blend mode settings. When used with these tools, the blend mode calculates the interaction between the tool's "paint" and the existing pixels on the target layer. This offers a dynamic way to paint and edit directly onto an image.
Keyboard Shortcuts for Efficiency
Mastering keyboard shortcuts can significantly speed up your workflow when working with blend modes. Holding Shift + (plus) and Shift - (minus) allows you to cycle through blend modes directly from the Layers panel or with certain tools active. Other shortcuts exist for adjusting opacity and fill, further streamlining the process.
Practical Use Cases
The applications of blend modes are virtually limitless, constrained only by your imagination. Here are a few examples:
- Hiding Whites or Blacks: Using Multiply to hide white backgrounds of images or Screen to hide dark backgrounds.
- Adding Textures: Applying textures with Overlay or Soft Light to add depth and visual interest to photographs.
- Color Correction: Using the Color blend mode to change the color of an object while preserving its original lighting.
- Compositing: Seamlessly integrating elements from different images by using appropriate blend modes to match lighting and color.
- Creating Special Effects: Employing modes like Hard Mix for abstract effects or Dissolve for particle simulations.
Ultimately, the most effective way to learn and master Photoshop blend modes is through experimentation. By understanding the underlying principles and exploring the diverse effects each mode offers, you can unlock new levels of creativity and efficiency in your digital art and design endeavors.