Adobe Photoshop is a powerful design tool that opens up a world of creative opportunities for digital artists and designers. While many beginners might feel overwhelmed by its complex interface and vast array of features, learning to draw in Photoshop is a foundational skill that can lead to professional results. This guide will take you through the essential techniques, tools, and concepts, from basic strokes to advanced manipulation, helping you to master the art of digital drawing.
Understanding the Photoshop Workspace and Core Concepts
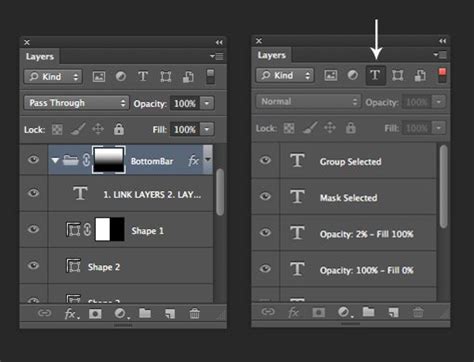
Before diving into drawing, it's crucial to familiarize yourself with the Photoshop environment. The workspace is customizable, allowing you to arrange panels and tools to suit your workflow. At the heart of Photoshop's drawing capabilities lies the concept of layers. Layers are a crucial concept in Photoshop; they let us work on different parts of an image separately. This non-destructive approach is vital for efficient editing and artistic creation. We start by creating a new layer for each element of our artwork, ensuring that individual components can be modified without affecting others.
The Power of Layers and Selections
Layers are the backbone of Photoshop drawings. Think of them as transparent sheets stacked on top of each other. This separation allows for immense flexibility. You can paint on one layer, adjust an image on another, and even apply text without it interfering with your artwork.
Selections in Photoshop help us isolate specific areas to work on. This means you can apply changes, paint, or move elements only within a designated region. For simple geometric shapes, we use the Marquee tool. For more organic, freehand selections, the Lasso tool is at the ready. Understanding how to make precise selections is key to controlling where your edits and drawings appear.
Beyond basic selections, layer masks offer even more sophisticated control. Layer masks allow us to hide or reveal parts of a layer without deleting anything. This is a powerful non-destructive technique. We paint black on the mask to hide the corresponding area of the layer and white to reveal it. Grays will create semi-transparency. This is invaluable for blending, complex masking, and controlled effects.
Essential Drawing Tools in Photoshop
Photoshop offers a diverse range of tools for creating lines, shapes, and freehand artwork. Each tool has its unique strengths and applications.
The Brush Tool: The Versatile Artist's Companion
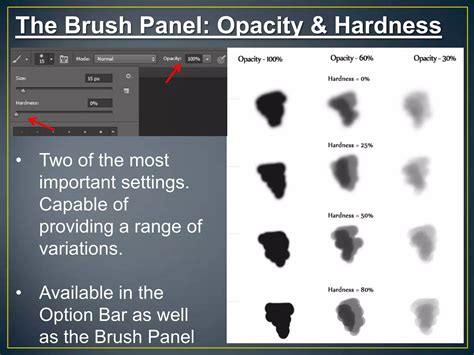
The Brush tool is one of the most indispensable tools in Photoshop for creating lines and applying color. Brushes are one of the most versatile tools within Photoshop. They are not just for painting solid colors; they can be used to create textures, simulate traditional media, and add depth to your work. By adjusting brush size, hardness, and opacity, you can create a wide array of effects, from soft, ethereal strokes to sharp, defined lines. Experimenting with different brush presets, including those that mimic watercolor or charcoal, can add significant depth and contrast to your work.
For those using a graphics tablet, pressure sensitivity greatly enhances the drawing experience. This allows the software to interpret how hard you press the stylus, translating that into variations in line weight, opacity, or color saturation, mimicking the natural feel of traditional drawing tools.
The Pencil Tool: For Sharp, Clean Lines
The Pencil tool lets you draw lines without rough, blurry, or distorted edges. Unlike the Brush tool, which can produce softer edges depending on the brush tip, the Pencil tool creates hard, pixel-based lines. This is ideal for technical drawings, pixel art, or when you need very crisp, definitive edges.
The Line Tool: Precision and Structure
To work as if with a ruler, the Line tool is at the ready. The Line tool creates a line segment that you can customize. You can draw it by clicking and dragging the line to the length you want and then releasing the mouse button at the endpoint. Creating vertical lines and horizontal lines with the Line tool can be particularly useful in the planning stages of a project, such as sketching out the basic structure for a digital painting, designing a user interface, or if you’re building a plan for a construction project like a bench or chair.
The Pen Tool: The Master of Paths and Precision
For precise lines and shapes, especially those with smooth curves, we turn to the Pen tool. The Pen tool can create selections, line segments, and curved lines. It works by creating paths, which are essentially vector-based outlines. These paths are not pixels; they are mathematical descriptions of lines and curves.
Paths are outlines that you can turn into selections, or fill and stroke with color. You can use a path as a vector mask to hide areas of a layer. Importantly, paths are resolution-independent-they maintain crisp edges when resized, printed to a PostScript printer, saved in a PDF file, or imported into a vector-based graphics application.
To create a path, you click to add anchor points and drag to create curves. For more complex shapes, you can combine multiple paths. Once a path is created, it can be converted to a selection, filled with color, or stroked with a brush. A work path is temporary unless you save it as a named path.
Simple Vector Art In Photoshop | Areeb Productions
Crafting Shapes and Custom Graphics
Photoshop offers powerful tools for creating unique designs and illustrations, going beyond simple lines and strokes.
Shape Tools and Custom Shapes
The Shape tools allow you to add pre-made geometric shapes like circles, rectangles, ellipses, and polygons to your canvas. These shapes are created as vector layers by default, meaning they are scalable without loss of quality.
Beyond these standard shapes, you can also create custom shapes. These are essentially saved paths that can be used like pre-defined tools. You can use the Pen tool to draw precise paths and then save them as custom shapes to quickly incorporate them into your designs. This is key to creating original designs in Photoshop.
Styles and Anchor Points: Refining Your Artwork
Styles and anchor points are crucial for refining illustrations. To use styles, you can open the Styles panel and click on a style to apply it to your shape or path, adding effects like gradients, bevels, or drop shadows.
Anchor points form the foundation of paths and shapes. To edit them, you use the Direct Selection tool. You can add or remove anchor points along a path, adjust their position, and manipulate the Bezier curves that control the shape's curvature. This meticulous control helps create more complex shapes or smooth out rough edges, giving your artwork a polished look.
Enhancing and Transforming Your Artwork
Photoshop doesn't just allow you to create; it also provides powerful tools for transforming and enhancing your images and artwork.
Cropping and Resizing Images
The Crop Tool helps frame your images. It lets you remove unwanted parts and focus on the main subject, essentially re-composing your canvas. Resizing is different from cropping; it changes the whole image dimensions, scaling all its content up or down. It's important to understand the difference to avoid unintended distortions or loss of quality.
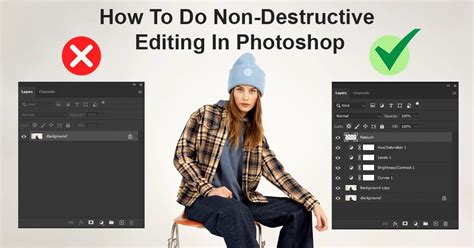
Non-Destructive Editing with Smart Objects and Adjustment Layers
Smart Objects are a key tool for non-destructive editing in Photoshop. When you convert a layer to a Smart Object, it becomes a container that preserves the original image data. This allows us to resize or transform images without loss of detail. To create a Smart Object, you right-click on a layer and select "Convert to Smart Object."
Similarly, adjustment layers are a non-destructive way to edit photos and artwork. They sit on top of your image layers and allow you to apply image adjustments like brightness, contrast, and color to all the layers below them. The beauty of adjustment layers is that they can be tweaked or removed at any time without permanently altering the original pixels. We can further refine their impact by using layer masks with adjustment layers to apply effects selectively to specific areas.
Masks: Precision Control
Masks are essential for precise control over image elements. We've discussed layer masks for hiding and revealing parts of a layer. Beyond that, clipping masks offer another powerful way to control visibility. For clipping masks, you place one layer above another and use Alt+Click (or Option+Click on Mac) between them. The top layer will then only be visible within the shape or content of the layer below it. This is incredibly useful for applying textures or effects to specific shapes.
Advanced Techniques and Professional Effects
Once you've mastered the basics, you can explore advanced techniques to take your digital art to the next level.
Creating Stunning Hand Lettering and Line Art
After perfecting line work, you can move on to creating stunning hand lettering. By combining the precision of the Pen tool for outlines with the expressive qualities of the Brush tool for filling and shading, you can create professional-looking typography. Line art can range from minimalistic cartoons to highly detailed sketches, and Photoshop provides the tools to achieve both.
Professional Photo Effects
Photoshop is also renowned for its capabilities in photo manipulation and the creation of professional photo effects. These can transform ordinary images into stunning works of art.
- Double Exposure: This popular effect combines two images for a dreamy, artistic look. It typically involves layering two images and using masks to blend them seamlessly.
- Retouching: For skin, we use tools like the healing brush and clone stamp tool to remove blemishes and imperfections. Eye brightening involves increasing contrast and adding a touch of sparkle to make eyes more captivating.
- Dodge and Burn: These classic photographic techniques help sculpt facial features and add depth by selectively lightening (dodging) and darkening (burning) areas of an image.
Workflow: Saving and Exporting Your Creations
A smooth workflow is essential for any creative process.
Saving Your Work
First, we save a PSD file to keep all layers intact for future edits. This is your master file, preserving all the editing flexibility.
Exporting for Different Platforms
For web use, we choose "Export As" and select appropriate formats like JPG (for photographic images) or PNG (for graphics with transparency). When exporting, we pay attention to file size to ensure fast loading times online. For print, higher resolution formats and settings are generally required.
File Naming Conventions
We make sure to name our files clearly. A good format is "project-nameversion-number.extension" (e.g., "logo-designv3.psd"). This helps in organizing your work, especially when dealing with multiple iterations.
Lastly, we always double-check our exported files to ensure they look as intended and meet the required specifications.
Drawing in Photoshop can be an exciting journey. For beginners, it's best to start with simple projects. Create a new document and experiment with different brush sizes and opacities. Try sketching simple shapes and objects without using the undo function to develop your hand-eye coordination. YouTube is also a great source of free Photoshop drawing tutorials.
Photoshop creates raster images, which are made up of pixels. This means it's generally better for creating detailed, textured drawings and paintings where pixel-level control is important. For precise curves and shapes that can be scaled infinitely without quality loss, the vector capabilities of the Pen tool and Shape tools are invaluable.
By familiarizing yourself with these basic tools and techniques, and by consistently practicing, you can unlock the vast creative potential of Adobe Photoshop and begin creating your own digital masterpieces.