Embarking on the journey of digital tattoo design can feel like a significant leap, especially for artists accustomed to traditional methods. However, with the advent of powerful and intuitive applications like Procreate for the iPad, this transition has become more accessible and transformative than ever before. This tutorial series is meticulously crafted to guide both burgeoning digital artists and seasoned tattoo professionals through the comprehensive capabilities of Procreate, aiming to revolutionize your design process from initial concept to final stencil.
The Procreate Advantage: Why Digital Design is a Game-Changer for Tattoo Artists
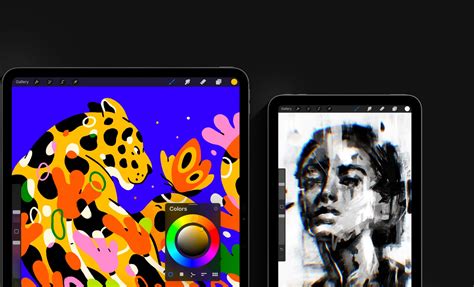
Procreate, an illustration app designed specifically for the iPad, has rapidly become a favored tool among tattoo artists. Its intuitive interface, combined with a robust set of features, offers unparalleled advantages over traditional design methods. Russ, a seasoned artist who has successfully transitioned from traditional to digital design, emphasizes the profound impact Procreate has had on his workflow, making it not just convenient but a true game-changer for creating tattoo stencils and designs. The digital realm allows for a level of precision, flexibility, and efficiency that is difficult to match with physical mediums. Whether your stencil is complex or simple, Procreate offers all the hacks needed to get them done efficiently.
Laying the Foundation: Getting Started with Procreate for Tattoo Design
The initial steps into digital art can sometimes feel daunting, but Procreate aims to demystify the process. This section covers the essentials, from downloading the app to configuring your iPad for an optimal design experience. For those new to digital art, understanding the basic settings is paramount. Consider enhancing your iPad experience with a matte screen protector, which can mimic the tactile feel of traditional sketchbook paper, providing a more familiar surface for drawing.
Selecting the Right Tools: iPad and Accessories
Before diving into the app itself, selecting the appropriate iPad model and accessories is a crucial first step. While many iPad models can run Procreate, newer versions often offer enhanced performance and compatibility with features like Apple Pencil hover. The Apple Pencil, in particular, is an indispensable tool, offering unparalleled pressure sensitivity and precision that translates directly onto the digital canvas.
Setting Up Your Digital Workspace: Canvas and Preferences
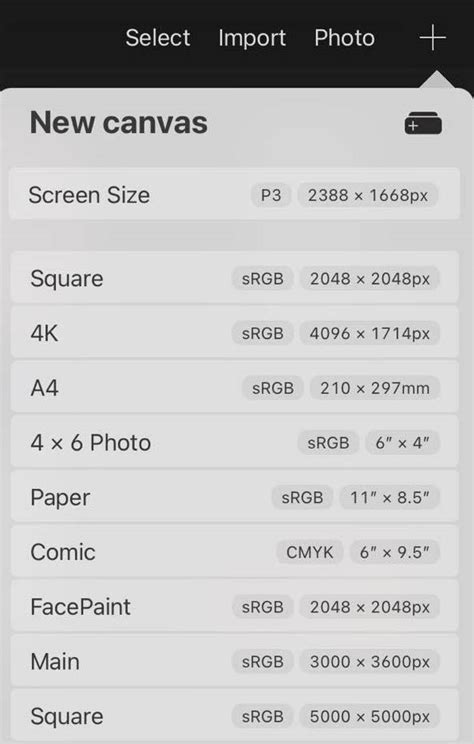
One of the fundamental aspects of starting your digital art journey in Procreate is setting up your canvas. This involves choosing the correct canvas size and resolution, which are critical for the quality and usability of your tattoo artwork. For tattoo stencils, selecting an appropriate canvas size ensures that your design will translate accurately to the skin.
- Canvas Size Selection: When starting a new project, Procreate offers a range of preset canvas sizes. For tattoo stencils, an A4 option is often an ideal choice. However, Procreate's flexibility allows for custom canvas sizes, which is essential when working on larger projects like back tattoos or sleeves. It's important to note that the larger the design, the fewer layers you can typically use, which can impact the complexity of your design. Generally, for larger prints, sticking to sizes like 11”x17” is recommended.
- Interface Orientation: Procreate allows you to customize the interface to suit your drawing habits. Depending on your handedness and preferred workflow, you can choose to have your brush size and opacity selectors on the left or right side of the screen. To adjust this, navigate to the 'wrench' icon, then 'preferences,' and select the 'right-hand interface' option. This simple adjustment can significantly enhance efficiency, allowing for quick modifications while you continue to draw with your dominant hand.
Organizing Your Digital Canvas: Stacks and Layers
In the world of Procreate, organization is your secret weapon. Effective management of your files and design elements ensures a streamlined and stress-free workflow.
Stacks: Your Digital Filing System
Stacks in Procreate function like mini stacks of paper, providing an invaluable tool for organizing all your designs and ideas. You can name and sort these stacks to keep your work categorized, whether it's sketches, half-finished masterpieces, or completed stencil designs. To create a stack, simply hold down on one drawing and drag it on top of another drawing you wish to group. Tapping the title of a stack allows you to rename it, maintaining a clear and accessible digital library of your work.
Layers: The Building Blocks of Great Tattoo Designs
Layers are the secret sauce in creating a killer tattoo design. Procreate allows for countless layers within any given file, enabling you to dedicate each layer to a specific element of your design. This is crucial for the tattoo design process, as it allows you to work on different aspects of your artwork independently.
- Layer Management: For example, your initial sketch, a rough draft, and the final design can all reside on their own separate layers. If you make a mistake while drawing, it's easy to fix because you'll only be working on that specific layer, leaving all other layers undisturbed. This is particularly beneficial when incorporating elements like reference images, which can be placed on their own layer without interfering with your primary artwork.
- Opacity Control: You can also lower the opacity of a layer. For instance, if you want to see your red sketch but don't want it to be too prominent, you can reduce its opacity. To change the opacity, click the "N" icon on the layer.
- Body Part Flow: To ensure your design flows seamlessly with the body, it's highly recommended to have a layer with a picture of the body part you are designing for. This visual reference will help you integrate your tattoo design naturally with the contours of the anatomy.
Precision and Form: Mastering Shapes and Lines
Achieving perfect shapes and clean, precise lines is fundamental to professional tattoo design. Procreate offers tools that simplify these often challenging aspects of artistic creation.
Crafting Perfect Shapes
Procreate's QuickShape feature is a revelation for creating flawless geometric forms. If you want to make a perfect circle, simply draw a circle and hold your stylus in place. Procreate will automatically refine it into a perfect circle. If it's more of an oval shape, but you desire a perfect circle, hold down the pen as normal and use your other hand to press a finger on the screen somewhere next to the circle. This process works similarly for other shapes as well, ensuring geometric accuracy with minimal effort.
The Brush Arsenal: Precision and Texture
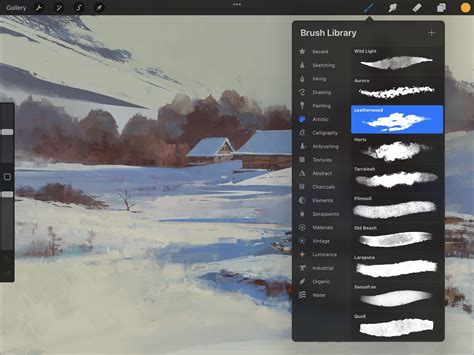
Procreate boasts an extensive brush library, with over 200 brushes available, offering a wide range of textures and line weights to suit any tattoo style. Precision is paramount in tattoo design, and Procreate’s tools are designed to support this.
- Favorite Brushes: Specific brushes are highly regarded for their utility in tattoo design. The "Perfect Sketcher" brush from the Battle Damage set is excellent for initial idea sketching. For varying line weights without switching brushes, "Sushi Liner" is a popular choice. For precise lines essential in tattoo designs, the "Digital Pen Steady" brush from the Liners set is highly recommended.
- Texture and Shading: To create textured effects, the "Murder Weapons 2 Particle Smoke" brushes are ideal for backgrounds, offering a sophisticated smoke effect. For shading, the "Weapons: Texture" brush from the Murder Weapons set is invaluable, as it helps create digital drawings that mimic the look and feel of traditional drawing or painting on paper. The "Murder Weapons 1" set also provides a variety of shade brushes that can be incorporated into the design or used for backgrounds.
Bringing Designs to Life: Value Studies and Coloring
Once your linework is established, the next critical steps involve adding depth through value studies and then infusing your designs with vibrant color.
Value Studies: Planning for Depth and Dimension
Creating value studies is a crucial practice for tattoo artists, allowing for precise planning of tattoo designs before the actual inking. This episode focuses on transforming simple line drawings into detailed value studies, a process that helps visualize the interplay of light and shadow.
- Adding Shades of Gray: Russ demonstrates how to add shades of gray to artworks, making them more dynamic and well-defined. This process involves carefully considering where highlights and shadows will fall, which is essential for creating a tattoo that has a sense of depth and form.
- FREE Brush Kits and Palettes: As an added benefit, this lesson often includes FREE brush kits and color palettes used by Russ himself, providing artists with valuable resources to enhance their value studies.
Coloring Tattoo Designs
Episode 4 delves into the art of coloring tattoo designs in Procreate. Russ showcases a fast and efficient method for bringing value studies to life with color, emphasizing the strategic use of overlay layers to preserve the integrity of the underlying value studies.
- Overlay Layers: Using overlay layers is a key technique. It allows you to apply color without altering the grayscale values beneath, ensuring that your shading and depth are maintained.
- Color Selection and Application: Guidance is provided on selecting appropriate hues, applying colors that enhance the designs, and making adjustments easily. This installment is particularly beneficial for artists interested in exploring different color schemes or completing designs for clients, offering crucial techniques to improve the digital art workflow.
Advanced Techniques: Enhancing Workflow and Realism
Moving beyond the basics, Procreate offers a wealth of advanced features and techniques that can significantly enhance workflow efficiency and the realism of your tattoo designs.
Gestures for Efficiency
Mastering Procreate's gestures can dramatically speed up your design process. Essential gestures include:
- Two-Finger Tap: This is a quick way to undo your last action.
- Three-Finger Swipe: This provides rapid access to cut and paste tools, allowing for swift manipulation of design elements.
Selection and Transformation Tools
The selection and transformation menus in Procreate are powerful tools for refining your tattoo designs with precision.
- Selection Tools: These allow you to isolate specific parts of your artwork for editing, moving, or transforming.
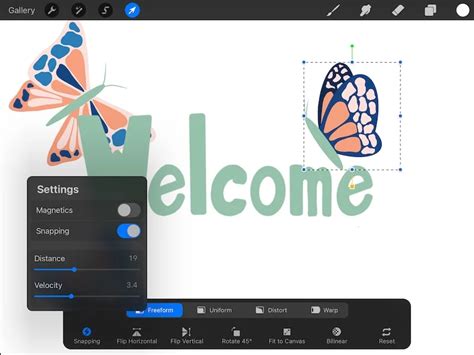
- Transformation Techniques: Russ demonstrates advanced transformation techniques, including:
- Free Form: Allows you to manipulate individual points of a selection.
- Uniform: Scales the selection proportionally.
- Distort: Allows for non-uniform scaling and skewing.
- Warp: Provides a grid-based system to bend and shape your selection in complex ways.
Creating Realism with Reference Images
For photorealistic tattoo designs, such as those of owls or lions, effectively utilizing reference images is paramount.
- Adjusting References: The "Hue, Saturation, Brightness" option in Procreate is highly recommended for analyzing reference images, especially dark ones. This feature helps reveal highlights and details in shadowed areas. For truly realistic tattoos, having multiple versions of a reference image-dark, light, and mid-tone-can be incredibly helpful for understanding the full depth of the subject.
- Saturation and Brightness: Adjusting saturation and brightness is key. Turning down saturation can help convert color designs to black and gray. Increasing brightness can reveal subtle highlights.
- Gaussian Blur for Stencils: A technique for refining stencils involves using the Gaussian Blur effect. Select your desired layer, tap on the Gaussian Blur effect within the adjustments menu, and adjust the slider to achieve the desired level of blur. Some artists recommend this step for an even more refined stencil, especially for designs that aren't simple tracework.
Utilizing Reference Images and Crafting Mockups
Efficiently using reference images and creating compelling mockups are vital steps in the tattoo design process, both for client presentations and for attracting new business.
Leveraging Reference Images
Lesson 6 provides a comprehensive guide on efficiently utilizing reference images. This covers everything from images provided by clients to those found through online searches. Understanding how to integrate and adapt these references into your unique style is a core skill.
Crafting Detailed Tattoo Mockups
Lesson 7 focuses on crafting detailed tattoo mockups. These are essential for presenting your designs to clients in a professional and visually appealing manner, helping them to envision the final tattoo on their skin. This also serves as a powerful marketing tool to attract new clients by showcasing your capabilities.
Boost Your Tattoo Sales with Procreate Mockups!
Finalizing Designs: Stencil Creation and Beyond
The culmination of the design process is the creation of a precise stencil that can be transferred to the skin. Procreate offers robust tools to ensure this final step is as seamless as possible.
Finalizing Tattoo Designs for Stencils
Episode 8 offers a comprehensive guide on finalizing tattoo designs specifically for stencil creation. This involves ensuring all lines are clean, values are clear, and the overall design is optimized for transfer.
- Stencil Optimization: Procreate's ability to resize designs without loss of quality is a significant advantage here. The digital precision ensures that the stencil will be accurate, making the tattooing process smoother.
- Bonus Resources: As a bonus, this episode often provides free brush kits and color palettes to assist artists in bringing their designs to life, further streamlining the entire workflow.
Considerations for Tattooing
When finalizing a design, it's also important to consider potential issues that might arise during the tattooing process, especially if the design is not simple tracework. For instance, black and gray artists may need to heighten the contrast in their images to achieve the desired look when the piece is complete. Procreate opens up a world of possibilities for anticipating and addressing these concerns during the design phase.
Embracing the Digital Future of Tattoo Artistry
By incorporating these detailed tips and techniques into your workflow, you will not only master stencil creation but also elevate your tattoo artistry to new heights. Procreate offers an intuitive and powerful platform that allows your creativity to flourish effortlessly on the digital canvas. The digital tattoo design process is often faster and more precise than hand-drawn designs, leading to perfect stencils that are easily resizable.
The Artist Accelerator Program is mentioned as a structured way of learning to tattoo, offering modules and support within a community of aspiring and professional tattoo artists. This program highlights the importance of structured learning and mentorship in the tattooing industry, which has historically been difficult to enter due to traditional apprenticeship models.
Ultimately, Procreate empowers tattoo artists to bring their visions to life with unparalleled ease and efficiency. This FREE tutorial series provides the essential knowledge and practical skills needed to harness the full potential of Procreate, ensuring you can nail every tattoo design and stencil with confidence.