Procreate, a powerful digital art application for iOS devices, offers a robust suite of export options designed to cater to a wide range of creative workflows. Whether you're a seasoned professional seeking to integrate your work into complex projects or an emerging artist looking to share your creations, understanding how to effectively export your layers is paramount. This guide delves into the intricacies of exporting layers as PNG files, while also exploring other valuable export formats and functionalities available within Procreate, ensuring you can share your art with the world in the most suitable way.
The Fundamentals of Layer Export in Procreate
Procreate empowers artists to manage their creations with a sophisticated layer system. Each layer can be treated as an independent element, offering immense flexibility during the creation process. When it comes to sharing, Procreate provides several methods to export these layers, either individually or as part of a larger package.
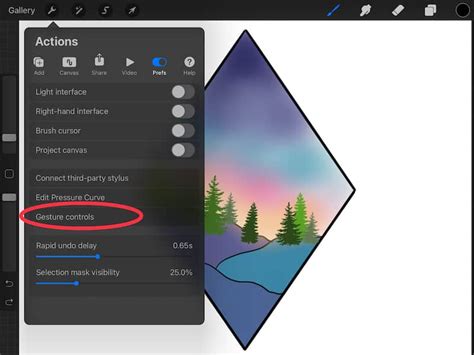
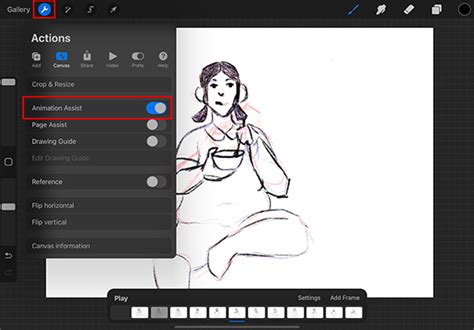
The primary gateway to these export options is through the "Actions" menu, typically accessed by tapping the wrench icon. Within this menu, you'll find the "Share" tab, which then leads to the "Share Layers" section. This is where the magic of exporting individual layers truly begins.
Exporting Layers as Individual PNG Files
One of the most common and versatile export needs is to share each layer as a separate image file, and PNG is the go-to format for this. PNG (Portable Network Graphics) is a "lossless" format, meaning it preserves the full image quality of your artwork without any degradation, even though it might result in a slightly larger file size compared to JPEGs. This is crucial when you want to maintain the integrity of each layer's details.
To export layers as individual PNGs, navigate to Actions > Share > Share Layers. You will then select the "PNG Files" option. Procreate intelligently handles the naming convention for these files. Each PNG is assigned a filename formed of the artwork name plus a sequential number. For example, if your artwork is called "Masterpiece," your exported PNG files will be automatically named "Masterpiece-1," "Masterpiece-2," and so on. This systematic naming convention is incredibly helpful for organizing your exported assets, especially when dealing with numerous layers.
Within the export settings for PNGs, you have the option to choose between "Max Resolution" and "Web Ready." Selecting "Max Resolution" will result in files with better quality but a larger file size, ideal for archival purposes or further editing in other software. Conversely, "Web Ready" offers a lower quality and a smaller file size, making it more suitable for quick sharing online or for use in web projects where file size is a critical consideration.
Bulk Exporting Layers
Procreate also facilitates the bulk export of layers, streamlining the process when you need to share multiple layers at once. This can be achieved by picking up one layer and then tapping others to add them to a selection stack. Once you've selected the desired layers, you can then proceed with the export process as outlined above. This feature is particularly useful for collaborative projects or when you need to provide specific elements of your artwork to a client or colleague.
Beyond PNG: Exploring Other Export Formats and Capabilities
While PNG is a favored format for its lossless quality and versatility, Procreate offers a broader spectrum of export options to meet diverse project requirements.
Multi-Page PDF Documents
For digital distribution or when you need to present a series of layers in a sequential manner, exporting as a multi-page PDF document is an excellent choice. Navigating to Actions > Share > PDF, you can choose from various quality settings: "Good," "Better," or "Best." Each layer of your artwork becomes a single page in the resulting PDF document. This format is ideal for sharing detailed illustrations, comic pages, or any artwork where the order and presentation of individual layers are important.
Animated Exports: PNG, GIF, MP4, and HEVC
Procreate also allows you to breathe life into your static artwork by exporting it as a looping animation. This is a fantastic way to showcase dynamic elements or to create engaging social media content.
Animated PNGs: These offer a higher visual quality than traditional animated GIFs and are particularly beneficial when your animation requires transparent backgrounds. Similar to static PNG exports, you can choose between "Max Resolution" and "Web Ready" settings, and adjust the animation speed using the "Frames per second" slider.
Animated GIFs: GIF (Graphics Interchange Format) is a widely recognized and versatile format for web animations. Procreate allows you to convert each layer into a frame for a looping animation. If your canvas has five layers, your animation will loop through these five frames.
Animated MP4s: These offer similar functionality to animated GIFs and PNGs. However, as they use JPEG encoding for each frame, they cannot support transparent backgrounds. You can adjust resolution and file size preferences similar to other animated formats.
Animated HEVCs: High Efficiency Video Coding (HEVC), also known as H.265, offers advanced compression for video. Animated HEVCs provide similar functionality to animated MPEGs but have the significant advantage of supporting transparent backgrounds. This makes them a powerful option for animations where transparency is a key requirement.
Native Procreate and PSD Formats
For maximum preservation of all your work's data, Procreate offers the option to export your artwork in its native .procreate file format or as a layered Adobe® Photoshop® PSD file.
Native
.procreateFormat: Exporting your artwork as a.procreatefile guarantees that all associated data is kept intact. This means that all layers, masks, effects, and even your signature are perfectly preserved. This is the ideal format for archiving your work or for transferring it between your own devices running Procreate. It ensures that when you reopen the file in Procreate, every element of your creation is exactly as you left it.Layered Adobe® Photoshop® PSD: For artists who collaborate with others or use Adobe Photoshop in their workflow, exporting as a layered PSD file is invaluable. This format preserves all your layers, layer names, opacity, visibility, and blend modes. This allows for seamless integration into Photoshop projects, enabling further editing and manipulation by other artists or within a professional pipeline.
Other Image Formats: JPEG and TIFF
Procreate also supports the export of your artwork in other common image formats:
JPEG: This is a "lossy" format, meaning it exchanges some visual quality for a significantly smaller file size. When you export as JPEG, your artwork is flattened into a single layer. This format is excellent for general-purpose sharing where file size is a primary concern and a slight reduction in image fidelity is acceptable.
TIFF: TIFF (Tagged Image File Format) is a format used for decades in print and is compatible with all major software. When exporting as TIFF, Procreate flattens your layers but perfectly preserves your image quality. This results in TIFF files being on the larger side, making them suitable for high-quality print outputs or professional archiving where image fidelity is paramount.
Advanced Export Considerations and Tips
When exporting your work from Procreate, several advanced considerations can enhance your workflow and the quality of your output.
Resolution and File Size Trade-offs
As mentioned, Procreate consistently offers a choice between "Max Resolution" and "Web Ready" for many export formats. Understanding this trade-off is crucial. "Max Resolution" is best for maintaining the highest possible image quality, essential for printing or for detailed post-processing. "Web Ready" is optimized for the internet, reducing load times and bandwidth usage. Always consider where your artwork will be viewed or used before making this choice.
How to Export Images from Procreate (3 Easy Ways for Perfect Quality)(+ Free Cheat Sheet!)
Solo Visibility and Layer Export
It's important to note that holding down the Visibility Checkbox to activate "Solo Visibility" will not affect layer export. This means that even if you've temporarily hidden other layers to focus on one, all visible layers will still be included in your export unless you manually hide them. This ensures that you don't inadvertently exclude layers from your export batch.
Procreate 5.3 and File Compatibility
With the release of Procreate 5.3, improvements were made to how files are compressed. A key point to remember is that any files exported from Procreate 5.3 will not open in older versions of Procreate and Procreate Pocket. This is an important compatibility note to be aware of, especially if you collaborate with users who may not have the latest version of the software. Always communicate your Procreate version if you are sharing files that might be impacted by this change.
Leveraging iOS Sharing
Beyond Procreate's built-in export options, iOS Sharing provides an additional layer of flexibility. This system allows you to export your image directly to any app linked to the iOS Sharing system. This could include cloud storage services like Dropbox or Google Drive, social media platforms, or other creative applications installed on your device. This integration further streamlines the process of getting your artwork from Procreate into your broader digital ecosystem.
By mastering these various export options, Procreate artists can ensure their work is shared, archived, and integrated into other projects with the utmost efficiency and quality. Whether you need individual layer PNGs for a design project, a multi-page PDF for a presentation, or a layered PSD for collaboration, Procreate provides the tools to achieve your desired outcome.