Procreate has revolutionized digital art on the iPad, and at the heart of its creative power lie its brushes. Whether you're a seasoned digital artist or just beginning your journey, understanding how to import, manage, and even create your own brushes is essential for unlocking the full potential of this powerful application. This guide will walk you through the process of importing brushes into Procreate, organizing your brush library, and even offer a glimpse into the world of brush customization.
Acquiring Procreate Brushes
Before you can import brushes, you need to have them. Brushes for Procreate typically come in two main file formats: .brush for individual brushes and .brushset for collections of brushes. You can acquire these in several ways:
- Download from the Internet: Many artists and websites offer free and premium Procreate brushes for download. These are often distributed as
.brushsetfiles. - Transfer from your Computer: If you have brushes saved on your computer, you can transfer them to your iPad using cloud storage services like iCloud Drive, Dropbox, or Google Drive, or by connecting your iPad to your computer.
- Purchase from Marketplaces: Platforms like Etsy, Creative Market, and dedicated Procreate brush stores offer a vast array of professionally designed brush packs.
Once you have downloaded or transferred the .brushset or .brush file to your iPad, the next step is to get them into Procreate.
Importing Brushes into Procreate: A Multi-Faceted Approach
Procreate offers several intuitive methods for importing brushes, catering to different workflows and preferences. The primary goal is to get your downloaded brush files into the app so you can start using them.
Method 1: The "Open In" Method
This is a straightforward method that involves opening the brush file directly from another application on your iPad.
- Locate the Brush File: Open the "Files" app on your iPad and navigate to the location where you have saved your
.brushsetor.brushfile. - Tap to Open: Simply tap on the
.brushsetor.brushfile. Procreate will automatically launch, and the brush will be imported. - Finding Your New Brush: If you've imported a single brush file (
.brush), it will typically be placed in a specially created folder called "Imported" at the end of your brush library. If you imported a.brushsetfile, it will usually appear as a new brush set at the top of your brush library.
Method 2: Drag and Drop Integration with the Files App
This method leverages Procreate's deep integration with the iPad's Files app for a seamless import experience.
- Open Files and Procreate Side-by-Side: Open the "Files" app and locate your brush file. Simultaneously, open Procreate. You can arrange these apps in Split View or Slide Over for easy access.
- Drag and Drop: Press and hold on the
.brushsetor.brushfile within the Files app. Once it "lifts up," drag it directly into the Procreate app. - Instant Import: Release the file where you want it to be imported. Similar to the "Open In" method, single brushes will go to the "Imported" folder, and
.brushsetfiles will appear as new sets.
Method 3: Importing via the Procreate Brush Library
Procreate provides a dedicated import function within its brush library for a more centralized approach.
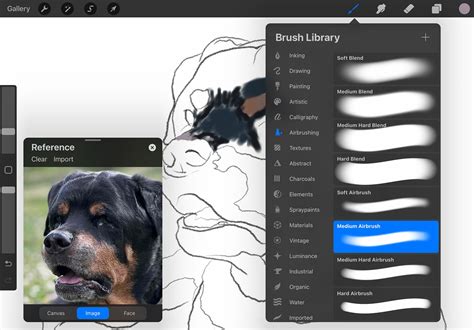
- Access Your Brush Library: Open Procreate and tap on the paintbrush icon to access your Brush Studio.
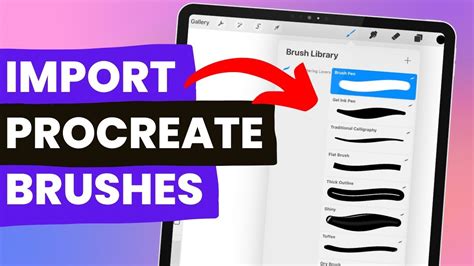
- Tap the Plus Button: In the top right corner of your brush library, you'll see a plus icon (
+). Tap this to reveal import options. - Select "Import from Files": A menu will appear. Choose "Import from Files."
- Navigate and Select: This will open the Files app browser. Navigate to your
.brush,.brushset, or even.brushlibraryfile and tap on it to import. - Location of Imported Brushes: As with other methods, single brushes will land in the "Imported" folder, while
.brushsetfiles will be added as new sets, typically at the top of your library.
Importing Photoshop Brushes (.abr)
For artists transitioning from Photoshop, Procreate's ability to import .abr files is a significant advantage. The process is similar to importing Procreate's native brush formats:
- Drag and Drop: Press and hold an
.abrfile in the Files app or another compatible application and drag it directly into Procreate. - Import from Files: Within the Procreate brush library, tap the
+button and select "Import from Files," then choose your.abrfile.
When you import an .abr file, Procreate attempts to translate its settings as closely as possible. While most brushes import well, some complex Photoshop brushes might not have a perfect one-to-one translation due to differences in the brush engines of the two applications.
Organizing Your Brush Library: Taming the Chaos
As you accumulate more brushes, keeping your library organized becomes crucial for efficient workflow. Procreate offers robust tools for managing your brush sets.
Creating New Brush Sets
A brush set is a folder that holds a collection of brushes. Creating custom sets helps you categorize brushes by style, medium, or project.
- Access Brush Sets: In your Brush Library, drag your brush set list downward.
- Tap the Blue Plus Button: A blue
+button will appear at the top. Tap it. - Naming Your Set: By default, a new brush set is named "Untitled Set." You can rename it immediately or later.
Renaming Brush Sets and Brushes
Clear and descriptive names are key to a well-organized library.
- Renaming Brush Sets: Tap a brush set twice (or tap and hold) and select "Rename" from the context menu. You can also rename brush sets directly within the Files app.
- Renaming Brushes: In versions prior to 5.4, renaming was done within the Brush Studio. Now, you can also rename brushes from the Files app.
Moving and Copying Brushes and Sets
Efficiently moving brushes between sets or even between different brush libraries (if you have multiple storage locations) is straightforward.
- Moving a Single Item: Tap and hold the brush or brush set you want to move. It will "lift up" slightly. Drag it to its new location and release.
- Moving Multiple Items: Pick up the first item as described above. Then, with another finger, tap other items you wish to add to the selection. A number will appear indicating how many items are in your stack. Drag the entire stack to the new location.
- Copying Brushes to a Set: If you hover brushes over the title of a brush set and drop them directly onto the title, this action will copy the brushes, placing copies in the target set instead of moving them. This is the only instance where a brush is copied rather than moved.
Deleting Brushes and Sets
Mistakes happen, and sometimes you need to remove brushes you no longer use.
- Deleting a Brush: Swipe left on the brush thumbnail in your library and tap "Delete."
- Deleting a Brush Set: Tap a brush set twice and select "Delete."
Important: When you delete a brush or brush set, it is permanently removed from both Procreate and the Files app. Always ensure you have backed up any important brushes before deleting them. If you accidentally delete an item, check the "Recently Deleted" folder within the Files app.
Duplicating Brush Sets
Need to experiment with a brush set without altering the original? Duplicating is the answer.
- Duplicate a Brush Set: Tap a brush set twice (or tap and hold) and select "Duplicate." An exact copy will appear directly below the original.
Using Emojis as Brush Set Icons
For a visual flair, you can assign an emoji as an icon for your brush set.
- Ensure No Icon is Set: First, make sure your brush set doesn't already have a custom icon.
- Name with an Emoji: Procreate will automatically use the first emoji found in the brush set's name as its icon. For example, naming a set "ð¨ Amazing Textures" will display a paint palette emoji next to it.
Exploring Procreate's Built-in Brush Library
Procreate comes with a rich collection of 18 handcrafted brush sets designed to cover a wide spectrum of artistic needs. These brushes are categorized to help you find the right tool for the job.
- General: A versatile set for clean, simple, and mostly rounded brushes.
- Inking: Ideal for comic or manga-style artwork, featuring inks and halftones.
- Artistic: Offers a range of rendering brushes for artistic drawing and digital painting effects.
- Dry Media: Designed for practical drawing, planning, sketching, and quick studies, mimicking traditional dry media.
- Wet Media: Encompasses a range of realistic and digital painting effects, including acrylic, stucco, and oil mediums.
- Texture: Focuses on creating interesting textures, from watery to clumpy effects.
- Specialty: Includes brushes with Streamline enabled for smooth, even calligraphic forms, and others that lay down large areas of texture quickly.
- Creative: Demonstrates Procreate's Brush Studio capabilities with brushes that change color, create smoky effects, or generate chaotic shapes.
- Elements: Features Material brushes with metallics and roughness, designed for 3D painting.
- Rendering: This set includes brushes that take full advantage of digital art's power to add realistic grunge textures.
- Organic: Mimics natural elements with scatter brushes for grass, leaves, and bark, as well as brushes that replicate handmade medium strokes.
- Watercolour: Offers several realistic watercolour brushes for expressive painting.
Experimenting with these built-in sets is a great way to understand the diverse capabilities of Procreate's brush engine and discover new artistic possibilities.
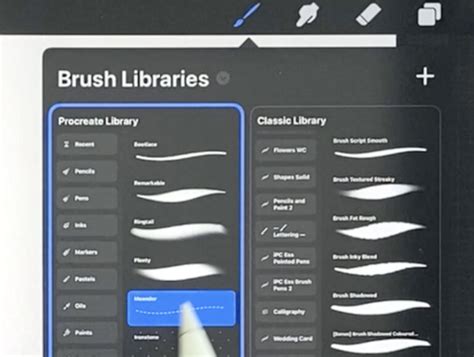
How to Organize Procreate Brushes with Brush Libraries 🖌️
Creating Your Own Brushes: The Brush Studio
For ultimate creative control, Procreate's Brush Studio allows you to build brushes from the ground up or heavily customize existing ones.
- Create a New Brush: In your Brush Library, tap the
+button within a brush set to create a new brush. - Enter Brush Studio: This action will open the Brush Studio, a powerful interface offering extensive customization options.
- Deep Customization: Within the Brush Studio, you can alter every aspect of a brush's behavior, including its shape, grain, dynamics, color dynamics, taper, opacity, flow, and much more. With hundreds of settings available, the combinations are virtually limitless. Procreate intelligently remembers your custom brush settings.
Managing Brush Libraries with the Files App
Procreate's integration with the iPad's Files app means your brushes, brush sets, and entire brush libraries are managed as files and folders.
- Brush Library Locations: Brush libraries are stored within the Files app, typically in "On My iPad" â "Procreate" â "Brushes" or in your "iCloud Drive" â "Procreate Brushes" folder.
- File and Folder Synchronization: Changes made to brushes within Procreate are reflected in the Files app, and vice versa. This ensures consistency across your workflow.
- Operating System Restrictions: Due to operating system limitations, certain characters cannot be used in the names of brushes, sets, or libraries.
Advanced Brush Management Features
Procreate offers several advanced features for managing your brush collection efficiently.
Recent Brushes
Procreate keeps track of your recently used brushes for quick access.
- Accessing Recent Brushes: Tap "Paint," "Smudge," or "Erase," then tap "Recent" at the top of the brush library sets.
- Finding the Original Set: Swipe left on a brush in the "Recent" set and tap "Find" to locate its original brush set.
- Pinning Brushes: Swipe left on a brush in "Recent" and tap "Pin." This keeps the brush permanently at the top of your "Recent" set, indicated by a pin symbol.
- Clearing Recent Brushes: Swipe left on a brush in "Recent" and tap "Clear" to remove it.
Exporting and Sharing Brushes
Sharing your custom brushes or backing them up is simple.
- Share Individual Brushes: Swipe left on a brush thumbnail and tap "Share."
- Share Custom Brush Sets: Tap a brush set twice and select "Share."
- Backup Options: Consider saving your brushes and brush sets to an iPad-compatible external hard drive or a cloud storage service for safekeeping.
Resetting and Troubleshooting Brushes
If a brush isn't behaving as expected, you can reset it to its default settings.
- Resetting a Brush: Navigate to the brush in your library, tap the button to open the context menu, and you should find an option to reset the brush (this is typically done within the Brush Studio).
By mastering these import, organization, and creation techniques, you can build a personalized and efficient digital toolkit within Procreate, empowering you to bring your artistic visions to life with greater ease and precision.