The digital art landscape is continuously evolving, offering artists and designers an ever-expanding toolkit to bring their visions to life. Among the most powerful and versatile tools within this digital realm are Photoshop brushes. These dynamic instruments allow for a level of personalization and expressive capability that can transform a flat image into a textured, nuanced work of art. Whether you're aiming to replicate the organic feel of traditional media or forge entirely new visual styles, understanding and creating custom Photoshop brushes, particularly those suited for sketching, is an invaluable skill. This tutorial will guide you through the process of creating and utilizing sketch brushes in Photoshop, from understanding fundamental concepts to implementing advanced techniques.
The Foundation: Understanding Photoshop Brushes
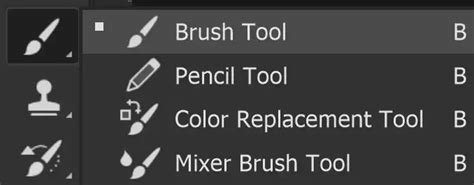
Photoshop brushes are essentially digital tools that simulate the application of paint, ink, pencils, or other media onto a digital canvas. They are defined by a "brush tip shape" and a series of dynamic settings that control how that shape is applied. At their core, Photoshop brushes are incredibly adaptable. You can use a vast array of pre-made brush sets, but the true power lies in the ability to create your own custom brushes. This personalization allows you to inject a unique personality into your artwork, moving beyond generic digital effects.
The process of creating custom brushes can be approached in several ways. You can derive them from existing images, intricate shapes, or even simple brush strokes. The beauty of digital art is that you can even translate traditional tools, like ink or paint applied to paper, into digital brush assets. For the best results when creating custom brushes, it's recommended to work on a larger canvas size. This ensures that finer details remain visible and intact even when the brush is resized for different applications.
When you create custom brushes, it's important to understand how Photoshop interprets the source material. While you can work with a file or drawing that has color, the image will ultimately translate into a black and white pattern. In this conversion, the black or color variations within your source image become the brush pattern.
Getting Started with Custom Brush Creation
The journey to creating your own custom Photoshop brushes begins with a simple concept: selecting an object or shape that you wish to turn into a brush. You can then use Photoshop's selection tools to isolate this element. Once selected, the process involves defining this selection as a new brush preset. This is typically done through the "Edit" menu, where you'll find the "Define Brush Preset" option. Giving your new custom brush a descriptive name is crucial for organization, especially as your library of brushes grows.
The Brush Settings panel in Photoshop is where the magic truly happens, allowing for extensive customization of your brush's behavior. Here, you can adjust parameters such as Size, Spacing, Shape Dynamics, Scattering, Texture, Dual Brush, and Transfer. These settings allow you to fine-tune every aspect of your brush, from how it responds to pen pressure to the texture it applies.
Crafting Realistic Sketch Brushes
Mimicking the nuanced look of traditional graphite pencils in Photoshop is a common aspiration for many digital artists and illustrators. The appeal lies in the ability to experiment with an endless variety of textures and colors without the constraints of physical materials. While achieving an exact replica of a real graphite pencil can be challenging, Photoshop offers powerful tools to get remarkably close.
The key to creating realistic sketch effects lies in simulating the subtle variations in texture and shading that give a drawing its character. This often involves working with custom brushes designed to emulate different pencil strokes and levels of pressure.
Experimenting with Traditional Media
To create authentic sketch brushes, a great starting point is to experiment with traditional tools. Grab a piece of paper and create an assortment of strokes, blobs, and shapes using inks, pens, paints, and pencils. Old sponges can also be excellent sources for unique textures. Once you have your physical marks, you can either scan the paper or take a high-quality photo using your phone.
The next critical step is to prepare these scanned or photographed textures for use in Photoshop. You'll need to remove any background color, especially if you're working with a white or black background. This can be achieved within Photoshop's Blending Options, specifically using the "Blend If" feature. By adjusting the sliders along the gradient bar, you can effectively make the background color disappear. If the edges of your objects appear harsh, holding down the Option/Alt key while adjusting the sliders can help to split the arrow and soften them.
Utilizing Custom Brush Sets for Sketch Effects
Many artists and educators have developed comprehensive sets of custom Photoshop brushes specifically designed to simulate various pencil strokes and pressure levels. These sets often include over twenty brushes, each crafted to replicate different weights and patterns of pencil markings. By using these pre-made brushes, designers and illustrators can achieve a realistic sketch effect quickly and efficiently.
Furthermore, the process of transforming photos into sketches often benefits from Photoshop Actions. These pre-recorded sequences of commands can automate complex editing steps, allowing you to apply a sketch effect to a photograph in a matter of minutes while retaining a high degree of control for a polished, professional look. These actions, combined with custom brushes and textures, create a streamlined workflow that prioritizes creation time.
🖋️How to Create a Realistic Pencil Brush in Photoshop | Step-by-Step Tutorial 🖋️
Advanced Techniques and Brush Settings
Beyond the basic creation of brushes, Photoshop offers a deep dive into brush dynamics that can elevate your sketch effects to a professional level. Understanding and manipulating these settings is crucial for achieving specific artistic outcomes.
The Brush Settings Panel: A Deep Dive
The Brush Settings panel (Window > Brush Settings) is a treasure trove of customization options. Here’s a breakdown of some key areas:
- Brush Tip Shape: This is where you select your base brush shape, from simple rounds and squares to custom shapes you've created.
- Shape Dynamics: This crucial setting controls how the brush shape changes as you paint. "Size Jitter" can be set to respond to "Pen Pressure," allowing your brush size to vary naturally with how hard you press on your tablet. This is fundamental for mimicking the organic feel of a pencil.
- Scattering: This setting introduces randomness to the placement of your brush marks. A slight scatter can help create softer, more textured edges, preventing a repetitive stamped look.
- Texture: This is where you can apply a pattern to your brush strokes, adding a tactile and realistic feel. You can use pre-defined textures or create your own seamless patterns from scanned materials.
- Dual Brush: This allows you to combine two brush tips, overlaying one on top of another to create complex and unique effects.
- Transfer: This panel controls how brush opacity and flow are affected by pen pressure. "Transfer" allows pen pressure to control opacity, while "Build-up" helps control both opacity and texture, creating a more painterly, layered effect.
- Other Dynamics: Settings like "Color Dynamics" can introduce variations in color, and "Noise" can add subtle grain to your brushwork.
Understanding Opacity and Flow
Opacity and Flow are two critical settings that often cause confusion. Opacity determines the overall transparency of a brush stroke. Each stroke lays down a "coat" of paint at that exact opacity. Flow, on the other hand, is designed to better mimic traditional paint. Think of it as a smoother version of opacity. Layering low-flow strokes on top of each other creates a distinctive pattern of overlapping streaks, a hallmark of digital artists. While Opacity always works the same way, some media brushes have different Flow functions programmed to accurately mimic how pencils or nearly dry paintbrushes behave. For painting, it's often recommended to leave Opacity at 100% and use pressure to control Flow and Size.
Brush Angle and Smoothing
The ability to change the brush angle precisely can be incredibly useful. You can set an exact brush angle by entering a number in degrees or by clicking and dragging. This is particularly helpful when trying to replicate the directionality of pencil strokes or the grain of paper.
Photoshop's smoothing engine, while different from other software, aims to produce smoother strokes. The "Pulled String Mode" (which can be made visible by enabling "Show Brush Leash" in Preferences) illustrates how Photoshop connects your brush cursor to your actual brush stroke with an invisible "string." A higher smoothing percentage increases the length of this string, leading to a smoother, albeit potentially less responsive, stroke.
Actions and Bit Depth
A common point of confusion for users is that many Photoshop Actions and filters only work on 8-bit images. If your file is set to 16-bit, these features may appear greyed out. It's essential to convert your image to 8-bit (Image > Mode > 8 Bits/Channel) before applying such actions or filters to ensure they function correctly. This is a critical detail for achieving many sketch effects, especially those that rely on the Filter Gallery.
The Evolution of Digital Brushes
The concept of digital illustration and the tools used to create it have a rich history, evolving alongside advancements in computing technology. Early pioneers in the 1960s, like Michael Noll, experimented with computers to generate images through mathematical patterns. The rise of companies like Adobe in the early 1980s, along with the introduction of the Macintosh operating system, marked significant milestones, bringing tools like Illustrator and Photoshop into the mainstream.
Today, digital illustration is an integral part of the creative industry. Tools like custom brushes allow artists to imbue their work with a human touch, mimicking the subtle variations that come from physical media. The ability to create one's own brushes with unique textures and shapes further personalizes the digital art process. This constant evolution means artists must stay aware of both aesthetic and technical trends.
From Traditional to Digital: Bridging the Gap
The desire to bridge the gap between traditional art techniques and digital creation is a driving force behind the development of sophisticated brushes and effects. Artists are no longer limited by the physical constraints of paint or paper; instead, they can leverage digital tools to explore a virtually limitless range of possibilities.
For those who may not possess traditional drawing skills, digital software offers a pathway to achieving compelling sketch effects. By understanding how to use and create custom brushes, combined with powerful tools like Photoshop Actions, anyone can transform ordinary photographs into unique pieces of art. The process, while sometimes appearing complex, is often broken down into manageable steps, making it accessible to a wide range of users.
Tips for Effective Brush Usage
As you delve into the world of Photoshop brushes, here are some tips to enhance your workflow and creative output:
- Practice Regularly: Like any skill, mastering Photoshop brushes takes practice. Experiment with different brush types and settings to understand their nuances.
- Organize Your Brushes: As your custom brush library grows, keeping it organized with descriptive names and potentially custom folders will save you time and frustration.
- Use Brushes Sparingly: Overusing a single brush type can make your work look repetitive. Vary your brush choices to maintain visual interest.
- Choose the Right Brush for the Job: Not all brushes are created equal. Consider the specific effect you want to achieve and select or create a brush that is best suited for that purpose.
- Experiment with Blending Modes: Just like layers, brushes have blending modes that can significantly alter how they interact with the canvas.
- Leverage Pen Pressure: If you're using a graphics tablet, ensure your brushes are set up to respond to pen pressure for more natural and expressive strokes.
The journey of mastering Photoshop brushes is an ongoing one. By understanding the fundamental principles, experimenting with creation techniques, and delving into the advanced settings, you can unlock a world of creative potential, transforming your digital art and design projects with unique and compelling sketch effects.