Photoshop's Envelope Distort feature is a powerful tool for visually reshaping and fine-tuning image layers, offering creative control over your designs. This tutorial will guide you through the intricacies of using this feature, from basic text distortion to advanced image manipulation, empowering you to achieve sophisticated visual effects.
Understanding the Core of Envelope Distort
At its heart, Envelope Distort in Photoshop allows you to bend, twist, and warp image elements as if they were contained within a flexible envelope. This envelope acts as a guide, and by manipulating its shape, you effectively distort the content within. This is particularly useful for making elements conform to curved surfaces, creating dynamic typography, or achieving unique artistic transformations.
Distorting Text: A Step-by-Step Approach
Distorting text in Photoshop is a straightforward process that can dramatically enhance your typographic designs. Follow these steps to achieve impressive text distortion effects:
- Type Your Text: Begin by selecting the Text Tool (T) and typing the text you wish to distort. Ensure the text is on its own layer.
- Rasterize the Type Layer: To apply distortion effects that alter the pixels of the text, you need to convert the text layer into a regular pixel layer. With the text layer selected in the Layers panel (Window > Layers), right-click on the layer and choose "Rasterize Type." You will notice the text layer icon in the Layers panel change from a "T" to a standard layer thumbnail, indicating it is now a pixel-based image.
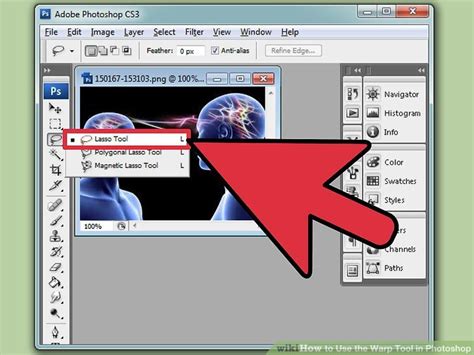
- Select the Text: With the text layer still selected, use a selection tool, such as the Marquee Tool or Lasso Tool, to draw a selection around your text. Alternatively, you can Ctrl-click (Windows) or Cmd-click (Mac) on the text layer's thumbnail in the Layers panel to create a selection around its opaque pixels.
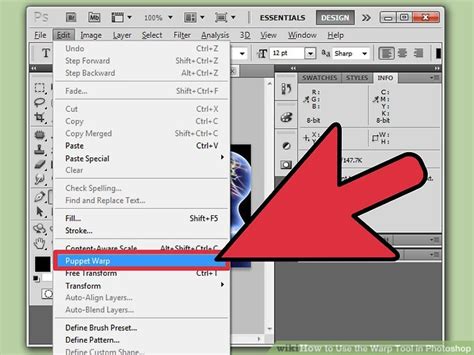
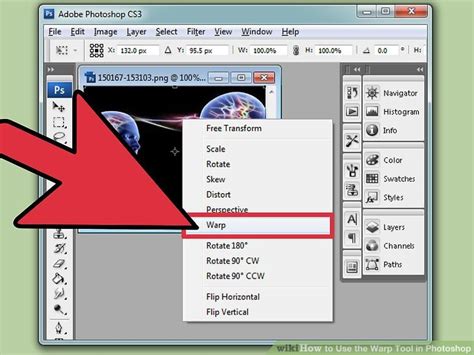
- Apply Envelope Distort: Now, navigate to the "Edit" menu, select "Transform," and then choose "Warp." This will activate the Warp tool, which functions as the core of the Envelope Distort feature for rasterized layers. You will see a grid overlaying your selected text.
- Manipulate the Warp Grid: The Warp grid consists of anchor points and lines. You can directly click and drag these anchor points to bend and shape your text. For more nuanced control, you can add more points to the grid.
- Adding Grid Lines: To add more control points, you can split the warp grid. In the Options bar at the top of the Photoshop window, you'll find "Split" icons. Select "Split Warp Horizontally," "Split Warp Vertically," or "Split Warp Crosswise" to add predefined grid lines and corresponding anchor points.
- Selecting Multiple Points: To move multiple anchor points simultaneously, you can Shift-click on individual anchor points or drag a selection box over them while holding down the Shift key. This allows for more complex and synchronized distortions.
- Adjusting Warp Settings: The Options bar provides several ways to fine-tune your warp:
- Change Warp Orientation: The "Change Warp Orientation" icon allows you to alter the direction of certain warp presets if you were using them.
- Reference Point Locator: The "Reference Point Locator" icon lets you define the pivot point around which transformations occur. Clicking on the squares within this icon changes the reference point.
- Numeric Values: For precise control, you can enter numeric values directly into the "Bend," "H" (Horizontal), and "V" (Vertical) boxes in the Options bar. These values dictate the extent of the warp along different axes.
Beyond Text: Distorting Image Layers
The Envelope Distort functionality, particularly through the Transform Warp feature, is not limited to text. You can apply these techniques to any image layer to achieve creative warping effects.
- Select Your Layer: In the Layers panel (Window > Layers), select the image layer or a specific area within a layer that you wish to warp. If you want to warp only a part of a layer, create a selection around that area first using any of Photoshop's selection tools.
- Activate Transform Warp: Go to "Edit" > "Transform" > "Warp." A bounding box with a customizable grid will appear around your selected layer or selection.
- Manipulate the Warp Grid: Similar to distorting text, you can manipulate the anchor points and lines of the Warp grid to reshape the image content.
- Density Option: The "Density" option in the Options bar controls how many lines appear between each Split Warp line. Increasing the density adds more control points, allowing for finer adjustments and more intricate distortions.
- Predefined Splits: As mentioned earlier, you can use the "Split Warp Horizontally," "Split Warp Vertically," or "Split Warp Crosswise" icons to add grid lines and points. This is an efficient way to subdivide the warp envelope for more detailed control.
- Selecting and Moving Points: Select individual anchor points by clicking on them. To select multiple points, hold down the Shift key and click on additional points, or drag a marquee selection over them. Once selected, you can move them together.
- Adjusting Warp Behavior: The Options bar provides controls to change the orientation of the warp and set the reference point using the "Reference Point Locator." Numeric input for "Bend," "H," and "V" offers precision.
Understanding the Options Bar Controls in Detail
The Options bar, which appears at the top of the Photoshop interface when the Warp tool is active, is your command center for fine-tuning the distortion process. Let's delve deeper into its functionalities:
The Warp Mode Dropdown
While not explicitly mentioned in the provided text as a separate menu, the Warp tool itself often presents a dropdown menu of preset warp styles. These presets, such as "Arc," "Arch," "Bulge," "Center," "Cheroot," "Cylinder," "Deflate," "Fisheye," "Inflate," "LA wave," "Merge," "Perspective," "Pipe," "Pucker," "Push," "Shell Lower," "Shell Upper," "Squeeze," "Twist," and "Wave," offer starting points for common distortions. You can select one of these presets and then use the grid manipulation to further refine the effect.
Density
The "Density" slider or input box is crucial for controlling the granularity of the warp grid. A lower density means fewer control points, resulting in broader, smoother distortions. A higher density introduces more lines and anchor points, enabling you to create complex curves and sharp bends. This is particularly useful when you need to precisely mimic a warped surface or create intricate patterns.
Split Warp Icons
These icons are your tools for manually subdividing the warp grid.
- Split Warp Horizontally: Adds a horizontal line across the grid, creating two rows of control points.
- Split Warp Vertically: Adds a vertical line, creating two columns of control points.
- Split Warp Crosswise: Adds both a horizontal and a vertical line, dividing the grid into four quadrants, each with its own set of control points.
By strategically using these split options, you can build a custom grid that perfectly suits the complexity of your desired distortion.
Change Warp Orientation
For certain warp presets or when manually manipulating the grid, the orientation can be critical. This icon allows you to flip the direction of the warp effect. For instance, if you've applied an "Arc" warp, changing its orientation might flip it from curving upwards to curving downwards.
Reference Point Locator
This grid of nine squares is fundamental to understanding how transformations are applied. The central square represents the default reference point. When you transform or warp, the action often pivots around this reference point. By clicking on one of the other eight squares, you change the reference point to a corner or an edge. This means that when you drag a handle or input values, the transformation will originate from or be relative to that new reference point, offering greater control over the transformation's origin and direction.
Numeric Input Boxes (Bend, H, V)
These boxes provide a precise, numerical way to control warp parameters.
- Bend: This value typically controls the overall curvature or intensity of the warp, often related to the primary distortion axis of a preset warp.
- H (Horizontal): Controls distortion along the horizontal axis.
- V (Vertical): Controls distortion along the vertical axis.
Entering specific numerical values allows for repeatable results and fine-tuned adjustments that might be difficult to achieve through manual dragging alone.
Advanced Techniques and Considerations
When working with Envelope Distort, especially the Transform Warp feature, consider these advanced tips:
Non-Destructive Warping with Smart Objects
For maximum flexibility, consider converting your layer into a Smart Object before applying the Warp transformation. Right-click on the layer in the Layers panel and select "Convert to Smart Object." Warp transformations applied to Smart Objects are non-destructive, meaning you can go back and re-edit them later without losing quality. This is a crucial workflow for professional design.
Combining Warp with Other Transformations
The Warp tool can be used in conjunction with other transform tools like Scale, Rotate, Skew, and Perspective. You can apply a warp, then scale the result, or vice versa. Experiment with the order of operations to achieve unique effects.
Distorting Selections
If you only want to warp a specific portion of a layer, create a selection first using any of Photoshop's selection tools (Marquee, Lasso, Magic Wand, Quick Selection, Pen Tool). Then, activate the Transform Warp. The Warp grid will only appear within your selection, and only the pixels within that selection will be distorted. This allows for highly targeted modifications.
Understanding the "Make with Warp" Feature (Object Menu)
While the provided text mentions "Make with Warp" under the "Object" menu, this is typically a feature found in Adobe Illustrator, not directly in Photoshop's standard "Edit > Transform > Warp" command for pixel layers. However, the concept of applying warp effects to objects is similar. In Photoshop, the closest equivalent for vector shapes or text layers before rasterization would be to use layer styles or, more powerfully, to convert them to Smart Objects and then apply the Warp transform. The Illustrator "Make with Warp" feature is a more direct way to apply preset warp styles to vector objects.
Photoshop Tutorial Apply design on subject Can Mockup Tutorial
The Role of Context and Creativity
Shari Fairclough, a Social Media & Graphic Design Expert based in Atlanta, Georgia, emphasizes versatility in design. Her extensive experience in social media marketing, UX/UI design, and graphic print production, coupled with her freelance and in-house roles, highlights the practical application of such tools. Fairclough's work, including founding Sunni Aesthetics, a platform blending culture, design, and art, demonstrates how creative tools like Envelope Distort can be integrated into broader artistic and branding strategies. Her Google UX Design certification and studies at The Creative Circus underscore a commitment to mastering design principles and tools.
The effectiveness of Envelope Distort lies not just in the technical execution but in the creative vision behind it. Whether you're aiming to make text wrap around a curved object, give a flat image a sense of depth, or create abstract artistic distortions, understanding the nuances of the Warp tool is key.
Avoiding Common Misconceptions
A common misconception is that Warp is only for extreme, cartoonish distortions. In reality, it excels at subtle adjustments. You can use it to slightly round off corners, gently curve a straight line to make it appear more natural, or add a subtle bulge to an object to give it a more tactile feel. Another misconception is that it's difficult to control. By mastering the use of anchor points, density, and the reference point, you can achieve highly precise and predictable results.
Practical Applications in Design
Envelope Distort finds application in numerous design scenarios:
- Product Mockups: Warping labels or logos onto curved product surfaces like bottles or cans.
- Web Design: Creating dynamic buttons or banners that appear to bulge or curve.
- Print Design: Making text or graphics conform to the shape of a packaging element or a brochure fold.
- Digital Art: Generating unique textures, abstract shapes, and surreal imagery.
- Social Media Graphics: Adding visual interest and depth to posts, as Shari Fairclough might curate for Guidepost Montessori's online presence.
By understanding and applying the techniques outlined in this tutorial, you can unlock the full potential of Photoshop's Envelope Distort feature, transforming your ordinary images and text into visually compelling design elements.