Creating convincing sand textures is a cornerstone of realistic 3D environments, whether you're populating a vast virtual Sahara or detailing a sun-drenched deserted beach. While Substance Designer, a powerful procedural texturing tool, offers immense potential, its learning curve can be steep. Fortunately, master material creator Josh Lynch has developed a detailed tutorial designed to demystify the process and empower 3D artists to build the best sand textures for their projects. This guide, aimed at experienced and intermediate Substance Designer users, delves into the intricacies of generating highly realistic sand materials within the software.
Understanding the Nuances of Sand as a Material
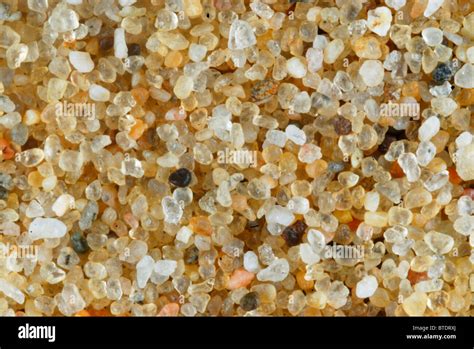
Before diving into the technical aspects of Substance Designer, it's crucial to understand the visual characteristics that define sand. Sand isn't a monolithic entity; it's a complex aggregate of countless individual grains, each with its own shape, size, and reflectivity. The overall appearance of a sand surface is a result of how these grains interact with light, creating subtle variations in color, roughness, and height.
Key visual elements to consider when creating sand include:
- Grain Variation: No two grains of sand are identical. There's a natural distribution of particle sizes, from fine dust to larger pebbles. This variation contributes significantly to the perceived realism.
- Surface Imperfections: Real-world sand is rarely perfectly smooth. It features small undulations, micro-cavities, and the occasional embedded debris.
- Color Palette: While we often think of sand as "beige," it encompasses a wide spectrum of colors. This can range from pale yellows and whites to deep reds, browns, and even grays, depending on the mineral composition and environmental factors.
- Roughness and Specularity: The way light reflects off a sand surface is critical. Individual grains are generally rough, scattering light. However, depending on moisture content or the presence of fine dust, there can be subtle variations in specularity.
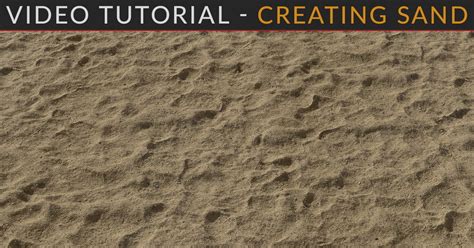
- Depth and Form: Sand dunes, beaches, and desert landscapes exhibit distinct forms. This involves not just surface detail but also the subtle sculpting of the material itself, creating ripples, drifts, and accumulations.
The Substance Designer Workflow for Realistic Sand
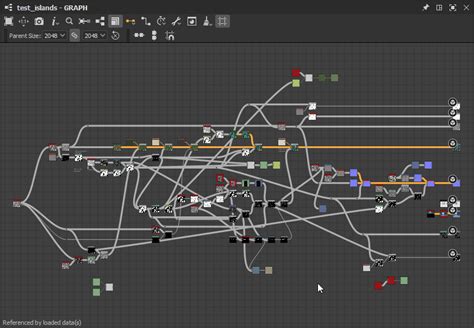
Josh Lynch's tutorial emphasizes a procedural approach, which is where Substance Designer truly shines. This means building the material from fundamental nodes and operations, allowing for infinite customization and scalability. The process generally involves several key stages:
1. Generating Base Grain Patterns
The foundation of any sand material lies in creating a convincing pattern of individual grains. This is typically achieved through a combination of noise functions and shape manipulation.
- Noise Generation: Various noise types, such as Perlin noise, Worley noise, or fractal noise, can be used as a starting point. These provide the fundamental randomness needed to simulate the irregular shapes of sand particles. Multiple noise layers are often layered and blended to achieve complexity.
- Shape Transformation: Raw noise is rarely sufficient. Artists then employ nodes like "Blur," "Sharpen," "Histogram Scan," and "Levels" to sculpt the noise into more distinct grain-like shapes. The "Histogram Scan" node, for instance, is invaluable for isolating specific intensity ranges within a noise, effectively defining the boundaries of individual grains.
- Edge Softening: To avoid overly sharp, artificial-looking edges, a subtle blur or a dedicated "Edge Detect" node followed by a blend can be used to soften the transitions between grains, mimicking the natural erosion and rounding of sand particles.
2. Simulating Grain Distribution and Density
Once individual grain shapes are established, the next step is to control how these grains are distributed across the surface and how densely they appear.
- Tiling and Blending: Ensuring that the generated grain patterns tile seamlessly is paramount for creating large, repeatable textures. This often involves careful use of tiling nodes and strategic blending techniques.
- Density Control: The density of sand can vary significantly. Artists can use masks or additional noise layers to control areas where sand is more or less concentrated. This is crucial for creating believable drifts and accumulations.
- Scale Variation: Introducing variations in the scale of the generated grains adds another layer of realism. This can be achieved by using multiple instances of the grain generation process with different scale parameters or by using a grayscale mask to drive scale variations across the texture.
3. Building Essential Texture Maps
A realistic PBR (Physically Based Rendering) material requires several key texture maps: Albedo (color), Normal, Roughness, Height (or Displacement), and Ambient Occlusion. Substance Designer allows for the procedural generation of all these.
- Albedo (Color) Generation: The color of sand is rarely uniform. This map is often built by first creating a base color and then overlaying subtle color variations based on the grain structure and underlying noise. Factors like ambient occlusion can also influence color, making crevices appear slightly darker. Josh Lynch's tutorial likely demonstrates techniques for introducing subtle color shifts and speckles to mimic mineral variations and dust.
- Normal Map Generation: The normal map defines the surface's micro-details and how light interacts with them. This is generated from the height information. High-frequency details, like the bumps and crevices between grains, are crucial for creating a convincing sense of relief. Substance Designer's "Normal" node is essential here, often taking the height map as input.
- Height/Displacement Map Generation: The height map dictates the perceived depth of the surface. For sand, this map is directly derived from the grain shapes. Areas representing individual grains will have varying levels of elevation, contributing to the overall topographic feel. This map is vital for parallax occlusion mapping or actual mesh displacement in rendering engines.
- Roughness Map Generation: The roughness map controls how sharp or blurred reflections are. For sand, this map is often derived from the height and color maps. Areas that are higher or have more pronounced grain features might be rougher. Additionally, subtle variations can be introduced to simulate slight moisture or dust accumulation, which can alter reflectivity.
- Ambient Occlusion (AO) Map Generation: AO simulates the shadowing that occurs in crevices and areas where light struggles to reach. This is particularly important for sand, as the spaces between grains will naturally trap some light. Substance Designer can generate AO maps from the height information, adding depth and grounding the material.

4. Adding Secondary Details and Environmental Influences
To elevate the realism beyond basic grain simulation, advanced techniques are employed to add secondary details and simulate environmental effects.
- Ripples and Dunes: For larger-scale features like sand ripples or dune formations, different noise patterns and procedural sculpting techniques are used. These might involve applying larger-scale noise to the height map or using flow maps to simulate the direction of wind.
- Debris and Imperfections: Real sand often contains small bits of organic matter, pebbles, or other debris. These can be simulated by introducing additional, distinct shapes or by using a scattering node with custom alpha shapes.
- Moisture Simulation: Damp sand behaves differently from dry sand. Subtle variations in roughness and color can be introduced to simulate areas where moisture might be present, leading to darker tones and slightly smoother reflections.
- Dirt and Dust Accumulation: Fine dust can settle in the crevices between grains, affecting the overall color and roughness. This can be simulated by using ambient occlusion as a mask to blend in a darker, slightly rougher color.
Sand Dunes | Designer Quick Tip #20 | Adobe Substance 3D
5. Fine-Tuning and Exporting
The final stages involve meticulous fine-tuning of all parameters and exporting the texture maps in a format compatible with common 3D software and game engines.
- Parameterization: Substance Designer allows for the creation of exposed parameters, enabling artists to easily tweak aspects like grain size, color variation, and overall roughness without having to rebuild the graph from scratch. This is a crucial aspect of creating reusable and versatile materials.
- Resolution and Format: The texture maps are exported at the desired resolution (e.g., 2K, 4K) and in appropriate file formats (e.g., .png, .tga) for use in engines like Unity, Unreal Engine, or 3D modeling software like Blender, Maya, or 3ds Max.
Why Josh Lynch's Tutorial is Invaluable
Substance Designer is not a very easy program to get into, although Allegorithmic has done a lot of changes and updates, making it more approachable for 3D artists. Still, some help is almost always welcomed, and Josh Lynch is here to help for sure. His tutorial, a long video, provides a comprehensive walkthrough that demystifies the complex node-based workflow. By following his detailed explanations and demonstrations, intermediate and experienced users can gain a profound understanding of:
- Efficient Node Workflows: Learn optimal ways to connect nodes and leverage their functionalities for sand generation.
- Creative Problem-Solving: Understand how to approach common challenges and find creative solutions within Substance Designer.
- Achieving Photorealism: Grasp the subtle techniques that differentiate a good sand texture from a truly photorealistic one.
- Building Versatile Materials: Create sand materials that can be easily adapted for various environments and lighting conditions.
The tutorial goes beyond simply showing how to make sand; it imparts a deeper understanding of procedural texturing principles that can be applied to creating a wide array of other materials. It empowers artists to move from following step-by-step instructions to confidently developing their own unique and high-quality assets.
Applications and Further Exploration
The ability to create realistic sand materials in Substance Designer has broad applications across various industries:
- Game Development: Essential for creating believable desert levels, beaches, and arid environments.
- Architectural Visualization: Used to enhance outdoor scenes, adding realism to landscapes surrounding buildings.
- Film and VFX: Crucial for generating digital environments in movies and visual effects.
- Virtual Reality (VR) and Augmented Reality (AR): Enhances immersion by providing tactile and visually convincing surfaces.
For those looking to further expand their skills, exploring variations in sand types (e.g., volcanic black sand, coral sand), incorporating animated elements like wind-blown sand, or experimenting with different environmental shaders to complement the material are excellent next steps. The principles learned in Josh Lynch's tutorial serve as a robust foundation for a vast array of creative endeavors in 3D art.