Timelapse photography is a mesmerizing art form, a visual magic trick that bends reality to show us the world in a way our eyes never can. It reveals the slow, graceful dance of the stars, the bustling, chaotic energy of a city, or the dramatic march of clouds across a mountain peak. But capturing these thousands of still images is only half the battle. The other half takes place in the digital darkroom, and for modern photographers, that darkroom is almost universally Adobe Lightroom. This guide is a deep dive into the complete workflow, from an idea to a finished video, using Lightroom as the powerful core of our process. We’ll explore every step, from planning and shooting to the meticulous post-processing that turns a collection of photos into a seamless, flowing story.

1. Planning and Preparation: Laying the Foundation for Success
A successful timelapse depends on meticulous pre-production. Before you even pick up your camera, you need to define your vision and gather the right tools.
1.1. Defining Your Story and Location
What story are you trying to tell? Once you have a subject, find a location where you can capture it undisturbed. You need a spot where your tripod will be stable and safe for the entire duration of the shot, which could be 30 minutes or 8 hours. Consider the light, the movement, and any potential obstructions. For example, a day-to-night transition requires a location with a clear view of the sky throughout the changing light conditions.
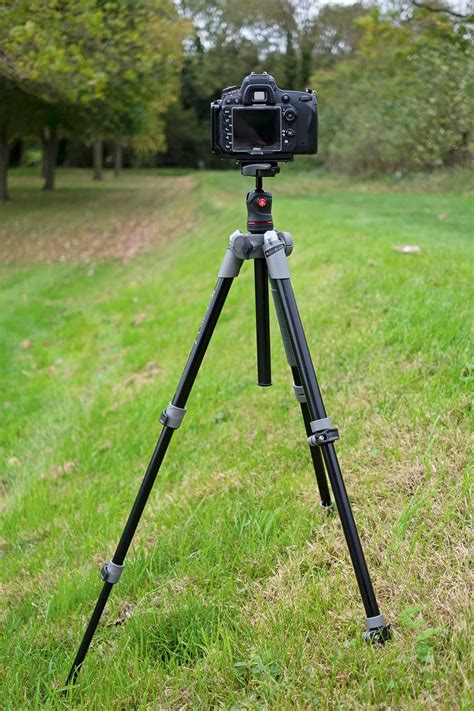
1.2. Essential Gear for Timelapse
A sturdy tripod is your most important piece of gear. Any vibration or “tripod drift” will ruin your shot. Invest in one that is robust and stable. An intervalometer is the device that tells your camera to take a picture every X seconds. Many modern cameras have one built-in, but if yours doesn’t, external intervalometers are readily available from brands like Canon (TC-80) or third-party manufacturers on platforms like eBay and Amazon. You’ll also need lots of battery power, as timelapse photography drains batteries significantly. A fully charged battery is a minimum, but for longer shoots, consider a battery grip or an external power bank connected via a dummy battery. High-capacity SD cards are crucial, as you’ll be shooting hundreds, if not thousands, of RAW files.
1.3. Understanding Intervals and Frame Rates
The interval-the time between shots-is the creative heart of your timelapse. The formula for determining your interval is directly linked to your target frame rate. Always shoot more frames than you think you need. Video is measured in terms of frame rate, that is, how many frames are played each second the video runs. Common frame rates include 23.97 fps, 24 fps, 25 fps, 29.97 fps, and 30 fps. Lightroom’s video export defaults to 29.97 fps, so it’s often best to aim for frame rates close to this. This means you need 30 shots for each second of footage. For instance, if you want 10 seconds of video, you’ll need approximately 300 images. A common interval for daytime wide scenes is 5 seconds, which results in approximately 25 minutes of shooting for 10 seconds of video. For faster-moving subjects like city traffic, a 1-2 second interval might be more appropriate.
How to Choose a TIme Lapse Interval
2. Shooting in Manual Mode: Ensuring Consistency
Consistency is everything in timelapse photography. Deviations in exposure or focus will lead to undesirable flicker and a less professional result.
2.1. Setting Up Your Camera for Consistency
Set your tripod on stable, level ground. Switch your lens to Manual Focus (MF). Use your camera’s Live View, zoom in on a distant object, and focus manually. Once it’s sharp, tape the focus ring down with gaffer tape to prevent any accidental adjustments. White Balance should never be set to Auto, as this will cause color flicker. Instead, choose a fixed setting like Daylight, Cloudy, or a specific Kelvin temperature. Aperture settings depend on your subject: for landscapes, f/8 to f/11 is common for a deep depth of field; for astrophotography, f/2.8 or f/4 is needed to gather enough light. Set your ISO, and then adjust your Shutter Speed until your exposure is correct. For a natural motion blur, which is essential for smooth video, aim for a shutter speed that is about half your interval. For example, for a 2-second interval, aim for a 1-second shutter speed.
2.2. The Power of RAW Files
Shooting in RAW is non-negotiable for serious timelapse work. RAW files (like .CR3, .NEF, .ARW) capture all the data from your sensor, providing maximum flexibility in post-processing. JPEGs discard a significant amount of this data, limiting your ability to correct exposure, recover highlights and shadows, or adjust white balance without quality degradation.
2.3. Handling Extreme Lighting Changes
What about a day-to-night (or night-to-day) shot? Your exposure will change dramatically, making it impossible to shoot in full manual across the entire sequence. In such cases, you can set the camera to Aperture Priority (Av) mode. The camera will automatically adjust the shutter speed as the scene gets darker or brighter. However, be aware that this will introduce a significant amount of flicker, which will require advanced de-flickering techniques in post-production.
2.4. The Waiting Game
Once your settings are locked and your intervalometer is started, your primary job is to wait. Don’t touch the camera or tripod during the shoot. Patience is a virtue in timelapse photography.
3. Post-Processing in Lightroom: Bringing Your Images to Life
After your shoot, the real magic happens in Lightroom. This is where you’ll refine your images and prepare them for video editing.
3.1. Importing and Organizing Your Files
Plug in your SD card and import all the captured images into Lightroom. Crucially, create a new Collection for this sequence. This keeps all the files grouped together logically, making them easy to manage. Within Lightroom, it’s also beneficial to organize your imported files into subfolders, perhaps by date and then by shot type, using logical and short descriptions for each folder name.
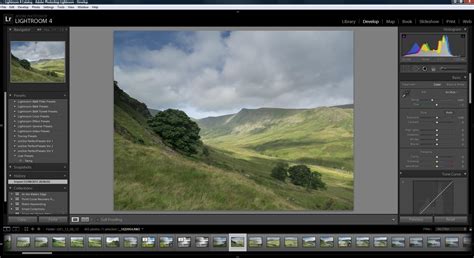
3.2. Selecting and Editing a Keyframe
Choose one representative image from your sequence - this will be your "keyframe." Edit this photo as you would any other landscape shot. Use the Basic Panel to adjust Exposure, Contrast, Highlights, Shadows, Whites, and Blacks, leveraging the RAW data to its fullest. Pull highlights down to recover the sky and lift shadows to reveal detail. In the Detail panel, apply Sharpening, using the Alt/Option key while dragging the Masking slider to apply it only to edges.
3.3. Consistent Cropping and Aspect Ratio
Cropping is an important step. If you decide to crop your image, you must use the exact same crop on every single frame in the sequence. Use the “Angle” or “Aspect” tool and lock it to ensure consistency. Any deviation will be jarring in the final video.
3.4. Synchronizing Edits Across the Sequence
Once you’ve perfected your keyframe, select all the other photos in the sequence within Lightroom’s filmstrip (Ctrl+A or Cmd+A). Then, synchronize the develop settings from your keyframe to the rest of the images. A dialog box will appear, allowing you to choose which settings to sync. Lightroom will then apply these edits to every photo in the sequence. This process may take a few minutes, so go grab a coffee while it works.
4. Tackling Flicker: The Professional’s Edge
Flicker (rapid, unwanted brightness changes) is the most common problem in timelapse photography. It’s typically caused by tiny, unavoidable changes in aperture or shutter speed between frames. While basic synchronization gets you close, advanced tools are often needed for a truly polished result.
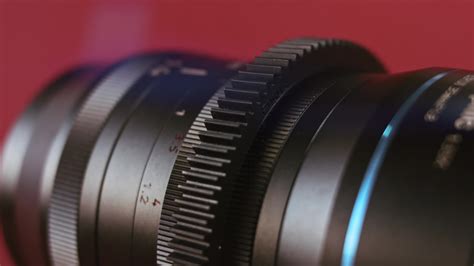
4.1. Understanding the Sources of Flicker
Aperture flicker is a primary culprit. Even if you set your aperture to f/8, the mechanical blades in your lens don’t close to the exact same physical diameter every single time a photo is taken. This minor variation can lead to subtle, yet noticeable, brightness shifts between frames.
4.2. Introducing LRTimelapse
For professional-grade de-flickering, LRTimelapse is an indispensable plugin that works in conjunction with Lightroom. Open your sequence in LRTimelapse, which reads the metadata and displays a luminance graph of your entire sequence, visually highlighting flicker.
4.3. The LRTimelapse Workflow
Within Lightroom, use the “Metadata > Read Metadata from Files” command. Then, filter by your keyframes. Navigate to the next keyframe (e.g., the “night” shot). Go back to LRTimelapse and click “Auto-Transition.” LRTimelapse calculates a smooth transition for every single frame between your keyframes. The real magic happens when you click “Visual De-flicker.” This process analyzes the luminance data and applies subtle adjustments to smooth out the unwanted brightness fluctuations, creating a seamless visual flow. This workflow is considered the professional standard for achieving flicker-free timelapses.
How to Choose a TIme Lapse Interval
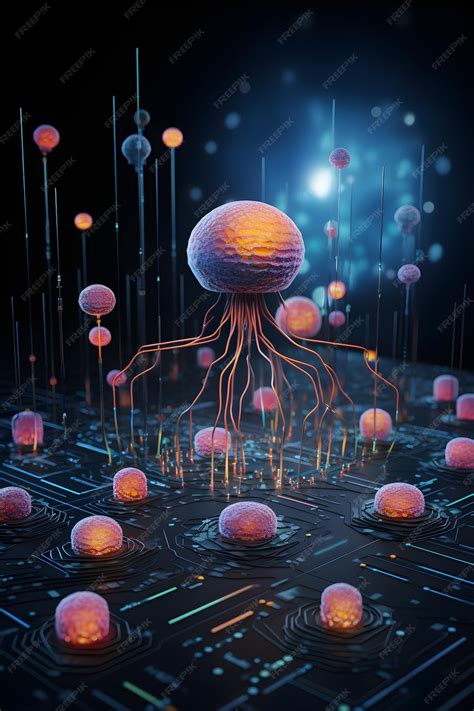
5. The Future of Timelapse: AI and Generative Models
While the LRTimelapse workflow is powerful, it’s still manual, technical, and time-consuming. The next generation of de-flickering and image manipulation is being powered by advanced AI technologies.
5.1. Smarter De-flickering with AI
Current de-flicker tools can sometimes be "dumb," smoothing out intentional brightness changes like lightning flashes or the headlights of passing cars. An AI model like Imagen could be trained to differentiate between unwanted aperture flicker and intentional, content-based light changes, providing a more nuanced and accurate de-flickering solution.
5.2. AI-Powered Object Removal and Generation
Did a bird fly through 15 frames of your shot? Or worse, did a person walk in front of your carefully composed scene and then walk back? Right now, that’s a nightmare of manual masking in Photoshop. A generative AI tool, built on models like Imagen, could potentially identify and remove such objects from all relevant frames, generatively filling in the background with realistic detail, all with a simple text prompt or selection.
5.3. Perceptual Transitions
The current "Holy Grail" transition in timelapse editing is often just a linear interpolation of slider values. But what if the desired aesthetic should change more organically? An Imagen-powered workflow could analyze your "day" and "night" keyframes and create a perceptual transition, not just a mathematical one, leading to more visually compelling and artistic results.
5.4. Generating Timelapses from a Single Image
This is the true futuristic leap. In the near future, you may be able to take a single photograph of a scene and, using a text prompt like, “Make the clouds move quickly from left to right and the sun set,” an AI like Imagen could generate a photorealistic 10-second timelapse from that single frame. It would understand the 3D geometry of the scene, how clouds move, and how light behaves, creating the entire sequence from scratch.
6. Exporting Your Timelapse: From Still Images to Video
Once your sequence is edited and de-flickered, it’s time to export the final images for use in video editing software.
6.1. Exporting JPEGs from Lightroom
The standard workflow involves baking your edits from Lightroom’s RAW processing into a universal, high-quality format like JPEG. While it might seem counterintuitive to convert from RAW, it’s computationally more efficient for video editors. Navigate to File > Export. Choose a new, empty folder for your exported JPEGs. Set the File Settings to JPEG, sRGB, and Quality: 100. For File Naming, select “Custom Name - Sequence” and ensure you use a sequential numbering system (e.g., My-Timelapse-0001.jpg, My-Timelapse-0002.jpg, etc.). Using at least four digits for sequencing is recommended, especially for larger image sequences. Resetting the sequence number to “0001” for each export is a good practice.
6.2. Reasons for Exporting as JPEGs
JPEG quality is acceptable for many applications, and the quick export process facilitates faster rendering in video editors. If you ultimately need to work directly from RAW files, the exported JPEGs can serve as a quick proxy for previewing and editing.
6.3. Considerations Against Using JPEGs
However, there are scenarios where JPEGs might not be ideal. When working on images with subtle gradients, such as beautiful twilight sunrises, JPEGs can exhibit terrible blocking and banding due to their compressed nature. In such cases, processing with RAW files directly in your video editor might be necessary, though it will be more computationally demanding.
6.4. Importing into Video Editing Software
After exporting your JPEGs, import them into your preferred video editing software, such as Adobe After Effects or DaVinci Resolve. In After Effects, go to File > Import > File, then select the first photo in your sequence. Ensure the “JPEG Sequence” and “Force Alphabetical” options are checked. Repeat this process for each shot folder. Do not drag the folder directly into the AE project window.
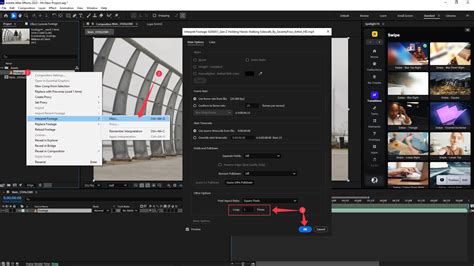
6.5. Adjusting Frame Rate in Your Editor
Once imported, right-click on the image sequence in your editor and choose “Interpret Footage.” Here, you can adjust the Frames Per Second (FPS) to your desired taste. Copying the image sequence to test different frame rates is a good way to experiment and find the perfect speed for your timelapse.
7. Troubleshooting Common Timelapse Issues
Even with meticulous planning and execution, you might encounter common issues. Understanding these problems and their solutions is key to a successful outcome.
7.1. Timelapse Too Fast or Too Slow
If your timelapse is too fast, it means you shot with too long of an interval (e.g., 10 seconds for fast-moving clouds). This is a creative choice that cannot be fixed in post-production; you’ll need to reshoot. If your timelapse is too slow, you likely shot with too short of an interval. This is an easy fix: in your video editor, simply speed up the clip (e.g., to 200% or 500% speed).
7.2. Why Lightroom is Superior to In-Camera Timelapse Modes
In-camera timelapse modes often shoot JPEGs, bake in all edits, and produce a compressed video file with no room for post-processing control. You cannot fix white balance, recover a blown-out sky, or de-flicker effectively. Using Lightroom provides granular control over every aspect of your image editing.
7.3. The 180-Degree Shutter Rule
The 180-degree shutter rule, a guideline from cinematography, suggests that your shutter speed should be approximately 1 / (2 * frame rate). For 24fps video, this translates to a shutter speed of 1/48s (often rounded to 1/50s). This rule helps create natural motion blur, which makes moving objects like cars, people, and water appear smooth and cinematic. A shutter speed that is half your interval, as recommended earlier, aligns with this principle.
7.4. Removing Unwanted Objects
Manually removing an object that appears in multiple frames, like a bird flying through the shot, can be tedious. In Lightroom, you might use the Spot Removal tool on the first frame and then sync that removal to subsequent frames, adjusting its position each time. For more complex scenarios, generative AI tools show promise for automated object removal and background regeneration.
7.5. Stabilizing a Bumped Tripod
If your tripod was bumped during the sequence, it’s not necessarily ruined. Most video editors offer stabilization effects, such as a “Warp Stabilizer” or a general “Stabilize” effect, which can often salvage a shot with minor movement.
7.6. Noise in Astrophotography Timelapses
Astrophotography timelapses are prone to noise due to high ISO settings. In Lightroom, navigate to the Detail panel and use the Noise Reduction (Luminance and Color) sliders. Be cautious not to overdo it, as this can lead to a “waxy” look. AI is also showing great promise in advanced noise reduction techniques.
7.7. Understanding Keyframe Ramping
Keyframe ramping, also known as the “Auto-Transition” feature in LRTimelapse, is the process of smoothly changing edit values between keyframes. For example, your exposure might ramp from 0.0 at the beginning of the sequence to -1.5 at a later point, and your White Balance might ramp from 5500K to 3400K to simulate a day-to-night transition.
7.8. Battery and Storage Management
A dead camera battery halfway through a shoot is a common pitfall. Always have multiple fully charged batteries or, for longer sequences, use a USB power bank with a dummy battery. Similarly, ensure you have enough high-capacity SD cards to store all your RAW files.