The ability to create repeating pattern brushes in Procreate for digital painting offers a significant advantage, drastically reducing the time spent on repetitive tasks like rendering individual scales. This not only streamlines the artistic process but also imbues digital illustrations with a heightened level of detail and sophistication. This tutorial will guide you through the straightforward process of making a scale brush in Procreate, providing essential tips and best practices for generating a variety of scale types, from the sleek scales of fish to the formidable armor of dragons, and the reptilian patterns of snakes.
Beginning Your Brush Creation Journey
To commence the creation of your custom scale brush, open Procreate and initiate a new document using the default square image template. Once your canvas is ready, add a new layer on top of the background. Select a brush tool; a custom pencil brush is recommended for its versatility, but any suitable brush will suffice. For precise and symmetrical designs, activate Drawing Assist and configure it to the Symmetry setting, specifically choosing the Vertical option.
For enhanced precision, consider utilizing Procreate's grid functionality. You can activate Drawing Assist with the Grid option and adjust its size to your preference. Trace this grid onto a new layer to establish a visual guide. After creating your grid, remember to switch Drawing Assist back to the Vertical setting to maintain symmetry for your scale pattern.
Designing Your Scale Texture
To achieve a realistic or visually appealing scale pattern, it's highly beneficial to have a reference image at hand, especially if you are aiming for a high degree of realism. Begin by drawing a single scale or a small cluster of scales on your drawing layer. The key to a seamless repeating pattern is to ensure that the edges of your design can connect without visible breaks.
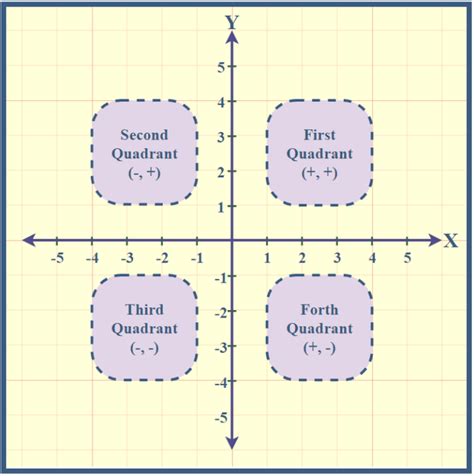
A common and effective technique for achieving this is to duplicate your drawing layer four times. Then, strategically move each of these duplicated layers into a separate quadrant of your canvas. Ensure that the "Snap" feature is enabled in Procreate; this will assist in precisely aligning the duplicated layers to the edges of the canvas. Carefully examine the areas where these quadrants meet. If any inconsistencies or misalignments are apparent, particularly in the central region where the quadrants converge, take this opportunity to refine and correct them.
Following this, duplicate the entire drawing layer again. Position one of these new duplicates above the original arrangement and the other below. Again, scrutinize the connections between these layers and meticulously fix any areas that appear messy or discontinuous. This iterative process of duplication, alignment, and refinement is crucial for ensuring a flawless repeating texture.
Next, create a fresh layer and fill it entirely with white. Position this white layer directly beneath your scale drawing layer. Duplicate your consolidated scale drawing layer one more time and then hide this duplicate; it will serve as a backup. Now, merge one of your visible drawing layers with the white fill layer. Once merged, select the entire canvas. A triple-finger tap gesture will copy the content of your canvas to the clipboard.
Testing and Refining Your New Brush
With your scale texture copied, it's time to create the brush itself. Navigate to the Airbrush Brush Menu within Procreate. Locate the "Hard Airbrush" and duplicate it. This duplicate will serve as the foundation for your new scale brush.
Tap on the duplicated brush to access its settings. Within the brush settings, find and tap on "GRAIN." Then, select "EDIT." You will see an option to "IMPORT." Tap on "IMPORT" and then choose "PASTE." Your scale texture should now be imported as the brush's grain.
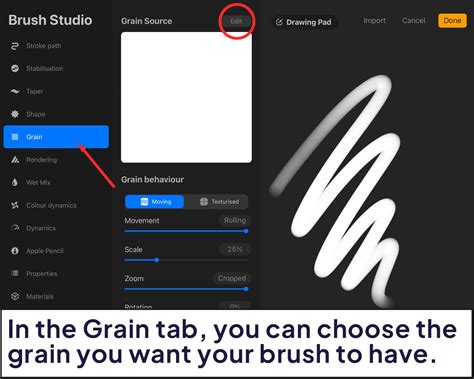
It is vital to check the imported texture. If the background of your imported texture appears white, you will need to invert the colors. To do this, tap on the image itself within the grain settings. The goal is to have white line art against a black background, as this is how Procreate interprets textures for brushes.
Now, test your newly created brush. Draw with it on your canvas. It should repeat cleanly, creating a seamless pattern. If you observe any areas with errors or visible seams, this indicates that you need to return to your texture creation layer and make further adjustments. Do not be discouraged if it takes a few attempts; it is far more efficient to rectify issues at this stage rather than after the brush is finalized.
Once you are satisfied that the brush repeats cleanly and meets your aesthetic requirements, tap "DONE" to save your brush. You can always revisit the brush settings later to fine-tune other parameters and further customize its behavior and appearance.
Applying Your Scale Brush in a Painting
The application of your custom scale brush in a painting involves a strategic approach to achieve naturalistic and flowing results. Begin with your line art or base drawing for your illustration.
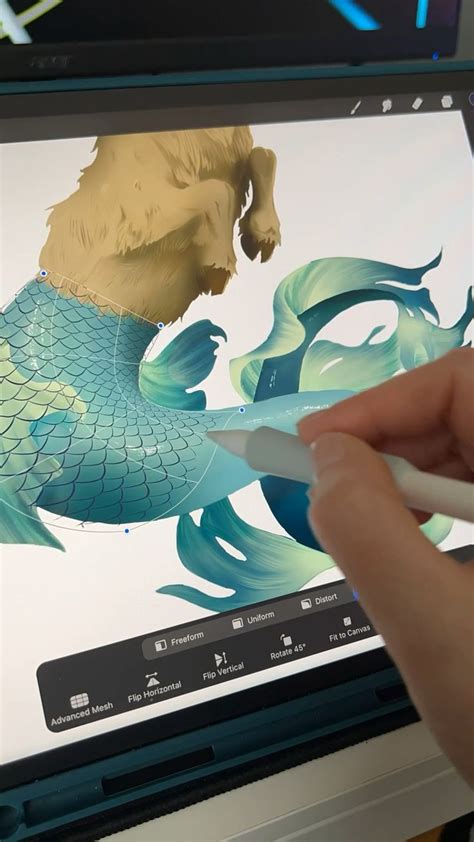
Create a new layer positioned directly above your line art. On this new layer, begin applying your scale brush. Fill a section or area with the brush to establish the scale texture. After applying the scales, select the layer containing the scales. Utilize Procreate's transformation tools, such as "Distort" and "Warp," along with resize functions, to manipulate the shape and flow of the scales. The objective is to make the scales conform to the underlying form and direction of the object they are depicting.
For intricate forms, such as a spiraling or twisting tail, it is often beneficial to create separate layers for each distinct section of the form. This allows for more precise control over the scale direction and blending. When dealing with areas where scales overlap, a highly effective technique is to strategically erase portions of the scales. This creates the illusion of depth and dimension, implying that some scales are naturally hidden beneath others. Remember the principle of "less is more"; carefully placed erased areas can significantly enhance the perceived realism without overworking the detail.
The process of creating custom brushes in Procreate, particularly for intricate textures like scales, is a rewarding endeavor that significantly enhances your digital art capabilities. By understanding the principles of pattern creation and utilizing Procreate's powerful tools, you can craft unique brushes that save time and elevate the visual quality of your artwork.
Exploring Pre-made Scale Brush Resources
While creating your own brushes offers unparalleled customization, the Procreate community and various artists also offer a wide array of pre-made brush sets that can be incredibly useful for adding scales to your digital paintings. These resources range from free options to premium packs, catering to diverse artistic needs and styles.
For artists looking to specifically paint dragons and other fantastical creatures, several brush packs are tailored for such purposes. These often include brushes designed to efficiently render dragon skin and textures, allowing for rapid creation of intricate scales that are perfect for speed painting.
How To Paint Scales (the easy way!)• 30 Days Of Digital Art 2022
Some artists contribute their custom brushes to community platforms, making them accessible to a wider audience. These shared brushes can offer unique styles and functionalities. Similarly, members of the Procreate community often develop specialized brush sets, such as those focused on reptilian textures, which can be a valuable addition to any digital artist's toolkit.
For those seeking to depict aquatic life or mythical beings like mermaids, brushes specifically designed for fish scales or iridescent, multi-layered scale effects are available. These can produce stunning visual results, with some brushes even offering a "glow" effect when overlapped, adding a magical quality to the artwork. Tattoo artists also often share their brush sets, which can include highly detailed and realistic scale textures, suitable for a variety of applications beyond traditional tattoo art.
When exploring pre-made brushes, consider the variety offered. Some sets provide brushes categorized as ordinary, multicolor, or monochromatic, each suited for different artistic outcomes. Others focus on specific textures, like snake skin, offering a range of realistic and stylized options. The key is to find brushes that align with your artistic vision and workflow, whether you're aiming for hyper-realism or a more stylized approach. Many creators also provide sample videos or images, allowing you to preview the brush's capabilities before integrating it into your projects. This exploration of existing resources can further inspire your own brush creation endeavors or provide immediate solutions for your scaling needs.