Creating visually striking 3D text within Adobe Photoshop is an achievable goal for designers of all levels, from those just beginning their digital art journey to seasoned professionals. While Adobe's direct 3D extrusion tool has been removed from recent versions of Photoshop (as of October 2024), this has spurred the development of innovative manual techniques that yield equally impressive results. This article will guide you through several methods for crafting compelling 3D text, covering everything from basic setup to advanced stylistic adjustments, and will also touch upon alternative software solutions for specific needs.
The Evolving Landscape of 3D Text in Photoshop
Historically, Photoshop offered a dedicated 3D panel that allowed for straightforward extrusion and manipulation of text into three-dimensional forms. However, with the discontinuation of this feature, the focus has shifted towards leveraging Photoshop's robust layer styles and manual manipulation techniques. This shift, while initially presenting a challenge, has ultimately fostered a deeper understanding and creative application of the software's capabilities. Adobe's encouragement to explore their Substance 3D suite for dedicated 3D modeling indicates a strategic move, but it doesn't diminish the power of Photoshop for creating sophisticated 3D text effects through its existing tools.
Method 1: The Manual Extrusion Technique (Layer Styles)
This method focuses on simulating 3D depth by duplicating text layers and applying a series of carefully chosen layer styles. It's a versatile approach that offers a high degree of control.
Step 1: Setting Up Your Document and Text
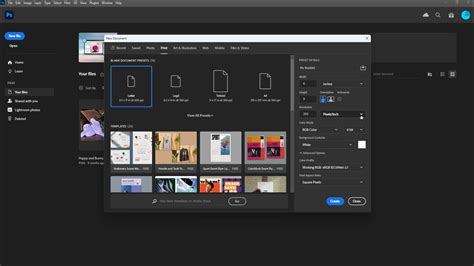
Begin by creating a new Photoshop document. For optimal results, especially if you intend to print your work, set the resolution to 300 pixels/inch. A square canvas, such as 10x10 inches, is a good starting point. Fill the background layer with a dark gray color (e.g., #333333) to provide a strong contrast for your text.
Next, select the Horizontal Type Tool (T) and choose a font. Geometric, sans-serif fonts like Avenir, Bebas, or Helvetica are excellent for beginners, as their clean lines make the extrusion process more straightforward. For more experienced users, cursive fonts can also yield unique results. Type your desired text. A large font size and a bold weight will contribute to a more impactful 3D effect. Center your text on the canvas using the alignment tools in the top menu (ensure both text and background layers are selected, then click Horizontal and Vertical Align Centers).
Step 2: Preparing for Extrusion
Before applying any 3D effects, it's crucial to rasterize your text layer. Right-click on the text layer in the Layers panel and select "Rasterize Type." This converts the text into pixels, allowing for more advanced manipulation, but it also means you won't be able to edit the text characters directly anymore. Ensure you are happy with your text before proceeding.
Step 3: Creating the Depth - Duplication and Darkening
Duplicate your rasterized text layer by pressing Ctrl+J (Cmd+J on macOS). Change the color of this duplicated layer to a significantly darker shade of your original text color, but not pure black. This darker layer will form the "depth" or "back" of your 3D text.
Now, drag this darker text layer beneath the original text layer in the Layers panel. To create the illusion of depth, you'll need to offset this layer. Select the duplicated layer, then press Ctrl+T (Cmd+T) to activate Free Transform. Hold down the Ctrl key and click and drag one of the corner transformation controls to skew the text. Alternatively, you can use the arrow keys to move the layer precisely. Experiment with the angle and distance to achieve the desired thickness and direction of your 3D effect. For a more pronounced effect, you can hold down the Alt key while pressing the arrow keys to create multiple, closely spaced duplicates, effectively building up the depth.

Step 4: Applying Layer Styles for Realism
This is where the magic happens. With the original (front) text layer selected, double-click it or click the "Add a layer style" icon at the bottom of the Layers panel.
Bevel and Emboss: This is fundamental for creating the illusion of sculpted edges.
- Style: Emboss
- Technique: Smooth
- Depth: Adjust to around 240%
- Direction: Up
- Size: Around 136 px
- Soften: Around 4 px
- Angle: 90°
- Use Global Light: Ticked
- Angle (Light Source): 30°
- Highlight Mode: Normal, Opacity: 36%
- Shadow Mode: Normal, Opacity: 41%
- Note: The highlight and shadow colors can be adjusted for different material looks. For example, using #FFCC66 for highlight and #DFA125 for shadow can create a metallic sheen.
Satin: This effect adds subtle shading and depth to the surface of the text.
- Blend Mode: Normal
- Color: A darker shade of your text color, or a complementary color like #F3881F.
- Adjust Opacity, Distance, and Size to taste.
Gradient Overlay: This adds a subtle color variation to the text's surface, preventing it from looking flat. Choose a gradient that complements your text color, often a lighter or darker shade within the same hue family. For instance, if your text is dark pink, a light pink gradient can work well.
- Left Color Stop: e.g., #F7F3A7
- Right Color Stop: e.g., #F3881F
Inner Shadow: This helps create the illusion of internal texture and tone.
- Blend Mode: Multiply
- Opacity: 58%
- Angle: 90°
- Distance: 4 px
- Choke: 0%
- Size: 4 px
Inner Glow: This can give the text an internal shine, making edges appear rounder. Use a color that is darker than the main text color but brighter than the background. Paste the hex code of your darker color into the hex code box.
- Blend Mode: Normal
- Opacity: 73%
- Technique: Softer
- Source: Center
- Size: 51 px
- Range: 22%
Outer Glow (Optional): This can make the text stand out, especially against a dark background. Use a darker tone of your text color.
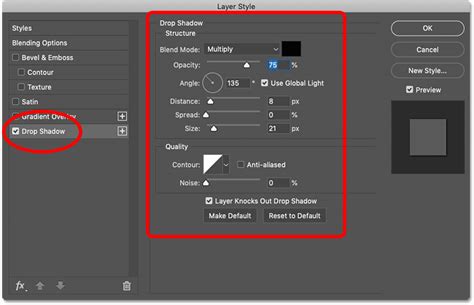
Drop Shadow: This finalizes the separation from the background and adds depth.
- Color: Black
- Opacity: 50%
- Adjust Distance and Size to achieve the desired effect.
Step 5: Refining the Extruded Edges
Now, focus on the duplicated (darker) text layer that forms the extrusion. Remove all layer styles from this layer by dragging them to the trash icon in the Layers panel. Adjust its color to a darker shade. You can use Curves (Ctrl+M or Image > Adjustments > Curves) and Hue/Saturation (Ctrl+U or Image > Adjustments > Hue/Saturation) to fine-tune the color and saturation to create a convincing shadow or depth color.
To create the actual 3D edges:
- Ensure the duplicated layer is directly below the original text layer. Move it one space to the left using the arrow key.
- Hold down the Alt key and repeatedly press the down and left arrow keys. This duplicates the layer and shifts it, building up the depth. Continue this process until you achieve the desired thickness.
- Link all these duplicated layers together by selecting them and clicking the "Link layers" icon. Then, merge them into a single layer using Ctrl+E (Cmd+E).
- Apply a Gradient Overlay to this merged edge layer to match the gradient on your main text. Black (#000000) and white (#FFFFFF) can be a good starting point for a neutral gradient.
- Duplicate this merged edge layer (Ctrl+J). Apply a Gaussian Blur (Filter > Blur > Gaussian Blur) with a Radius of around 8px. Then, use Curves (Ctrl+M) to darken it further, creating a softer shadow effect.
- Finally, clean up any jagged edges using the Polygonal Lasso Tool to select and delete unwanted pixel areas, ensuring smooth transitions.
Method 2: Leveraging the 3D Panel (Older Photoshop Versions or Specific Workflows)
While the direct 3D panel is no longer readily available in the latest Photoshop versions, understanding its functionality can be beneficial, especially if you are using older software or exploring specific workflows.
Step 1: Initial Setup and Text Creation
Create a New File in Photoshop. Type some text in a big, bold font. Your text will be turned into a 3D object with some default settings.
Step 2: Scene and Camera Setup
Before adjusting the text itself, it's helpful to set the scene. Click the 3D text and navigate to the 3D panel (Window > 3D). In the Properties panel, you'll find options to adjust the camera. Use the camera tools to move around your object and establish your desired viewing angle.
Add a background that your object will interact with. You can resize a rectangular shape to fill the scene or import a background image.
Step 3: Adjusting 3D Text Properties
Within the 3D panel, select your text object. The Properties panel will now display 3D-specific settings.
- Shape Presets: Explore different shape presets to alter the fundamental form of your text.
- Cap Tab: This section allows you to adjust the "caps" of the 3D text, controlling the depth, bevel, and overall shape of the extruded sides. You have access to many settings to achieve the result you need.
Step 4: Lighting the Scene
Lighting is crucial for defining the form and mood of your 3D text.
- Infinite Light: Add an "Infinite Light" to simulate a directional light source. Adjust its position and intensity to cast shadows and highlights.
- Adding More Lights: Click the white card at the bottom of the 3D panel and select "New Infinite Light." Turn off the first light temporarily and position the new light to illuminate the contours of the letters, creating rim lighting or accentuating details.
Step 5: Defining Materials
The Materials tab allows you to define the surface properties of your 3D text.
- Diffuse: This is the main color of the object. Select all materials of the text and assign colors.
- Specular: This controls the color of the highlights and shine on the surface.
- Ambient: This affects the color of the shadows. To make shadows brighter, you can also add some ambient light to the scene. Find "Environment" on the 3D list and change "Global Ambient" to a bright color.
Step 6: Rendering the Scene
Once you are satisfied with the settings, click "Render" to see how your scene truly looks. If you notice anything that needs fixing, press Escape to stop rendering and adjust the settings, such as light intensity, direction, or material properties.
Alternative Solutions for 3D Text Creation
For users seeking a more streamlined or specialized 3D text creation experience, several alternatives exist:
- Adobe Illustrator: While not a direct Photoshop replacement for 3D, Illustrator can be used to create vector-based text and then export it for further manipulation in Photoshop or other 3D software. Its "3D" effects (Extrude & Bevel, Rotate) can offer basic 3D capabilities.
- Wondershare Filmora: This video editing software offers a user-friendly interface for creating 3D text effects, particularly for video content. It provides pre-set templates and animation options, making it accessible for beginners. You can import 3D text created in Photoshop into Filmora for video integration.
- Creating 3D Text in Filmora:
- Input Text: Use the "Titles" library, choose a title, and add text in the text field.
- Add Animation: Select "Animation" styles for "In," "Out," or "Loop."
- Copy Text Track: Duplicate the text track on the timeline.
- Add Adjustment Layer: Place an "Adjustment Layer" between text tracks.
- Apply Blur Effect: Use the "Effects" library to add a blur, creating a 3D motion effect.
- Save for Future Use: Save the created text as a custom preset.
- Reposition and Export: Adjust the text's position and export.
- Creating 3D Text in Filmora:
- Dedicated 3D Software: For highly complex or photorealistic 3D text, consider software like Blender (free and open-source), Cinema 4D, or Maya. These programs offer advanced modeling, texturing, lighting, and rendering capabilities.
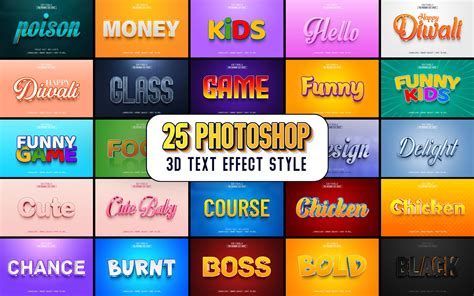
Exploring Pre-made 3D Text Effects and Bundles
For those looking to quickly achieve professional-looking 3D text without extensive manual creation, numerous pre-made Photoshop assets are available:
- Six Options Set: A collection offering six distinct 3D text effects.
- Unique Double-3D Text Set: Features three variations of a soft, rubbery-shaded effect.
- Awesome 3D Effect Asset: Works on text, shapes, and logos with organized, editable layers.
- High-Quality Bundle: Includes eight different styles with vivid gradients and isometric compositions.
- Simple Yet Useful Effect: Provides five outline styles that are fully editable and suitable for various projects.
These resources can significantly speed up the design process and offer inspiration for further experimentation.
Advanced Techniques and Considerations
- Non-Destructive Editing: Always strive to work non-destructively. Use adjustment layers, smart objects, and layer masks to maintain flexibility and allow for easy revisions.
- Custom Brushes: For more organic or textured 3D effects, consider using custom brushes for painting shadows, highlights, or surface details.
- Combining Methods: Don't hesitate to blend techniques. You might use layer styles for the base effect and then manually paint in additional depth or lighting details.
- Understanding Light and Shadow: A fundamental understanding of how light interacts with surfaces is key to creating convincing 3D effects. Observe real-world objects to grasp how light creates highlights, midtones, and shadows.
- Typography Principles: Remember that effective 3D text is built upon strong typography. Choose fonts that suit your message and design, and pay attention to kerning, leading, and overall composition.
By mastering these techniques, you can elevate your designs with dynamic and engaging 3D text, adding a new dimension to your creative projects in Photoshop.